Feb 042013
 
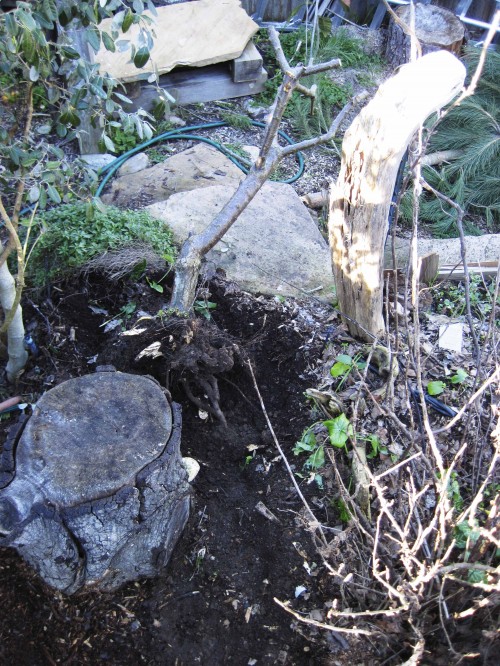
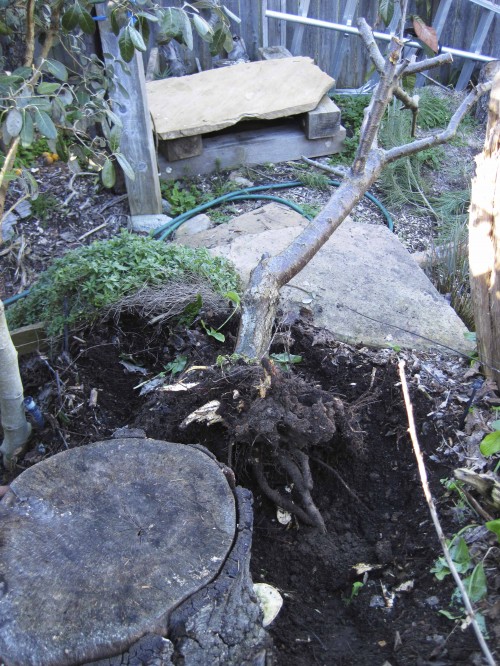
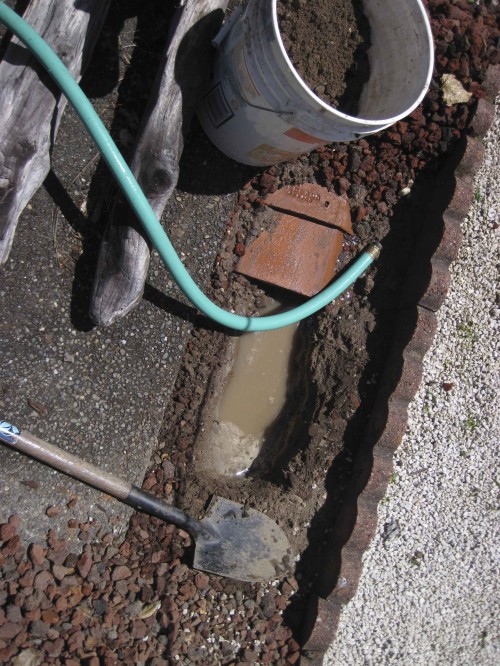
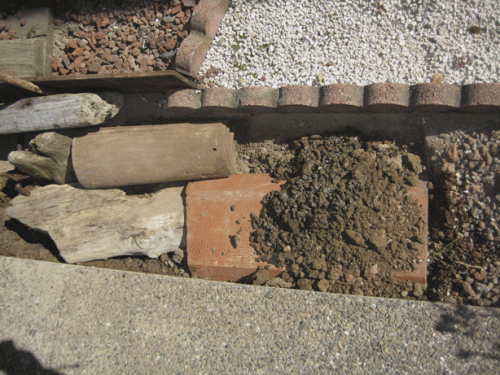
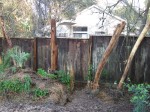
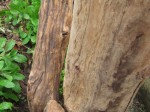
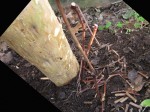
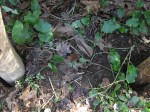
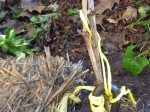
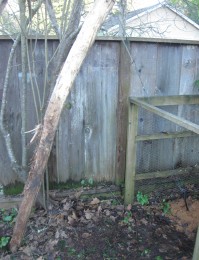
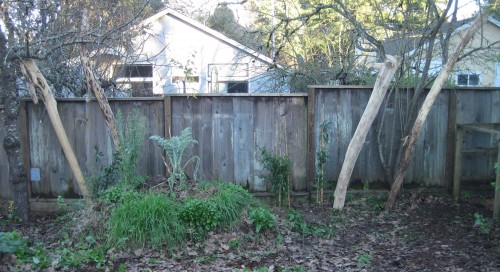
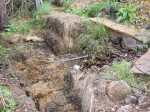
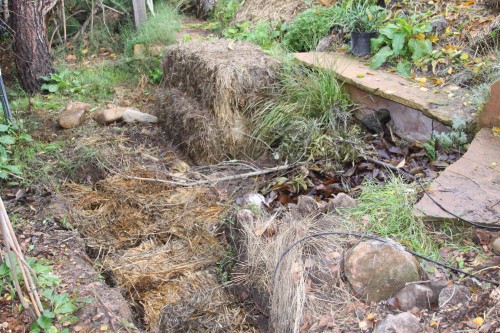
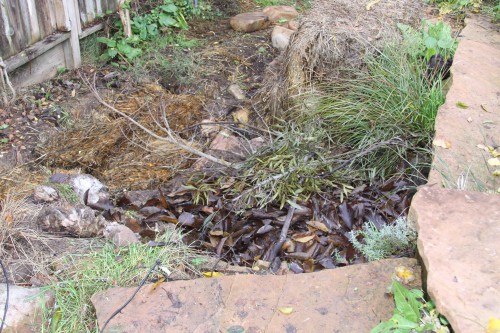
Close-up of nearly removed apricot tree and its rootball.

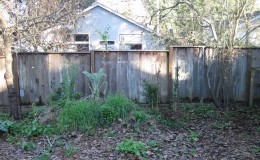
Time to remove the apricot tree, Grandpa’s Apricot Tree, in our back garden.  Almost no fruit in at least 6 years.  Seasons, soil, water, and our hungry food-producing mindsets will wait no longer!  Time to nurture another tree.  We will plant a Santa Rosa plum tree, who’s namesake is the next town over from our sunny California garden.


Almost!  I almost got the entire apricot rootball out before coming to my senses.  Yes, I like to create an animal habitat EVERY time I dig into the soil.  But, I thought I would shortcut that vision because so many parts of the garden call for my attention.  (Truth be told, the garden would do very well without my meddling.)  Then, with ¾’s of the root ball removed and even less breath in my lungs, I came to my senses. 


Yes!, this is a habitat.  I can stop right here.  This rootwad DOES NOT have to be completely removed from the bed.  The Santa Rosa plum can be planted next to the almost-removed rootball of Grandpa’s Apricot Tree.  My exhausted muscles can think of many reasons why to keep the leaned over, buried tree trunk.  Watch today’s video and the next 2 to come to find out why!


Habitat it and they will come!


20130130 Grandpa’s Apricot Root Worlds Fair 1 of 3

 (video):

20130130 Grandpa’s Apricot Root Worlds Fair (pics):

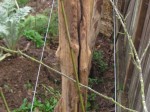
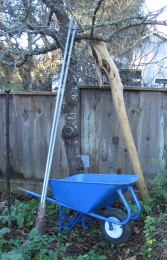
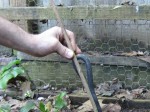
The apricot tree was pruned to make removal easier.The apricot tree was pruned to make removal easier.  Note the old grafting sites (with yellow grafting sealer); even new stock would not produce fruit.  A shame – the tree growth was vigorous with beautiful structure and wood/bark.


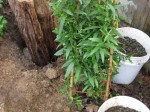
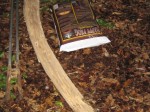
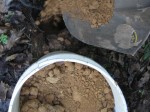
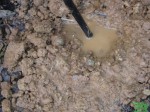
A tree is down!  Repeat, a tree is down!A tree is down!  Repeat, a tree is down!  After cutting some roots with a shovel, and bronco-riding the tree, other roots snapped and the tree was rendered a soil dweller.


Close-up of nearly removed apricot tree and its rootball.Close-up of nearly removed apricot tree and its rootball.  This is where, when I discovered that the tree need not be completely removed, that the soil-rich rootball makes a fantastic garden animal habitat.


Enjoy your habitat thinking-out-of-the-box creations.  Nothin is debris in a habitat garden food forest!

Tony

Jan 172013
 
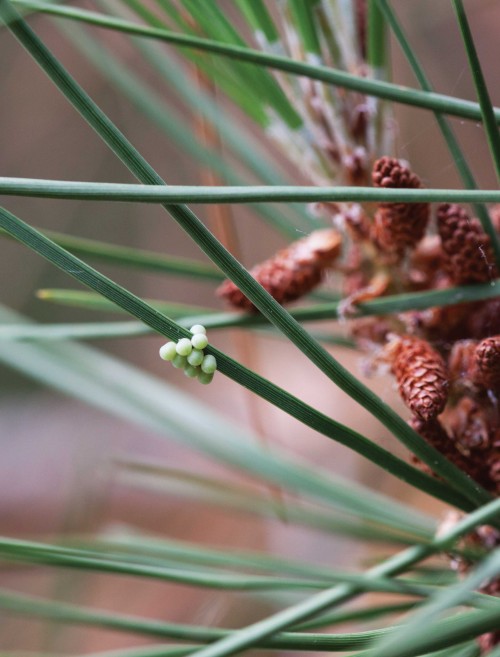
Insect Eggs on Pine Needle.

Pine Brush Pile is a  Zone 4 or 5 (Permaculture) habitat oasis in Tony’s back yard.  Great place to resource this year’s Xmas tree.

 20130114 Pine Brush Pile (video):


Pine Brush Pile (pics in Tony’s book):

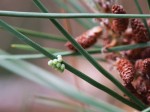
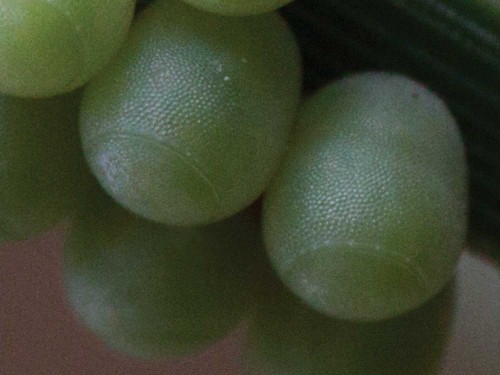
Insect Eggs on Pine Needle.Figure B.4 Insect Eggs on Pine Needle. [The picture has two parts: the background is from a distance and an insert is the close-up of the eggs. See post below for the close-up.]


Close-up of Insect Eggs on Pine Needle.  Figure B.4 Insect Eggs on Pine Needle.  The insect eggs shown are probably true bug eggs.  True bugs, order Hemiptera, are insects like cicadas, stink bugs, planthoppers, leafhoppers, shield bugs, aphids, and others.  All bugs are insects, but not all insects are bugs!   True bug eggs often have the visible “escape hatch” (the circular disc on the top of each egg), which is visible in the inset photo close-up view.   I particularly love the outer texture to the egg wall — looks like lime bumps on an orange.


Pine Brush Pile (pics from Tony’s garden):

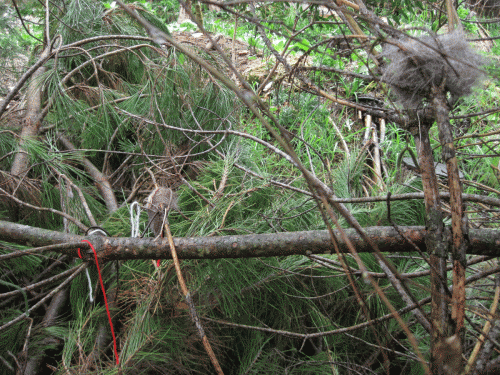
Nest-building supplies made available for birds.Nest-building supplies made available for birds.  Lots of birds come and go in Pine Brush Pile thicket, some looking to build nests.  Yarn, string, and hair is left to help them color coordinate and insulate their nests.  Always fun to discover “foreign” articles in a bird nest.


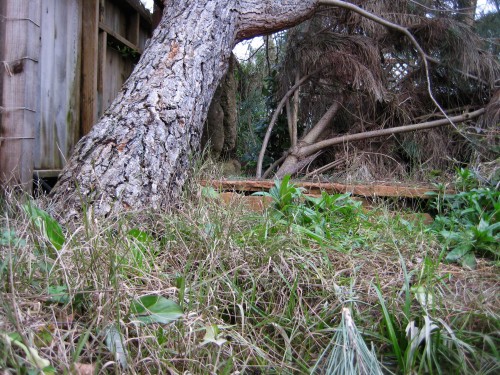
Ground view of Pine Brush Pile from Snake Shores.Ground view of Pine Brush Pile from Snake Shores.  Perhaps a snake will slither down from the thick, warm slate of Snake Shores.  It can enter Mayan Totem Seat, the 18-inch-deep stack of slate AND spacers in the foreground, or go beyond, into the coolness and food-rich jungle of Pine Brush Pile.


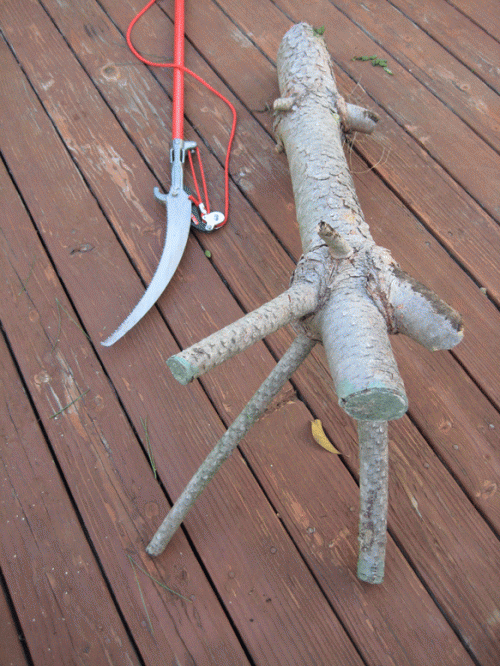
Pine log, shaped to maximize thicket-building.Pine log, shaped to maximize thicket-building.   The branch stubs left on this log will keep the log off the ground and from snugging up to other logs.  More space between logs means…[who knows but Habitat It and They Will Come!].  See next pic for the placement of this log in Pine Brush Pile.

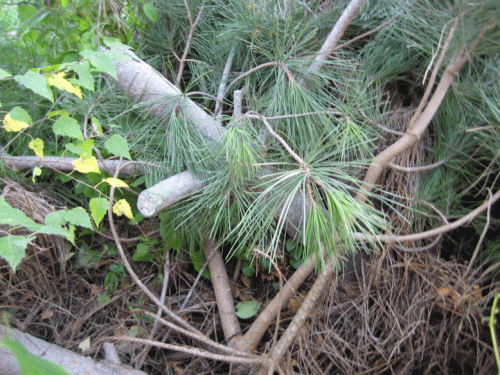
Nobody but us pine logs here!Pine logs and branches in Pine Brush Pile.  Helter skelter never looked so good!


Enjoy your habitat thicket creations.  Nothin is debris in a habitat garden food forest!

Tony


Dec 042012
 
Tony’s last conversation with Monica Mannequin.

First a video  re “Planting Salvia spathacea next to Monica Manzanita Mannequin 2 of 2”,  then some  pics of “Monica Manzanita  Mannequin animal habitat installation” (below the video):

Planting Salvia spathacea next to Monica Manzanita Mannequin 2 of 2 (video):

Monica Manzanita  Mannequin animal habitat installation and planting Salvia spathacea (pics):

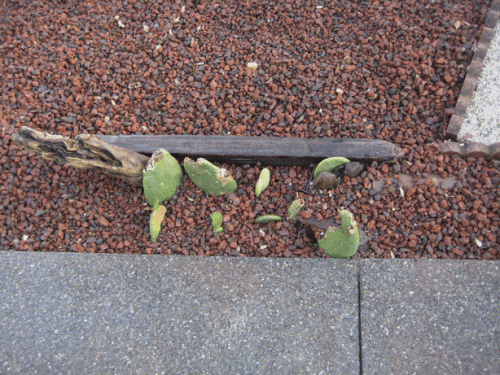
The west end of Cacti Caverns is cleared of lavarock.  The west end of Cacti Caverns is cleared of lavarock.  The “Monica” (species name) manzanita (Spanish for “little apple”) shrub will be planted on top of Cacti Caverns’ terra cotta flat roofing tiles.


The lower tile is slide under the top tile.The lower tile is slide under the top tile to make room for Monica Manzanita Mannequin animal habitat.   Poor quality soil (high percentage of adobe clay) is removed to make room for planting (better quality) soil.


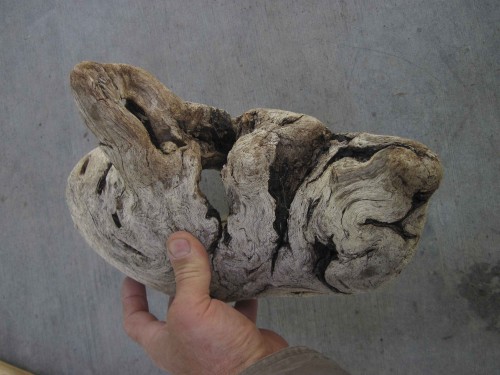
Tony’s last conversation with Monica Mannequin.  Tony’s last conversation with Monica Mannequin.   Note the wavy wood grain, identifying the mass as a tree root burl.  The “nose”,  or upright projection (Hey, work with me here!), is the base of the trunk, which starts out a straight grain.


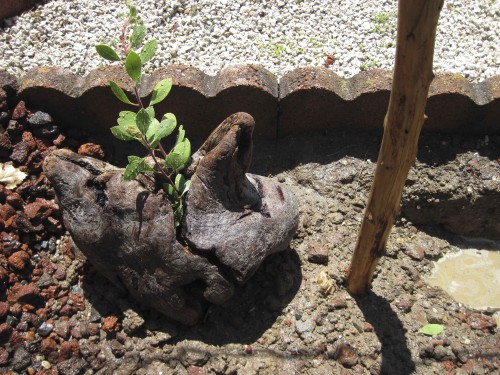
Monica Manzanita threaded through Mannequin.  Monica Manzanita threaded through Mannequin.   Soon critters will inhabit the inside vaulted ceilings and come and go through Mannequin’s crevices.   A pole planted next to MMM serves as a handhold while traversing the walk path.


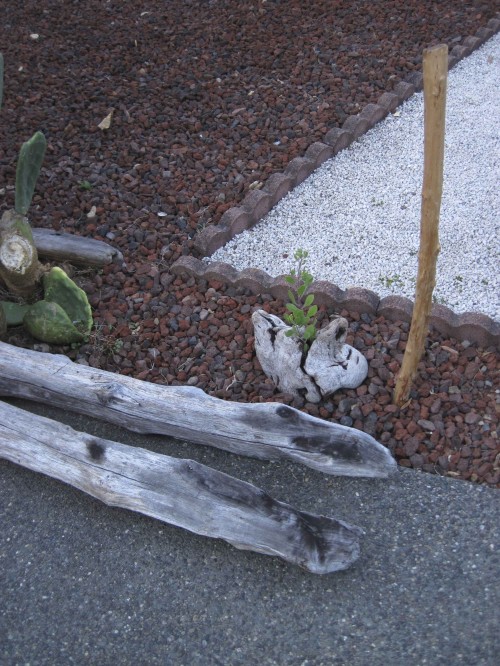
Monica manzanita a month after being planted.Monica manzanita a month after being planted.  Looks happy to me!  Not over watering is probably the biggest challenge this manzanita shrub will offer here in California,  where it is a native plant.


Monica manzanita 2 months after planting. After two healthy months, the typically very slowly growing shrub looks to be establishing itself.  Grape Overpass is sporting bunches of green grapes that will ripen in a couple of months.


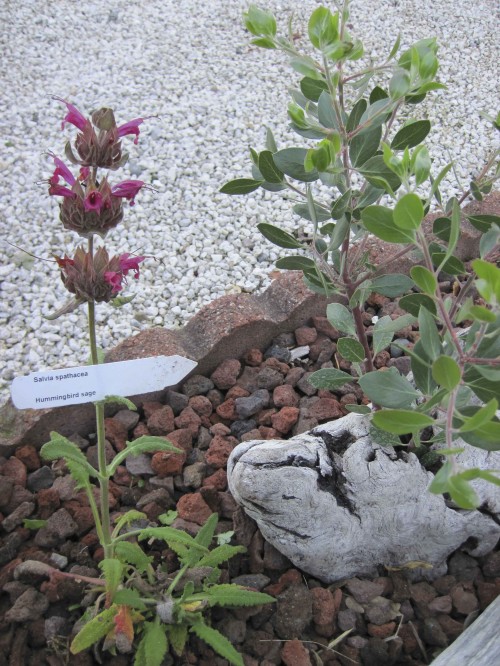
Hummingbird sage (Salvia spathacea) planted next to Monica Manzanita Mannequin habitat.Hummingbird sage (Salvia spathacea) planted next to Monica Manzanita Mannequin habitat.   The salvia, like the manzanita, is also a native plant that will thrive in the dry hydrozone garden bed.


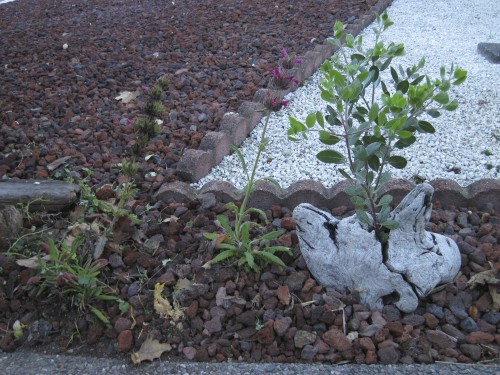
Both hummingbird sage (Salvia spathacea) next to Monica Manzanita Mannequin habitat.Both hummingbird sage (Salvia spathacea) pose for a photo op next to Monica Manzanita Mannequin habitat.  The critters will be happy!, especially in years to come when the manzanita tree canopies its undergrowth of hummingbird sage.

Happy animal habitat installations.  See you tomorrow.

Tony


Dec 032012
 
Hummingbird Salvia (Salvia spathacea) shows off Tony and his camera gear before being planted.

First a video  re “Planting Salvia spathacea next to Monica Manzanita Mannequin 1 of 2”,  then some  pics of “Cacti Caverns animal habitat installation” (below the video):

Planting Salvia spathacea next to Monica Manzanita Mannequin 1 of 2 (video):


Cacti Caverns animal habitat installation and Planting Salvia spathacea (pics):

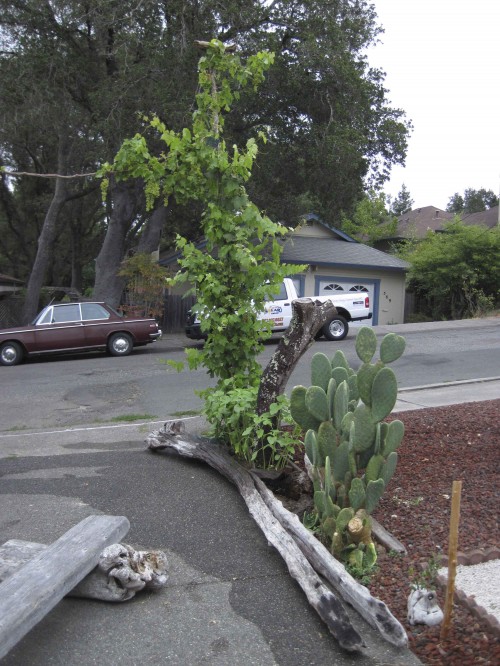
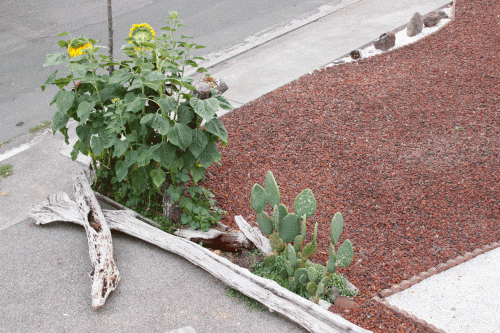
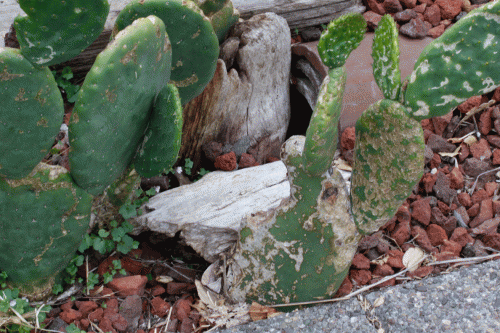
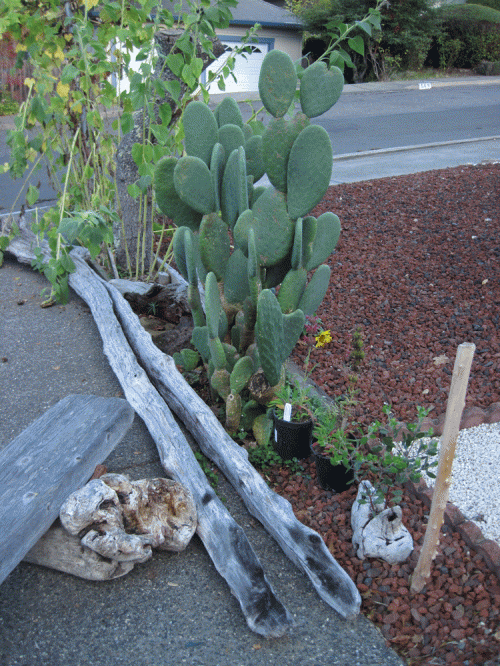
Roof view of Cacti Caverns animal habitat installation in 2010 (2 years old).Roof view of driveway property line in 2010: From street, 1) sunflowers are growing in Canyon Wall Oasis (large cavity in ground), AND 2) cacti grow above Cacti Caverns.  Note that the lavarock continues past Cacti Caverns to THE WORLD (especially if you are a tiny critter!).


Close-up of Cacti Caverns  in 2010.  Close-up of Cacti Caverns  in 2010.  Low profile above ground.  Several small sheltered cavities below ground.  Note the applewood tunnel in foreground and the 3-stack thick curved clay roofing tile tunnel in rear.  All earthworks are critter approved!


Hummingbird sage (Salvia spathacea) shows off Tony and his camera gear before being planted.On with the show!  Let’s get this Hummingbird sage (Salvia spathacea) planted and shoot some film.


The hummingbird sage will be planted between Cacti Caverns and Monica Manzanita Mannequin.  The two hummingbird sage will be planted between Cacti Caverns habitat and Monica Manzanita Mannequin habitat.  Truth be told, the salvias are actually planted above one of Cacti Caverns buried roofing tile cavities.


Pics and captions from Tony’s new book, Habitat It and They will Come of Cacti Caverns animal habitat installation (pics):

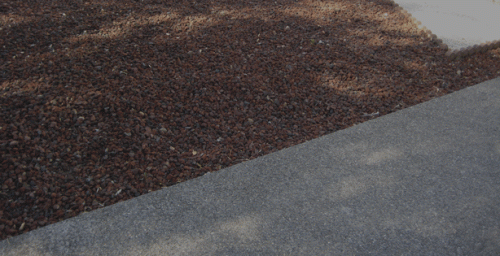
The property line along our driveway in 2008 -- not much animal habitat!Figure 4.52  Property line before Cacti Caverns installed.  Zeroscape for miles and miles and miles.  Time to change that.  Cacti Caverns will provide a little greenery, a little nook and cranny, a little Life is what you make it! to this property line.


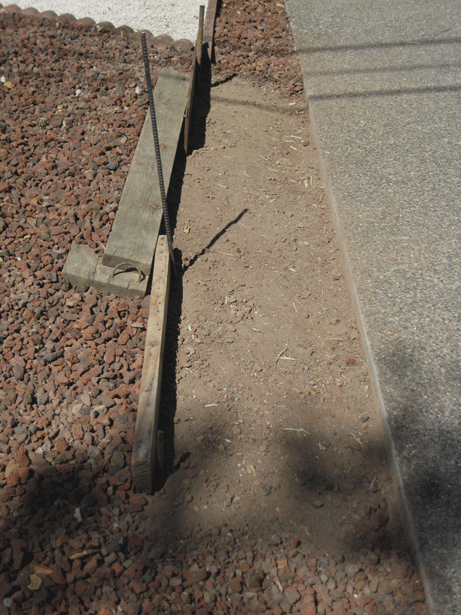
Cacti Caverns' canvas cleared of lavarock -- ready to receive art!Figure 4.60  Planks held in place by rebar.  The sturdy barricade will keep the rock in place during work.  A worthwhile effort.  Cascading creative ideas and manipulation of the moonscape into Cacti Caverns wonderland won’t have to be interrupted to replace rock landslides.


Underground cavities installed in Cacti Caverns, which continues to the left.Figure 4.72  Flat Clay Roofing Tiles resting on tunnel.  Gaps on both sides of the rounded log section will shelter          (fill in critters of your choice)        .  Note shovelful of soil used to anchor tile in place; the soil will be washed down to settle both sides of the tile.  Lavastone will rest directly on the tile’s flat surface.


Cacti Caverns habitat installation completed.  Lots going on underground!Figure 4.88  Wala!.  Retaining wall planks and rebar supports removed.  We’re finished!


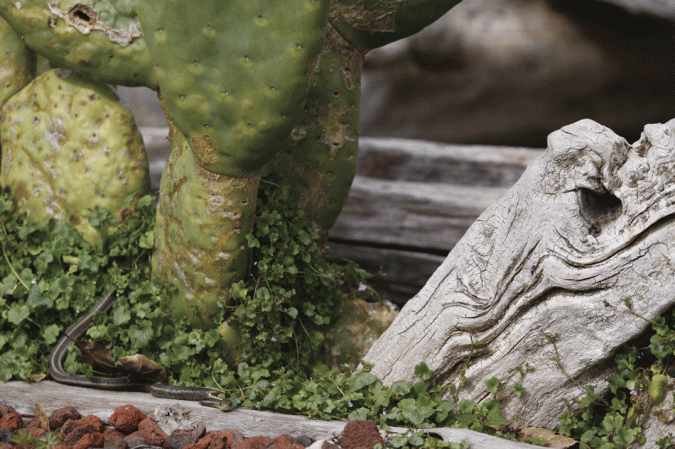
2011 -- A garter snake crawls out of Cacti Caverns to announce, "This animal habitat rocks!"Figure 4.94   Three Years Later.  next pages  Cacti Caverns has matured.  The cacti have grown paddle upon paddle upon paddle, a delicate flowering ivy has spread throughout, and Sea Creature has silvered (aged gracefully, they say).  Wood destined for the garden (in background, out of focus) awaits its turn alongside Cacti Gardens.  A wary garter snake has crawled out of the thicket of ivy and cacti, and rests on the fencepost.  Even more exciting than the snake itself (in our garden!) was watching it retreat from my pestering photography down into the ivy-obscured entrance of the applewood tunnel.


Happy animal habitat installation.  See you tomorrow.

Tony


Jan 112012
 
20120108-LTH-retaining-wall

Garden Log (what I did):
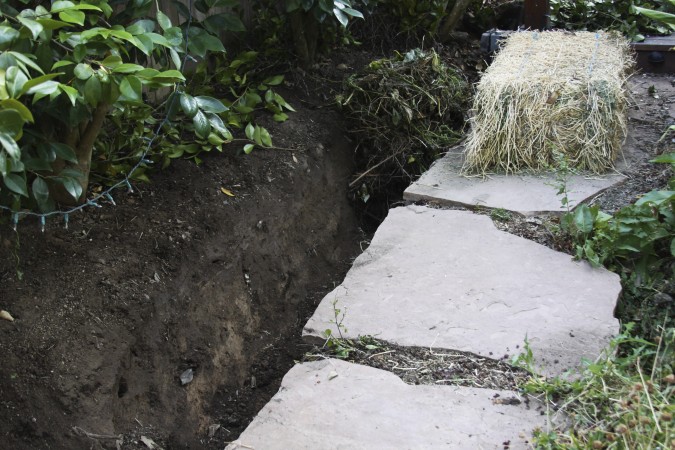
071509 LTH -- soil harvest

071509 Leaf Trench Highway. Soil has been harvested from the trench, between the slate walk path and the planting bed. The trench will be prepped for more soil making, starting with a base of straw from the awaiting bale. Since this picture, lots of organics have been composted onto and into the trench. Those organics include: tree prunings, wheat straw, alfalfa straw, oak leaves, carbon harvest (for example, pumpkin vines), twigs and stout tree limbs, wood chips, and horse manure. Beautiful, rich, high quality tilth soil has been harvested several times from the trench.

1. Constructed a low retaining wall to increase the soil volume of a planting bed, Leaf Trench Highway.  Leaf Treanch Highway got its name back in 2007 when we were installing irrigation supply to our garden’s back corner.  The water supply was trenched along a walk path, buried about three (3) feet and encased in 3″ perforated plastic drainpipe.  The depth and casement were to allow “mistakes” in the garden — a shovel could graze the drainpipe and might not break through and bust the water supply.  Lots of digging since then, and no busted trench pipe, yet.  The trench was called a “highway” because, when filled with leaves, or other organics, it’s a corridor for critters to move about the garden.

So, there we were, in 2007, with a sizeable 3-foot deep trench running along the property line’s planting bed.  We decided to use the trench to make soil; we would use the trench to turn compostable material into planting soil.
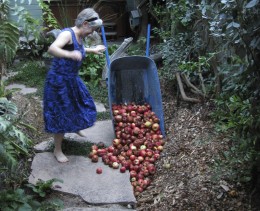
20110929-LTH-Apples

"Opps! Did I spill that?" No, Anita, Leaf Trench Highway is getting a rotten apple harvest -- Sebastopol's finest for our dear soil-making critters.

About every six months, the trench is dug up for a soil harvest.  That harvested soil is then used to amend the soil in the gardens.  And yes, sometimes waiting the six months or so is difficult.  But having fresh, new, teeming-with-microbe, alive! soil on hand when we do harvest is all that much more a treat after the wait.
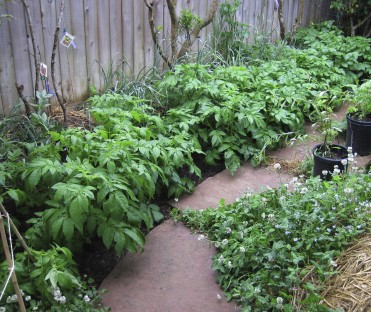
20100604 LTH -- potatoes

Potato (broad-leaved), garlic (along fence), red and white clover grow in Leaf Trench Highway in the summer of 2010. The red and white clover serve as both insectary and nitrogen-fixing plants.

This time around,  in 2012, I want to grow a crop above the composting trench.  I want us to produce a garlic and vegetable crop WHILE the trench is composting.  I have also found that new crop love a good compost under it.  BUT, the compost can not be too hot or the new crop will burn.  For this planting, there is a good base of wood chips, green manure, oak leaves, and a recent magnolia tree pruning.  Especially with the magnolia twigs and limbs, those bulky organics will supply microbes, miosture, and nutrients to the growing crop.  Also, as the crop plants grow, their roots will travel the moist, nutrient-rich paths along the decaying wood.  Great mulch for the coming dryer months.  Throughout the spring, we will harvest salad from the composting trench.  By July, the garlic will be ready to be dug up — harvest garlic, harvet soil.  Garlic for the kitchen, soil for the garden.
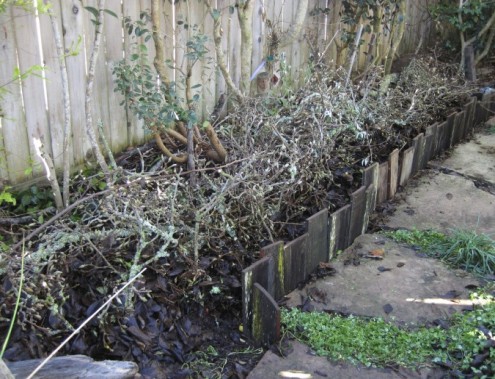
20120108-LTH-retaining-wall

Low retaining wall built to increase the soil capacity of Leaf Trench Highway's planting bed. Old redwood fence boards were cut in two-foot lengths and pounded into the gap between the planting bed and the vertical slate border. Using a wood block between the fence board and the sledgehammer kept the fence boards from splitting.
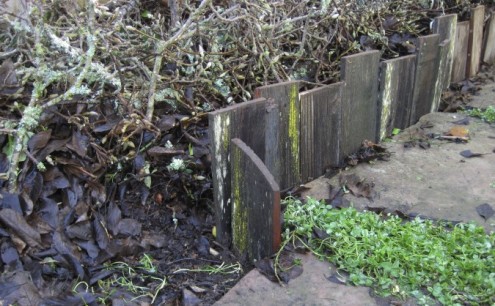


20120108-LTH-retaining-wall, close-up

20120108-LTH-retaining-wall, close-up. Note the beautiful mosses and lichens on the old fence board. Not only is this FREE!!! redwood fence board functional (it will last many years in the soil), it is also beautiful. Moist soil from the planting bed was rubbed into the board cuts to instantly age those fresh-cut surfaces -- we are talking art here! I am interested to see if that soil smear will promote moss growth on the top edges of the boards. Stay tuned.

2. Manure run.  Collected both hot (fresh) and cold (old) horse manure from my secret source (nothing personal).  The hot manure was laid down at the bottom of the fence boards to create a little heat for the wintering crops.  The cold manure, which is pretty much a sandy loam soil because it has broken down for so long, was thrown on top of the bed.  That cold manure was thrown into and on top of the magnolia tree prunings, enough of it to plant the crops in.
20120107-manure-collecting

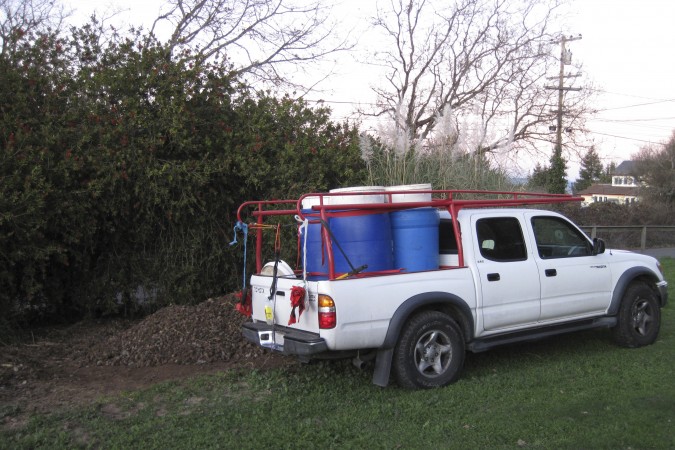
Collecting horse manure from a neighbor's pile. The bins/barrels help keep the job cleaner and easier. Using the barrels, my truck does not have to be washed afterwards and the manure can sit in the bins until ready for use. Sure is nice to load it once (into the barrels) but not have to clear it out of my truck's bed the same day. Note the looseness of the fresh (hot) pile at the rear of the truck. That pile was moved twice -- once to get it out of the way so the buried old (cold) manure could be harvested, then again to fill up the hole that cold manure harvest left. Perhaps in 6 months, that filled in hole will be cold manure soil itself. Just another example of our wondrous revolving World at work.
20120110-LTH-garlic-planting-2

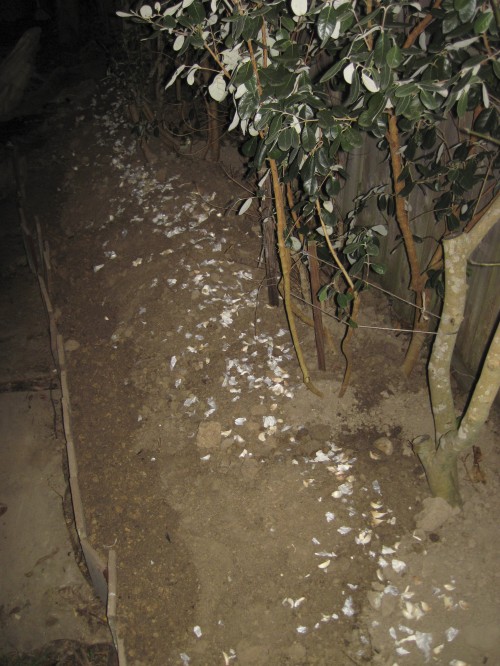
It's late, but the garlic is in. Come tomorrow, I will throw a thin mulch of rice straw over the veggie seeds and garlic starts. Note how the low retaining wall of recycled (reused) fence board allowed enough soil to be added to the bed to cover most of the magnolia prunings. Will be exciting to see what crops actually do rise out of the straw mulch and to see how well they thrive in this compost, soil-making bed. Oh, did I tell you -- it's an experiment. 🙂

You, the Habitat Gardener (reflections):

1. Leaf Trench Highway is a major no-toll pathway in our garden.  True, there is often construction along this roadway, but the improvements are always worth it.  This year’s road upgrades include last year’s woodchip pile from Santa Rosa’s waterways cleanup (oak and willow), oak leaves from the neighborhood, our ridiculous Jack-in-the-Beanstalk pumpkin patch green manure, the magnolia tree’s prunings, hot manure, and cold manure soil.  Microbes party down!  All insects and amphibians welcomed.  Just add water, as the soon-to-come rains will do, and the entire length of Leaf Trench Highway will be a mess of healthy fungi, vegetables, flowers, microbes, crawly critters, and birds.  And that’s just at ground level.  The length of the trench, along the fence, is a fedge — food hedge, a permaculture term.  That hedge planting includes fig, pineapple quava, loquat, and pomegranate.

2. Our soil gets better every year as we grow more food each year.  And we share — without an atom of pesticide, herbicide, or fungicide, the trench and fedge will take on a natural balance.  The critters will get some of the planted crop, but by far, we will get our fair abundant share.

Happy soil making to you.

                                                            Tony


The Next Day and Night:

1. More cold manure soil was added to the bed tocover the garlic and to give the veggie seeds more soil to establish themselves in.
20120111-LTH-veggy-planting

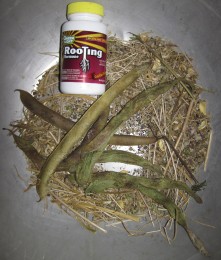
Bowl-O-Seeds. Rooting powder was used to help the seeds germinate, a tall task during these wintery days.

2. The vegetable seeds were all mixed together with rooting powder (only because I didn’t have any mycorizzae spore on hand).  Life is good!, especially when I get to open dozens of seed packets that I prepared throughout last growing season.  Round and round, mixed in a large stainless bowl, or bucket, and dusted with a little love (spore or rooting powder).  Then I’ll carefully toss the seeds out onto a prepared planting bed — a dash here, a dash there, some over my right shoulder, some underhanded between my legs.  Most importantly, I get to have fun being ridiculous.  I get to plant way too many seeds.  Yes, I work hard to collect seeds all year long so that I can have a Chia Pet garden.  Too many plants that grow too much means I will eventually get to havest them, in whole or in part, and reap the green manure they are.  I will be harvesting carbon — all that alive, green plant material is merely bottled up sunshine to be poured onto the compost pile.  Sun >>> plants >>> photosynthesis >>> juicy packets of carbon >>> Tony’s compost >>> SOIL MAKING.  And with that carbon-rich soil, we will grow more STUFF, whether it be flowers, food, or fodder.  And we will live happily ever after.

The seeds I grew and collected and mixed together are cilantro, parsley, Queen Anne’s lace, bok choy, gopher plant, impatiens, fennel, round zuccini, calendula, “Primo” danelion, and chard.  Store-bought seeds that also became part of the mix are broccoli, cauliflower, and lettuce.  SOMETHING ought to grow!

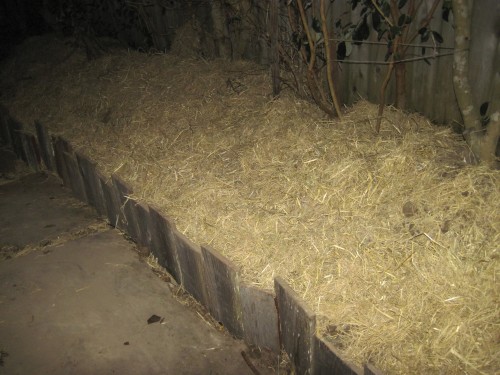
3. The seeded bed, also with its garlic starts, was mulched with rice straw to keep critters away from the seeds and to keep the seeds moist for germination.  The mulch will also help the seeds receive waterings and/or rain without being washed out of the planting bed.  Perhaps too heavy a cover of straw to be left on the young sprouts.  BUT, I will keep an eye on the bed and will thin off some of the straw in a week or two.  I will be curious to see what plants actually do come up during these frosty nights and cool days.  Nice to have some ground warm perculating upward toward the seeds from the hot manure below.  Even if nothing were to germinate now, surely some seeds will germinate further down the year when the sun warms the soil and spring rains moisten it.  How fun to wait and see.
20120111-LTH-veggy-planting-mulched

The seeds have been sown and the rice straw mulch is in place. A little water. A lot of waiting. Soon enough, though, a forest of food and flowers.
 

Jan 302011
 
trellis habitat House Finch Hideaway

Trellis habitat House Finch Hideaway will support a thicket of vines.

Garden Log (what I did):

1. Completed installation of the trellis habitat, House Finch Hideaway.

You, the Habitat Gardener (reflections):

Trellis wire on center post.

Trellis wire on center post. Note the crevices in the post's wood -- great shelter for small criters willing to make the climb.

1. Today’s job was to finish the trellis habitat, House Finch Hideaway.  For previous entries re this project, see HFH — Installed Posts and HFH — Trellis Wire Installed.  To most people, this job would be a trellis installation to create back-fence privacy, period.  But for me, this project is a great opportunity to grow food for our table.  Also, the trellis will provide food and shelter for critters.  I see a thicket of perennial jasmine vines with knock-me-out fragrant flowers, a sun-basking wall of hanging fruit, subterranean crevices and water for amphibians, a ladder system of wood posts for insects and lizards, perches and nesting shelter for birds, and a rising sun backlighting enormous grape and fig leaves.

Top cross wire loosely in place (before stapled).

Top cross wire loosely in place (before stapled). Note the post's lean away from the back fence.

After laying out and attaching the top wire loop with a Gripple lock, I realized that the wire was not as tight as I wanted it to be.  The distance between the two center posts was too long.   A 5th post, a true center post, will bridge the gap and prevent the someday vegetation-laden wire from sagging in the middle.  All the better to know now that my original plan for four posts was unrealistic.  Besides we can milk this mistake.  I’ll get the most out of changing the plan by a) charging more for the job, b) installing more beautiful driftwood in the garden, and c) installing a separate animal habitat when digging the hole for the new center post.  About a) charging more — Oh well, I forgot this is an unpaid job.  About b) more driftwood — YES!!!  How better to fix a problem than to pull out the driftwood?  Better yet, the center post is a union of two pieces of driftwood.  About c) another habitat — Dano’s Great Newt Grotto is born; see my future post (I’m going to bed!).

Base of center post yet to be backfilled with rock, gravel, and soil.

Base of center post yet to be backfilled with rock, gravel, and soil.

We want Center Post to rise about a foot above the 7-foot-high top cross wire.  That one foot height over the wire will be a critter perch.  Perhaps a bird, squirrel, or a very stupid insect or lizard (wanting to be so visible) will use the lookout.  Our post is 9 and 1/2 foot long, so that does not leave too much wood to be buried below ground.  First off, give up on the one foot and settle for a 6″ perch.  Then, the post can be buried 2 feet (9.5-7.5) — way not enough for that heavy piece of tree to stay vertically suspended AND support the heaviest load of the trellis.  What to do?

Center post base (left) supporting center post pole (right).

Center post base (left) supporting center post pole (right). Note the available critter shelter between the two pieces of wood.

Another piece of driftwood comes to the rescue.  The second piece of wood to become Center Post is a glorious redwood root section.  Being of redwood root stock, it is extremely dense, insect resistant and strong.  That piece is dug into the ground about 5 feet and snugly holds up the center post pole.   In fact, the base piece perfectly cradles the post piece, making a perfect lean forward away from the fence.  Perhaps that lean away from the fence will keep the someday rotting posts from crashing through the back fence.  Fences make good neighbors AND busting up the fence between you and your neighbor makes for trouble.  Therefore, the heavy and strong Center Post has a slight lean away from the back fence.

grape cuttings at left end post

Grape cuttings at left end post. The small "wood chip" pieces of grape vine will make friendly mulch for the soon-to-thrive vines.

Plenty of rocks were used to fill in Center Posts’ hole.  The rocks will better pack around the wood posts because they will not compress like soil fill does.  Also, the rocks and gravel will help the posts stay dryer in the ground, which will slow down their rotting.  Not only will water filter through the gravel better than soil, but also the rocks and gravel will not retain moisture like soil or clay does.  Less water retained means dryer posts.  I also like the use of the larger rocks because cavities will be created around them during the natural settling process (of the soil, gravel, and rocks).  Those cavities will shelter critters.

Compost soil was used to fill in the remaining post bases and grape cuttings were planted at the base of a couple of posts.  The Center Post’s habitat, Dano’s Great Newt Grotto, incorporated a healthy transplanted jasmine vine rootball and short vine strands.  Those short vine strands will quickly thrive and climb up the waiting stake, to the Center Post, and then off in both directions along the cross wires.  Short stake “fences” were made around a couple of the post planting to keep foot traffic from destroying the plants.  The planted cuttings were then mulched with old straw to protect the soil from heavy rain.

Vines at base of posts -- caged and mulched.

Vines at base of posts -- caged and mulched. Jasmine is far left, next to tallest stake. Grape is right, inside short stake fence.

So exciting to have a planting in place.  Training the vines up the posts and weaving a living wall with flower and fruit vines will be fun.  What neighbors?  Oh yes, we have neighbors to the back of us, behind the vegetation wall.

Enjoy the regeneration of spring.

…………………………………………………………………… Tony

Jan 242011
 
Original Plan for House Finch Hideaway

Garden Log (what I did):

1. Installed posts for House Finch Hideaway.

You, the Habitat Gardener (reflections):

1. A beloved neighbor of mine has very little privacy in her back yard and wants more.  Her yard slopes up from the back fence, so her back neighbors have a straight-shot view of her patio sliding door and into the house.  What a drag to have to draw the curtains for privacy.  But, I want to see the garden!  Solution: Create privacy at the fence.  Then, even the garden becomes private.

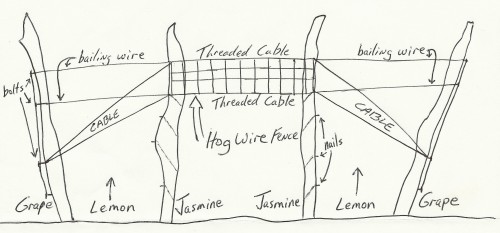
Original Plan for House Finch Hideaway

Original Plan for House Finch Hideaway

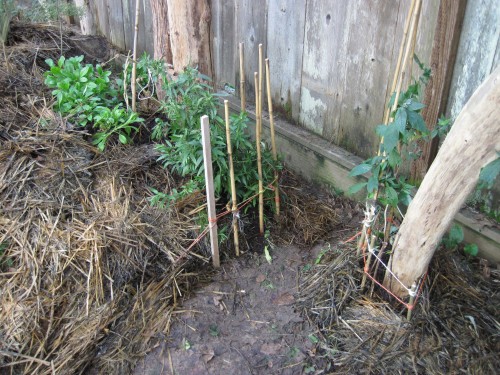
I love trellises.  Vertical growing allows stacked vegetation (Ex. = plants on the ground and above) or “stacked functions” [a permaculture term] (Ex. = a clear walkway below and plants above).  We will use a trellis to create Beloved Neighbor’s privacy and support for fruit vines.  Grape, kiwi, fig, and espaliered lemon all do well growing along trellis wire.  However, because our first goal is to create privacy, evergreen plants become our first choice.  Of those fruiting vines just mentioned, only the lemon is evergreen.  And one drawback to evergreen lemon trees is their relatively slow growth when compared to fruiting vines.  Pink Jasmine to the rescue — a fast growing evergreen vine with very fragrant flowers.  The jasmine will become a suspended thicket very welcoming to nesting birds and the fragrant flowers will attract bees and hummingbirds during the early spring bloom.

Back fence line before trellis installation of House Finch Hideaway.

Back fence line before trellis installation of House Finch Hideaway.

My friend, Jim, an organic apple farmer, took me for a walk in the orchard last spring.  He was excited to show me the perimeter fencing that he installed.  Jim’s wire fence is a grape trellis, and a couple of thousand feet long.   That’s a lot of grapes.   He was particularly excited to show me how simple the hardware is.   I was sold.   Why just put up a fence when the same fence can support a crop?   House Finch Hideaway is basically a vinyard fence a few more feet off the ground and not very long.   The entire trellis will be 2 end posts with 2 center posts between them.

Left end post positioned in ground.

Left end post positioned in ground.

Yes!, I get to sink driftwood into the ground.   I just happen to have a few good-sized driftwood poles left over from last year’s driftwood collecting.   The four poles I’ll be using are all well over 10 feet long.  They are long enough to secure 5-6 feet in the ground and still reach above the fenceline a few feet.  My custom-made posthole digger tool (electric conduit fastened to digging clams) is long enough to do the job and save my back from breaking.   And wala!, the first post, the Left end post, is in.  I chose to sink that post first because placement next to the cherry tree is more critical than with other elements in the yard.  The post was up-ended, in other words, the heavy trunk end was flipped up into the air and the thinner end of the pole was sent into the ground.  Art!  We want creatures in the garden and what better way to do that than to jog the imagination with tree trunks in the air.

Right center post waits patiently to be installed.  Length = 15 feet.

Right center post waits patiently to be installed. Length = 15 feet.

The oddly angled posts present some challenges for this linear wire trellis.  Sinking the driftwood posts for allignment of all four posts is part guesswork and part skill.  I have worked with driftwood for a long time and can anticipate how pieces will lay, most of the time.  Fortuneately for me, I did goof up here by the time I got to the center posts.  But that’s part of my skill — to take advantage of goof ups.  For instance, I THOUGHT I wanted the center posts perfectly vertical, like a respectable fence ought to be.  BUT, I wasn’t thinking clearly and dug the center holes vertically.  Well, duh, the two center posts are not straight.  In the end, after some trial and error by my lowering them into both holes only to retreive them and switch their position, the posts told me where they belong.  And what beautiful gracefulness they are in, with the strength of the trellis magnified by their self-directed position.  Specifically, the center posts are also openning outward, as are the end posts, which will better stretch the fruit-laden wires of the trellis.  There will be less sagging in the middle of the trellis because of the great tension created by the outward-facing posts.  The wood talks!

Posts in holes left loose for wire tensioning.

Posts in holes left loose for wire tensioning.

All four posts have been left loose in their holes, in other words, soil has not been backfilled to secure their position.  The posts might want to twist and turn a bit when the wire fenceline is tightened — no sense in counteracting that movement.  Then, when the wire tension is appropriate, and the posts have fallen into resting position, the postholes will be backfilled with planting mix and vine starts.  What happy plants they will be, with their roots sucking water from the hugh wood posts.

Installing earth anchors for the two end posts is next.  Securing the end posts to the ground will help keep them from breaking under the heavy weight of the vines, fruit, wire and center posts.

Earth anchor with eye bolt end.

Earth anchor with eye bolt end.

Earth anchor in shallow hole.

Earth anchor in shallow hole.

Measuring length of anchor rod before drilling.

Measuring length of anchor rod before drilling.

A crowbar provides leverage for drilling in the earth anchor.

A crowbar provides leverage for drilling in the earth anchor.

The earth anchor has been drilled into the ground "this far".

The earth anchor has been drilled into the ground "this far".

Adobe clay used to "cement in" the buried anchor.

Adobe clay used to "cement in" the buried anchor.

Clay soil soaked to maximize settling.

Clay soil soaked to maximize settling.

Grape vine cuttings planted with Right earth anchor. Note the highly visible yellow cord to warn passersby.

Grape vine cuttings planted with Left earth anchor. Note the highly visible yellow cord to warn passersby.

I don’t want to lose sight of how deep the anchors are so I use a crude stick measurement for the before and after depth of the anchors.  A crowbar in the anchor’s eye helps drill the other end’s screw into the soil.  Well, that anchor is pretty far down there but I will fill in the hole with heavy adobe clay to increase the weight on the anchor — would be a drag if the vine and fruit loaded trellis and poles were to heave out the anchor some day.  Keeping the adobe soaked in the hole will help it pack and maximize it’s volume and weight as it settles.

With both earth anchors in place, now it’s time to wire the end posts to the anchors.  13 gauge galvanized vinyard wire will be secured by Gripple fasteners; see www.gripple.com for how Gripple’s line of agricultural hardware is used.

The endposts are secured with wires angling down to the ground at 45 degrees (90 degrees to the slanting posts).  Yet to be done, the horizontal fruit-/vine-bearing wires will be strung between all four posts.

Right end post wired to earth anchor.

Right end post wired to earth anchor.

Today I got as far as wiring in the end posts.  The horizontal wires will come another day.  Stay posted, pun intended.

House Finch Hideaway's four posts awaiting connecting wire.

House Finch Hideaway's four posts awaiting connecting wire.

Tony

Jan 102011
 
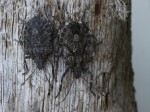
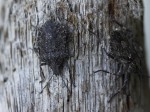
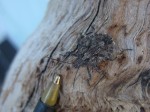
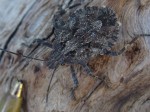
Brown Marmorated Stink Bug on redwood driftwood

Garden Log (what I did):

1. Cold here in Sebastopol, California — well at least for us — with the growing season nearly dormant.  We finally got some garlic starts in the ground about a month ago in the front veggie bed along the sidewalk.  Maybe this week I’ll plant fava beans there to grow SOMETHING.

2. Harvested hachiya persimmons from a neighbor’s tree.

3. Inspected Salamander Swimhole’s vitality.

4. Discovered brown marmorated stink bugs on a piece of driftwood in the front garden.

You, the Habitat Gardener (reflections):

1. Our garlic crop in the front bed will be ready next late spring, just in time for us to plant sunflowers.  We get garlic; the critters will reap the sunflowers.

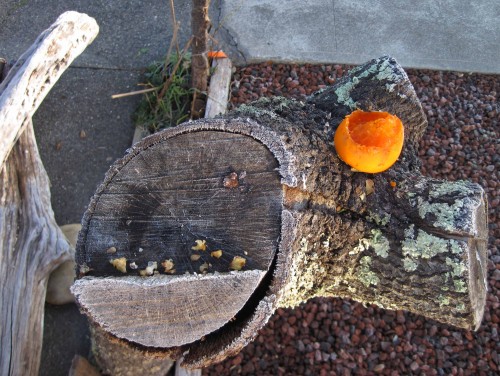
2. The persimmon that was left on Oak Pedestal last night is half eaten.  A long deck screw holds the persimmon in place and secure from strong critters, like a squirrel, that might want to eat the persimmon elsewhere.  The long screw’s head was snipped off, then that end was impaled into the oak limb’s crotch, leaving the pointy  end of the screw skyward.

Top view of Oak Pedestal feeder with partly eaten persimmon.

Top view of Oak Pedestal feeder in winter garlic bed with partly eaten persimmon.

Oak Pedestal feeder -- side view

Side view of Oak Pedestal feeder in winter garlic bed.

So easy to screw an apple, a persimmon, a tough piece of food onto the screw and thwart thieving critters.  Ha!, I am smarter for once.

Oak Pedastal Feeder and SF leaves

Top view of Oak Pedestal feeder surrounded by a summer crop of sunflower. The black oiled sunflower seeds are bagged birdseed. How fun to place some seeds on the sunflower leaf platters. Note the up-ended deck screw (in the oak limb crotch), which is used to secure apples and other food offerings.

3.Salamander Swimhole, which seemed a lost cause because of foul water (see my November 27, 2010 entry: http://sporelore.com/residential-habitats/garden-pond/) is clearing.  The magnolia tree’s leaves have all fallen for a month now so the pond is no longer being overwhelmed with fresh organic matter.  Algae is growing faster now that more sunlight is reaching the pond; the magnolia leaves were shading the new pond water.  Just-visible microbes are whirling about in the water and the potted plants are showing new growth.  The pond will thrive, with luck in time for a pacific tree frog to want to lay eggs in it this spring.

4.  Brown marmorated stink bugs ( Halyomorpha halys) are in the insect family Pentatomidae and are known as an agricultural pest in their native range of China, Japan, Korea and Taiwan.  Yes, they are not native to our California soil.  But they are so cool!  Given the species’ alien trait, I’d rather they didn’t exist in our garden BUT three bugs on one small piece of driftwood means there are probably many others entrenched in our neighborhood.  What’s a sustainability-minded Master Habitat Landscaper Apprentice like me to do?  Nothing, that’s what.  Sure, I rather the garden be full of native insects to work the garden and provide food for higher tropic animals.  But perhaps alien pollinators (or non-pollinators) will feed some of those higher tropic animals, i.e., animals more sophisticated/more developed.  An insect meal might just be an insect meal to a hungry woodpecker during these food-is-sparse short days of winter.

A couple of cool facts about these alien-to-California brown marmorated stink bugs: a) They are actually bugs!  “Bug” is often a lay term for “insect”, but “true bugs” are only one order of insect, like “beetle” is another order of insect.   b) Stink bugs get their name from a smelly fluid emitted from their thorax when threatened.   I was lucky to get the bugs pictured (below) without getting sprayed — surely their sluggishness from the cold was in my favor.  c) The term “marmorated” is derived from Latin for “marbled”.  Close inspection of the seemingly “brown”/dull-looking wing tips and exoskeleton’s back plates (pronotum, esculetum, elytron) reveals magnificent design and color.  Sure wouldn’t want to be an ant when that steel-plated star cruiser crawls overhead.

Brown Marmorated Stink Bugs on redwood driftwood Brown Marmorated Stink Bugs on redwood driftwoodBrown Marmorated Stink Bug on redwood driftwood

Brown Marmorated Stink Bug on redwood driftwood Brown Marmorated Stink Bug on redwood driftwoodEnjoy all things, stinky or not.

Tony

Dec 102010
 
Zen Canyon Snake Pit -- slate stacking completed

Garden Log:

1. Completed slate stacking to bring Zen Canyon Snake Pit’s ceiling flush with surrounding edges, which finished the installation of the habitat.

Zen Canyon Snake Pit covered over with soil, leaves and branches.

Zen Canyon Snake Pit covered over with soil, leaves and branches. The topmost slate of the slate-layered chamber will support a branch/twig/stump/log pile. That pile of organic material will be a thriving animal habitat as it breaks down, soon to be thrown onto the compost.
2. Dug out soil around irrigation zone #3’s last riser, in corner of back garden, to expose the tee connection.  Threw the soil on top of Zen Canyon Snake Pit.
3. Cleaned magnolia leaves off spa deck and on pathways in back garden — thanks Glory!  Leaves were dumped on top of fresh soil just thrown on ZCSP.

4. Began stick debris pile on top of Zen Canyon Snake Pit; sticks were from dying birch and miscellaneous piles around the yard.

5. Tossed old straw “tiles” into the trench that was the base of Rock Pile Planter.

6. Harvested persimmon fruit from neighbor’s tree.  Thanx for the persimmons, Sunny!

You the Habitat Gardener:

1. What a great session in the garden today.  Always a good day when an animal habitat is completed.  All the ideas, the what-if’s, the how would that be’s, the plans and sketches, the gathering of materials, the actual work (imagine that!) to manipulate space and materials are over.   Sometimes, finishing a habitat installation is anti-climatic, especially one that has been in my mind for months, maybe years.  But today’s completion of Zen Canyon Snake Pit brings our back garden to a new stage.

Now that Zen Canyon is bridged over with slate, we can begin to create an organic debris pile (sticks, tree limbs, etc.) on top of it.  Debris Pile Food Court is born!  Where there once was a hole in the garden, there will be a through-fare for the wheelbarrow and a large-item compost pile, that is, a debris pile.  We will keep the debris pile to one edge of the top of the snake pit and have a path for the wheel barrow over the other edge of it.  The filled over  “canyon” will become the base, or floor, of the debris pile, a new habitat in of itself.

Habitat stacking in the garden — the debris pile will shelter many microbes, insects, snails, slugs, spiders, and small animals feeding on them.  Perhaps some of those critters will seek shelter below the debris pile, in the staking of slate and stone  or in the two toilet tanks that make up the cracks and crevices of Zen Canyon Snake pit.  And all the while the debris pile breaks down we will be making soil.  Eventually most of the organic debris pile will be tossed on the nearby compost pile.  We’re making soil!

Debris Pile Food Court above Zen Canyon Snake Pit

Organic garden debris, too large for the compost pile, will be piled to create the Debris Pile Food Court above Zen Canyon Snake Pit. Perhaps larger critters will live below ground and feed on the debris pile's smaller critters above.

2. Today began the creation of  Debris Pile Food Court (Garden Log #2,3,4) — a  pile of sticks , logs, stumps, tree limb sections piled above Zen Canyon Snake Pit.  The debris pile will stand alone as an animal habitat, friendly to critters from microbes to insects to birds, amphibians, and reptiles.  Maybe even a garden snake!  Soil was thrown at the base of the pile to help sustain such biodiversity.  Maybe some of those microbes working (breaking down) the wood pile will take shelter or food from the soil floor of the pile.  Maybe that soil floor will be where the insects, snails, and slugs lay their eggs to keep the explosion of life going.  And, that soil floor, rather than the slate floor is was, will also keep water available to further sustain animal life.

3. The magnolia leaves (Garden Log #3) cleared of our spa deck and off our garden slate pathways was thrown on top of Debris Pile Food Court’s soil base.  Not great science, just wanted some place to put the leaves till our compost pile area is ready AND the leaves under the wood pile will add to the bio-diverse habitat of the now-planned soil-leaves-wood pile.  Note that I said the leaves were only cleared away from the spa deck and the pathway; all other leaves will be left to break down on our small grass patch and in the beds of the back yard.  What a mess!  But that mess will provide great nutrition,  shelter, and insulation for the soil microbes, larger critters, and plants ALL WINTER LONG.  And be assured, by spring, the ground cover beds and grass will not only have recovered, but will be thriving and happy.

4. Used straw tiles (Garden Log #5) to fill up the base trench to the demolished Rock Pile Planter.  Pulling off a few inches at a time from the end of the bale made nice thick, wet, heavy, partially-decayed slabs, or tiles, of straw.  Perfect for filling in the thin trench.  Eventually that straw will break down and leave a nutritious layer for the soil.  Sure beats the adobe that was in the trench.  And, in the meantime, the area has been leveled off and will have wheelbarrow access to the area.

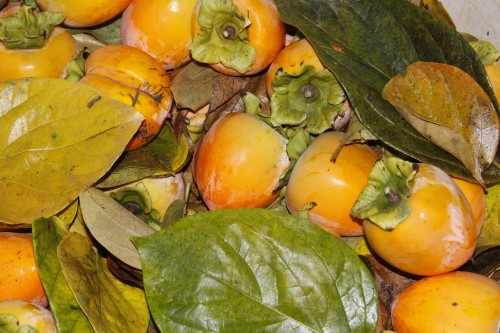
5. Persimmon Harvest (Garden Log #6) is here.  The beautiful fruit is ready to pick off of our neighbor’s tree.  Enough fruit is left high in the tree, beyond reach with a 12-foot orchard ladder, to treat the birds of the neighborhood.  No fruit goes unused — we will throw any harvested damaged fruit into the Earthworm Bin.  Had some fun harvesting persimmons this year by using Nature-provided packaging.  We used persimmon leaves between layers of fruit — the leaves provided a soft cushion AND are ripe with beauty.  Will be fun to pack away some leaves as we pull out the fruit.  Now you know what old phone books are good for; they have thin, absorbent paper that easily makes a flower or leaf press.

Hachiya persimmon fruit and leaves

Hachiya persimmon fruit and leaves, pulled in from the cold (some frost on fruit).

Competed installing one animal habitat and started another — what a great day!

Tony

Dec 022010
 
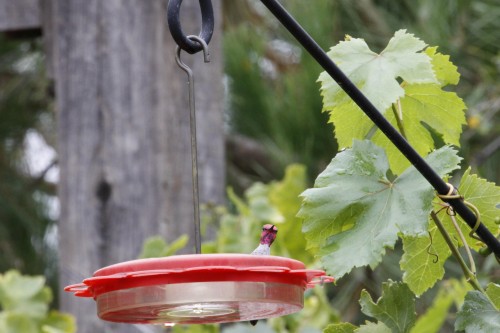
Anna's Hummingbird
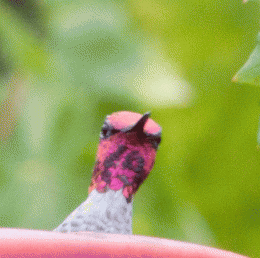
Male Anna's Hummingbird

A male Anna's hummingbird at our back deck.

Garden Log:

1. Not much in the garden today, on this near-winter day.  A brief hello while moving our 4 small potted citrus under a jasmine vine thatch along the deck lattice.

2. Divided up the kitchen washbasin water between the  citrus, avocado, and paw paw tree pots.  All the trees are young and small.  The 4 avocado and 4 paw paw are patiently waiting to be unpotted and are residing in Anna’s Avocado Aviary alongside are back deck.

You the Habitat Gardener:

1. Our back deck has lattice along one side to increase privacy from the next door neighbors.  Then, we planted jasmine at the base of the deck to grow on the lattice — awesome privacy,  EVERGREEN plants and beautiful, fragrant flowers.  Great cover for brave nest-building birds, wasps, and spiders.  Habitat!  Nowadays the jasmine could use a trim, but I knew there was a reason I didn’t get to it.  Okay you young citrus trees in pots, wanting to escape the night’s frost, hide under here.  So the citrus pots were pushed up against the lattice wall and are tucked under the overhanging jasmine thatch.  The frost, which falls straight down, will fall directly below the canopy line of the jasmine and won’t leaf damage the citrus.  Mission accomplished and I didn’t have to move the trees and cover them with a sheet elsewhere.

Jasmine Gondola Apartments alongside back deck

Jasmine Gondola Apartments alongside back deck. Since this pic (last March), the jasmine has grown much thicker. The citrus are resting comfy tonight up against the lattice, protected by the jasmine vine thatch overhead. The empty gourds hanging in the jasmine thatch provide shelter for spiders, crawling insects, and wasps.

2. Our Sunset zone here in Sebastopol, California is 15.  Pretty cushy weather-wise.  Dry summers with morning fog, cool winters with some frosting, almost no snow.  So we are going to grow avocado and paw paw (the largest native North American friut, native to east of the Mississippi).  Frost protection, especially during the trees’ young years will help them get to the old years.  And some work may be worth it — both tree species deliver exceptional fruit and the trees are long-lived and attractive.

In order to more easily throw a tarp above the trees, they will be planted alongside our back deck.  The deck structure will enable an easy secure point to toss a tarp above the trees.  Note that I say “above” and not “on”.  The covering, whether it be a sheet of cloth or plastic, should not rest on the trees wood or foliage.  If touching like that, the cold above the tarp will transfer through the covering directly to the tree.  So the key is to provide a covering AND an air space above it.  And because I envision an aisle of avocado, paw paw, guava, and honeysuckle, all in bloom some day, the habitat is called Anna’s Avocado Aviary.  Anna’s frequent our garden, even beyond the hummer feeder that hangs on the back deck.

Anna's Avocado Aviary alongside deck lattice frame.

Anna's Avocado Aviary alongside deck lattice frame. The area was chosen because a frost-protecting tarp can be easily spanned, on especially cold nights, from the high lattice wall over to the honeysuckle trellis. The large potted trees alongside the deck are avocado, the smaller are paw paw.

A closeup of Anna’s Avocado Avairy’s guest of honor:

male Anna's hummingbird at feeder

A male Anna's hummer wants to know, "Do I bother YOU when you're eating?"

That’s all folks!

Tony