Garden Log (what I did):
1. Installed an underground watering hole habitat, called Dano’s Great Newt Grotto.

Trellis habitat, House Finch Hideaway. The subterranean habitat, Dano's Great Newt Habitat, was installed while the Center Pole posthole was being backfilled.
You, the Habitat Gardener (reflections):
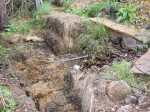
 in ground, yet to be backfilled.")
Center Post (2 posts) in ground, yet to be backfilled. The posts were dug in on the back side of Captain Cicada's Buried Treasure, a buried wood pile animal habitat. The adobe soil in the foreground is from the posthole digging and covers the small hill's topsoil.
1. The celestial heavens were so kind to me the other day. Dan and I were on our way to completing an awesome garden project — a 6-post two-tier trellis built to grow food and provide privacy. We had just lowered the Center Post (which is actually 2 posts; see House Finch Hideaway — Completed ) into its hole when the noontime lunch whistle blew. Dan was off to follow his stomach’s commands. Cool!, now I have some time to throw in a habitat up against the center posts before the area is backfilled. A quick search of material caches and I was back with a toilet tank top, a small piece of flagstone slate, two old kitchen tiles, a water-catching boulder, and a bucket lid. Habitat here we come!

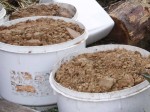
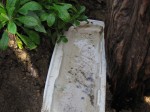
The habitat's toilet tank top will catch and hold water.
Water. So often when building a habitat, I include a focus of making water, or at least moisture, available for garden critters. Perhaps I am so drawn to water because one of my strongest passions in building animal habitats is to increase amphibian populations in residential gardens. And amphibians LOVE, thrive, and do water well (pun accepted!). This habitat’s major water feature is a toilet tank top rescued from a dumpster. “Help, help, please help!”, I faintly heard coming from the bottom of a commercial renovation project’s 10-yard dumpster. So I took the beautiful uncracked enamel critter swimming pool home with me and vowed to incorporate it in a habitat. Alas, Toilet Tank Top is delivered to the soil and its critters while Dan is off at lunch. A little water in the upside down lid helps me install it level (to hold the most amount of water possible).

The new Olympic-sized swimming pool at Critter Convention Center.
The enamel coated top side of the toilet tank lid seals the pottery and enables it to hold water. The underside of the lid, which is pictured holding water, will absorb some of that water because it is not enamel coated. But that’s okay — moisture-loving critters, like insects, snails, slugs, salamanders, frogs and toads, will seek out that cool dampness in the dryer months.
I stand on the upside down lid to press it into the adobe soil at the edge of the posthole and up against the Center Post. It sets in firmly and gives me confidence that it will hold at least some water, that is, stay level, for a long time.

Flagstone and kitchen tile cover the habitat's grotto.
Now to protect the top of the swimming pool to keep it from completely filling with soil. Some soil will likely backfill into the swimming pool, and that’s okay, but we would like some of the upside down toilet lid’s volume to be available for water. Completely sealed off would not be good either — the critters would think the pool is closed. “Oh man, we always come on the wrong day!” A small piece of flagstone slate and kitchen tiles are the strong, non-biodegradable materials I come up with to protect the habitat’s pool of water. Two kitchen tiles are used to add strength and to provide another crevice (between the tiles) that critters can take advantage of. Sure there’s a gap between the tiles and the slate but we’ll deal with that shortly. For now, we’re sitting pretty because the swimming pool was just upgraded to a grotto. How European! The subterranean pool, or grotto, will shelter and feed many a microbe and larger critter that had never dreamed of travelling to such places.

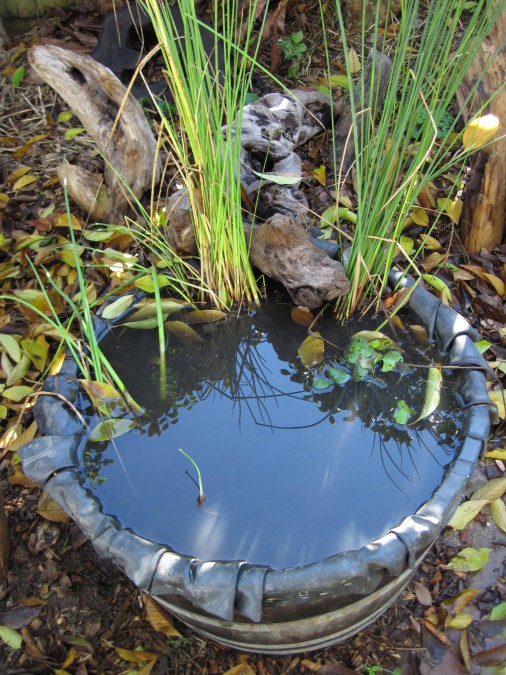
Water-holding boulder sits above the grotto.
Now to cover the small gap between the tiles. And I just happen to have a bucket lid that will cover that gap. One good thing about the plastic lid is that it will last a zillion years. Sure, some people would cringe about burying plastic in the garden but I figure that the trade-offs here are worth it. If it never breaks down, then some critters will have shelter security. If it does break down, then we are doing our part to return this human-made atrocity to the soil. Hey, why get out of bed in the morning if your rationalization system is not intact?! And now back to the plastic bucket lid on top of the kitchen tiles and the flagstone slate. Yes!, the bucket lid turns out to more helpful than I thought it would be. Not only will it cover the gap, but also it is a coaster (like a table coaster protecting delicate wood) for the brittle tile and crackable slate. Now a good-sized rock, AKA boulder, can be stacked on top of the grotto, tiles, and slate.

Leveling the boulder to hold water. Wood frame protects the tile.
Multi-tasker boulder will 1) keep the materials below it securely in place because of its heavy weight, 2) provide temperature modulation to the habitat, and 3) hold a smidgen of water in the small indentations on its top surface. That’s pretty much the bulk of the habitat, but now I want to take measures to protect this underground waterhole, this subterranean grotto. Because it’s underground, or hidden, foot traffic could easily kick it apart by accident. I grab a couple of fireplace logs and frame the exposed tile corner. That sits pretty but why leave things up to chance?

Firewood log staked with gap awaiting compost fill.
I take the extra time to secure the downhill side of a log with a hefty wooden stake pounded into the ground. The stake is surely very secure BUT I missed my mark. The stake is a couple of inches away from the fireplace log instead of snugly up against it. Once again, THE PROBLEM IS THE SOLUTION (a permaculture axium). In other words, there’s good to be found here so why not go with that? Lucky for me, I sometimes take my own advice. I snug the firewood log up against the post to expose a gap alongside the habitat. That gap, or couple of inches “off”, will now allow me to throw in some nutritious compost soil. There will be more good soil for the jasmine vine I will plant above this habitat.

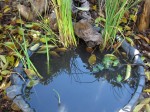
Jasmine vine planted above Dano's Great Newt Grotto.
Time to plant the jasmine vine that will grow up Center Post and create a thicket on the trellis. The grotto habitat is nearly complete except for planting and cosmetic issues. The jasmine vine’s roots will help secure the “hillside” of soil and help tie together the habitat’s elements. Perhaps those roots will find the grotto and drink its water — hard to say because the roots will not develop in the intended air cavity of the habitat. In the end, though, I vote that the jasmine will be a happy camper as a result of the grotto habitat. If nothing else, the poop factor will benefit the jasmine — there will be so much poop (that feeds the soil) from the snails and slugs that come to vacation at the grotto.
Compost soil is strewn over the habitat and surrounding area. The jasmine vine is wiggled into position next to the boulder and surrounded by as much compost soil as will stay on the little hill of Captain Cicada’s Buried Treasure. Forget-me-not plants that were moved to the side for protection are returned to the hill, above the habitat. Some bamboo stakes are pounded into the ground and strung together to make small fences to protect the area from foot traffic. Lastly, old straw mulch is used to keep the compost soil and plants in place. Also, the old straw mulch will keep the area moist and humus-rich as it breaks down. The decaying straw is a habitat unto itself!
.")
Dano's Great Newt Grotto habitat is buried under old straw mulch (left). Grape cuttings at a post's base for the trellis habitat, House Finch Hideaway.
What a great day! A habitat within a habitat day. Hard work and looking forward to my vacation. See you at The Grotto.
……………………………………………………. Tony