Feb 022011
 
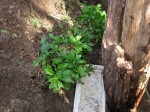
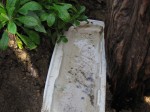
The new Olympic-sized swimming pool at Critter Convention Center.

Garden Log (what I did):

1. Installed an underground watering hole habitat, called Dano’s Great Newt Grotto.
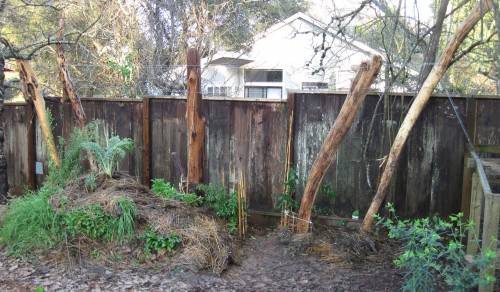
Trellis habitat, House Finch Hideaway.

Trellis habitat, House Finch Hideaway. The subterranean habitat, Dano's Great Newt Habitat, was installed while the Center Pole posthole was being backfilled.

You, the Habitat Gardener (reflections):
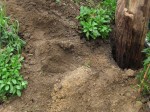
Center Post (2 posts) in ground, yet to be backfilled.

Center Post (2 posts) in ground, yet to be backfilled. The posts were dug in on the back side of Captain Cicada's Buried Treasure, a buried wood pile animal habitat. The adobe soil in the foreground is from the posthole digging and covers the small hill's topsoil.

1. The celestial heavens were so kind to me the other day.  Dan and I were on our way to completing an awesome garden project — a 6-post two-tier trellis built to grow food and provide privacy.  We had just lowered the Center Post (which is actually 2 posts; see House Finch Hideaway — Completed ) into its hole when the noontime lunch whistle blew.  Dan was off to follow his stomach’s commands.  Cool!, now I have some time to throw in a habitat up against the center posts before the area is backfilled.  A quick search of material caches and I was back with a toilet tank top, a small piece of flagstone slate, two old kitchen tiles, a water-catching boulder, and a bucket lid.  Habitat here we come!

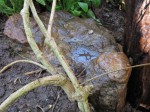
The habitat's tiolet tank top will catch and hold water.

The habitat's toilet tank top will catch and hold water.

Water.  So often when building a habitat, I include a focus of making water, or at least moisture, available for garden critters.  Perhaps I am so drawn to water because one of my strongest passions in building animal habitats is to increase amphibian populations in residential gardens.  And amphibians LOVE, thrive, and do water well (pun accepted!).  This habitat’s major water feature is a toilet tank top rescued from a dumpster.  “Help, help, please help!”, I faintly heard coming from the bottom of a commercial renovation project’s 10-yard dumpster.  So I took the beautiful uncracked enamel critter swimming pool home with me and vowed to incorporate it in a habitat.  Alas, Toilet Tank Top is delivered to the soil and its critters while Dan is off at lunch.  A little water in the upside down lid helps me install it level (to hold the most amount of water possible).

The new Olympic-sized swimming pool at Critter Convention Center.

The new Olympic-sized swimming pool at Critter Convention Center.

The enamel coated top side of the toilet tank lid seals the pottery and enables it to hold water.  The underside of the lid, which is pictured holding water, will absorb some of that water because it is not enamel coated.  But that’s okay — moisture-loving critters, like insects, snails, slugs, salamanders, frogs and toads, will seek out that cool dampness in the dryer months.

I stand on the upside down lid to press it into the adobe soil at the edge of the posthole and up against the Center Post.  It sets in firmly and gives me confidence that it will hold at least some water, that is, stay level, for a long time.

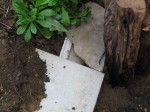
Flagstone and kitchen tile cover the habitat's grotto.

Flagstone and kitchen tile cover the habitat's grotto.

Now to protect the top of the swimming pool to keep it from completely filling with soil.  Some soil will likely backfill into the swimming pool, and that’s okay, but we would like some of the upside down toilet lid’s volume to be available for water.  Completely sealed off would not be good either — the critters would think the pool is closed.  “Oh man, we always come on the wrong day!”  A small piece of flagstone slate and kitchen tiles are the strong, non-biodegradable materials I come up with to protect the habitat’s pool of water.  Two kitchen tiles are used to add strength and to provide another crevice (between the tiles) that critters can take advantage of.  Sure there’s a gap between the tiles and the slate but we’ll deal with that shortly.  For now, we’re sitting pretty because the swimming pool was just upgraded to a grotto.  How European!  The subterranean pool, or grotto, will shelter and feed many a microbe and larger critter that had never dreamed of travelling to such places.

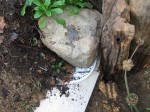
Water-holding boulder sits above the grotto.

Water-holding boulder sits above the grotto.

Now to cover the small gap between the tiles.  And I just happen to have a bucket lid that will cover that gap.  One good thing about the plastic lid is that it will last a zillion years. Sure, some people would cringe about burying plastic in the garden but I figure that the trade-offs here are worth it.  If it never breaks down, then some critters will have shelter security.  If it does break down, then we are doing our part to return this human-made atrocity to the soil.  Hey, why get out of bed in the morning if your rationalization system is not intact?!  And now back to the plastic bucket lid on top of the kitchen tiles and the flagstone slate.  Yes!, the bucket lid turns out to more helpful than I thought it would be.  Not only will it cover the gap, but also it is a coaster (like a table coaster protecting delicate wood) for the brittle tile and crackable slate.  Now a good-sized rock, AKA boulder, can be stacked on top of the grotto, tiles, and slate.

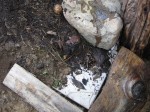
Leveling the boulder to hold water.  Wood frame protects the tile.

Leveling the boulder to hold water. Wood frame protects the tile.

Multi-tasker boulder will 1) keep the materials below it securely in place because of its heavy weight, 2) provide temperature modulation to the habitat, and 3) hold a smidgen of water in the small indentations on its top surface. That’s pretty much the bulk of the habitat, but now I want to take measures to protect this underground waterhole, this subterranean grotto.  Because it’s underground, or hidden, foot traffic could easily kick it apart by accident. I grab a couple of fireplace logs and frame the exposed tile corner.  That sits pretty but why leave things up to chance?

Firewood log staked with gap awaiting compost fill.

Firewood log staked with gap awaiting compost fill.

I take the extra time to secure the downhill side of a log with a hefty wooden stake pounded into the ground.  The stake is surely very secure BUT I missed my mark. The stake is a couple of inches away from the fireplace log instead of snugly up against it.  Once again, THE PROBLEM IS THE SOLUTION (a permaculture axium).  In other words, there’s good to be found here so why not go with that?  Lucky for me, I sometimes take my own advice.  I snug the firewood log up against the post to expose a gap alongside the habitat.  That gap, or couple of inches “off”, will now allow me to throw in some nutritious compost soil. There will be more good soil for the jasmine vine I will plant above this habitat.

Jasmine vine planted above Dano's Great Newt Grotto.

Jasmine vine planted above Dano's Great Newt Grotto.

Time to plant the jasmine vine that will grow up Center Post and create a thicket on the trellis.  The grotto habitat is nearly complete except for planting and cosmetic issues.  The jasmine vine’s roots will help secure the “hillside” of soil and help tie together the habitat’s elements.  Perhaps those roots will find the grotto and drink its water — hard to say because the roots will not develop in the intended air cavity of the habitat.  In the end, though, I vote that the jasmine will be a happy camper as a result of the grotto habitat.  If nothing else, the poop factor will benefit the jasmine — there will be so much poop (that feeds the soil) from the snails and slugs that come to vacation at the grotto.

Compost soil is strewn over the habitat and surrounding area.  The jasmine vine is wiggled into position next to the boulder and surrounded by as much compost soil as will stay on the little hill of Captain Cicada’s Buried Treasure.  Forget-me-not plants that were moved to the side for protection are returned to the hill, above the habitat.  Some bamboo stakes are pounded into the ground and strung together to make small fences to protect the area from foot traffic.  Lastly, old straw mulch is used to keep the compost soil and plants in place.  Also, the old straw mulch will keep the area moist and humus-rich as it breaks down.  The decaying straw is a habitat unto itself!
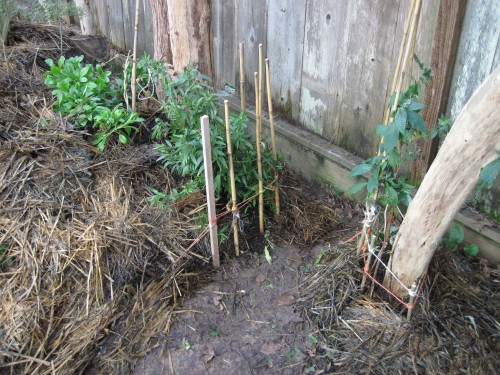
Dano's Great Newt Grotto habitat is buried under old straw mulch (left).

Dano's Great Newt Grotto habitat is buried under old straw mulch (left). Grape cuttings at a post's base for the trellis habitat, House Finch Hideaway.

What a great day!   A habitat within a habitat day.  Hard work and looking forward to my vacation.  See you at The Grotto.

……………………………………………………. Tony
Jan 302011
 
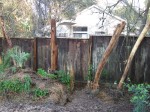
trellis habitat House Finch Hideaway

Trellis habitat House Finch Hideaway will support a thicket of vines.

Garden Log (what I did):

1. Completed installation of the trellis habitat, House Finch Hideaway.

You, the Habitat Gardener (reflections):

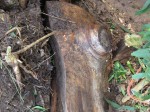
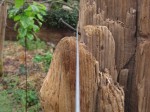
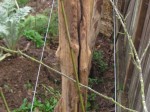
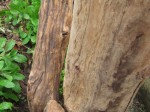
Trellis wire on center post.

Trellis wire on center post. Note the crevices in the post's wood -- great shelter for small criters willing to make the climb.

1. Today’s job was to finish the trellis habitat, House Finch Hideaway.  For previous entries re this project, see HFH — Installed Posts and HFH — Trellis Wire Installed.  To most people, this job would be a trellis installation to create back-fence privacy, period.  But for me, this project is a great opportunity to grow food for our table.  Also, the trellis will provide food and shelter for critters.  I see a thicket of perennial jasmine vines with knock-me-out fragrant flowers, a sun-basking wall of hanging fruit, subterranean crevices and water for amphibians, a ladder system of wood posts for insects and lizards, perches and nesting shelter for birds, and a rising sun backlighting enormous grape and fig leaves.

Top cross wire loosely in place (before stapled).

Top cross wire loosely in place (before stapled). Note the post's lean away from the back fence.

After laying out and attaching the top wire loop with a Gripple lock, I realized that the wire was not as tight as I wanted it to be.  The distance between the two center posts was too long.   A 5th post, a true center post, will bridge the gap and prevent the someday vegetation-laden wire from sagging in the middle.  All the better to know now that my original plan for four posts was unrealistic.  Besides we can milk this mistake.  I’ll get the most out of changing the plan by a) charging more for the job, b) installing more beautiful driftwood in the garden, and c) installing a separate animal habitat when digging the hole for the new center post.  About a) charging more — Oh well, I forgot this is an unpaid job.  About b) more driftwood — YES!!!  How better to fix a problem than to pull out the driftwood?  Better yet, the center post is a union of two pieces of driftwood.  About c) another habitat — Dano’s Great Newt Grotto is born; see my future post (I’m going to bed!).

Base of center post yet to be backfilled with rock, gravel, and soil.

Base of center post yet to be backfilled with rock, gravel, and soil.

We want Center Post to rise about a foot above the 7-foot-high top cross wire.  That one foot height over the wire will be a critter perch.  Perhaps a bird, squirrel, or a very stupid insect or lizard (wanting to be so visible) will use the lookout.  Our post is 9 and 1/2 foot long, so that does not leave too much wood to be buried below ground.  First off, give up on the one foot and settle for a 6″ perch.  Then, the post can be buried 2 feet (9.5-7.5) — way not enough for that heavy piece of tree to stay vertically suspended AND support the heaviest load of the trellis.  What to do?

Center post base (left) supporting center post pole (right).

Center post base (left) supporting center post pole (right). Note the available critter shelter between the two pieces of wood.

Another piece of driftwood comes to the rescue.  The second piece of wood to become Center Post is a glorious redwood root section.  Being of redwood root stock, it is extremely dense, insect resistant and strong.  That piece is dug into the ground about 5 feet and snugly holds up the center post pole.   In fact, the base piece perfectly cradles the post piece, making a perfect lean forward away from the fence.  Perhaps that lean away from the fence will keep the someday rotting posts from crashing through the back fence.  Fences make good neighbors AND busting up the fence between you and your neighbor makes for trouble.  Therefore, the heavy and strong Center Post has a slight lean away from the back fence.

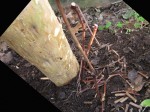
grape cuttings at left end post

Grape cuttings at left end post. The small "wood chip" pieces of grape vine will make friendly mulch for the soon-to-thrive vines.

Plenty of rocks were used to fill in Center Posts’ hole.  The rocks will better pack around the wood posts because they will not compress like soil fill does.  Also, the rocks and gravel will help the posts stay dryer in the ground, which will slow down their rotting.  Not only will water filter through the gravel better than soil, but also the rocks and gravel will not retain moisture like soil or clay does.  Less water retained means dryer posts.  I also like the use of the larger rocks because cavities will be created around them during the natural settling process (of the soil, gravel, and rocks).  Those cavities will shelter critters.

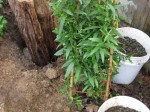
Compost soil was used to fill in the remaining post bases and grape cuttings were planted at the base of a couple of posts.  The Center Post’s habitat, Dano’s Great Newt Grotto, incorporated a healthy transplanted jasmine vine rootball and short vine strands.  Those short vine strands will quickly thrive and climb up the waiting stake, to the Center Post, and then off in both directions along the cross wires.  Short stake “fences” were made around a couple of the post planting to keep foot traffic from destroying the plants.  The planted cuttings were then mulched with old straw to protect the soil from heavy rain.

Vines at base of posts -- caged and mulched.

Vines at base of posts -- caged and mulched. Jasmine is far left, next to tallest stake. Grape is right, inside short stake fence.

So exciting to have a planting in place.  Training the vines up the posts and weaving a living wall with flower and fruit vines will be fun.  What neighbors?  Oh yes, we have neighbors to the back of us, behind the vegetation wall.

Enjoy the regeneration of spring.

…………………………………………………………………… Tony

Jan 052009
 

Previously posted on the Spore Lore Forum:

Last week when I was pruning a rose bush and weeding around it, I found a small garter snake curled near the base of the rose bush under some leaves and debris. It was cold and barely moving, but alive. I covered it back up and left it alone. It got me wondering though, should I be leaving the unwanted plants (“weeds”) and leaf material alone right now, and in general not doing much in the garden (except perhaps the raised veggie beds) because there may be reptiles and amphibians hanging out too cold to move??? I don’t want to step on anyone!!! Any thoughts on this, in general, would be greatly appreciated. Thanks   –artichoke

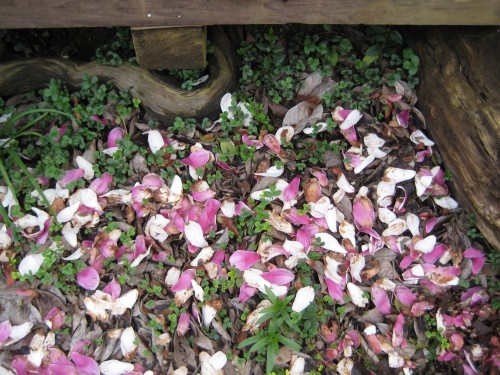
tulip magnolia leaves left to mulch groundcover plants

Tulip magnolia leaves left to mulch groundcover plants

Artichoke,
Thanx for asking! And I am also answering for the critters in your garden.

Absolutely! A good idea to leave most of the leaves, mulch, and “debris” (one person’s trash is another’s treasure) in the garden. Not only will the extra layer, or blanket, keep the microbes and other animals warmer, but it will also keep feeding them. Those organics will also continue to break down and nutrify the soil for next spring’s blast of Life. Also, the plants themselves, like some bulbs and roots of trees and shrubs, will be better protected by the blanket of soon-to-be compost. Soil run-off will also be less if your precious topsoil is protected from pounding rains by the fallen leaf layer.

The flip side — why to clear out (and note I do not use the term “clean out”) the garden beds:
— If the soil is poor draining and you feel a tree or some plants would apreciate drying out.
— If you won’t sleep well without the beds cleared out. If that’s the case, save your soul (I jest) by minimizing the damage to the ecology. Consider leaving a debris pile in the yard to create habitat. Perhaps next spring you will be able to harvest some good compost from the bottom of it. Till you do, the ecology will enjoy the food and shelter (and Jungle Gym).

Have fun with your garden “stuff”. I’d love to know how it goes.
Tony