Contest Entries
During each calendar month, Spore Lore will accept postings of residential wildlife habitats to Spore Lore’s facebook page, Habitat It and They Will Come.

Click to post your Habitat of the Month entry.
Contest entries must include:
1) The name of the garden habitat.
2) The 4 components of wildlife habitat:
SHELTER =
FOOD =
WATER =
SPACE TO RAISE YOUNG =
3) At least one picture of the the wildlife habitat.
Entry Awards and Contest Winners
All Habitat of the Month Contest entries will receive a “Habitat It!” bumper sticker. Habitat of the Month, as in the The Winner, will receive a signed copy of Tony McGuigan’s book, Habitat It and They Will Come. The month’s winning habitat will be chosen from a review of Comments (facebook) posted to the entry AND ALSO from Tony’s impression of the contest entry. In the case of a tie, two (2) winners, both declared “Habitat of the Month” will be announced.
Contest entries (postings to the facebook page Habitat It and They Will Come) will be accepted till noon (Pacific treefrog time) of the 28th day of the month (26th day for February). Contest winners will be announced by 6PM (Pacific treefrog time) on the 30th day of the same month (28th for February). Contest winners will be announced primarily at Spore Lore’s website (sporelore.com\Blog\Habitat of the Month Contest) and at Spore Lore’s facebook page (Habitat It and They Will Come).
To receive your contest entry “Spore Lore” sticker, and/or receive a book if your habitat is chosen as Habitat of the Month, please email your postal address to habitatofthemonth@sporelore.com; please include the name of your habitat in your email.
Please enter your garden habitat one time only. However, if significant changes have been made to the habitat and/or significant documentation (like pictures!) of the habitat is available, then the same habitat may be re-submitted as a new contest entry.
Create wildlife habitat and have fun.
Post your habitat to Habitat of the Month.
Good Luck!
Fine Print — Other Rules
There is no cash value for any contest rewards or contest prizes.
Participants/Entrants of the Contest give Spore Lore permission to leave contest posts on Spore Lore’s facebook page, https://www.facebook.com/HabitatItAndTheyWillCome, and to post Contest entries and Contest winner announcements to Spore Lore’s facebook pages (Habitat It and They Will Come, Spore Lore, and Tony McGuigan), as well as Tony McGuigan’s/Spore Lore’s other social media sites (Twitter, Instagram, Pinterest, YouTube) and Spore Lore’s website (sporelore.com). Spore Lore reserves the right to use the winner’s name (if provided in the contest entry), habitat name and habitat location (if provided in the contest entry), for publicity purposes only in connection with the Contest and for no other reason.
Spore Lore is not bound to announce contest entries/winner/winners.
GOVERNING LAW: Contest governed by the laws of California and subject to all applicable federal, state and local laws and regulations. Accordingly, all issues and questions concerning the construction, validity, interpretation and enforceability of these Official Rules, or the rights and obligations of the Contestant and Sponsor in connection with the Contest, shall be governed by, and construed in accordance with, the laws of the State of California, without giving effect to any choice of law or conflict of law rules (whether of the State of California or any other jurisdiction). The Contest is void where prohibited by any applicable law. Contestants, by participating in this Contest, hereby waive and release, and agree to hold harmless Spore Lore and all of its respective officers, directors, employees and representatives and agents, from and against, any and all rights, claims and causes of action whatsoever that they may have, or which may arise, against any of them for any liability for any matter, cause or thing whatsoever, including but not limited to any injury, loss, damage, whether direct, compensatory, incidental or consequential, to person, including death, and /or property, arising in whole or in part, directly or indirectly, from their acceptance, possession, use or misuse of any prize, or their participation in this Contest, or any prize-related activity. By participating in this Contest, Contestants agree to be bound by these Official Rules and the decisions of Sponsor. Except where prohibited by law, by accepting a prize, winner agrees that Spore may use the winner’s name, address (state), photograph, likeness, and/or prize information for advertising, publicity and promotional purposes and to the use of statements made by or attributed to winner relating to Spore Lore or to this Contest and grants to Spore Lore any and all rights to said use without further notice and/or compensation except where prohibited by law.


 planted next to Monica Manzanita Mannequin habitat.")
 next to Monica Manzanita Mannequin habitat.")

.")

 shows off Tony and his camera gear before being planted.")


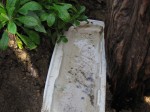

 in ground, yet to be backfilled.")


.")