
First a video re “Planting Salvia spathacea next to Monica Manzanita Mannequin 1 of 2”, then some pics of “Cacti Caverns animal habitat installation” (below the video):
Planting Salvia spathacea next to Monica Manzanita Mannequin 1 of 2 (video):
Cacti Caverns animal habitat installation and Planting Salvia spathacea (pics):
.") Roof view of driveway property line in 2010: From street, 1) sunflowers are growing in Canyon Wall Oasis (large cavity in ground), AND 2) cacti grow above Cacti Caverns. Note that the lavarock continues past Cacti Caverns to THE WORLD (especially if you are a tiny critter!).
Roof view of driveway property line in 2010: From street, 1) sunflowers are growing in Canyon Wall Oasis (large cavity in ground), AND 2) cacti grow above Cacti Caverns. Note that the lavarock continues past Cacti Caverns to THE WORLD (especially if you are a tiny critter!).
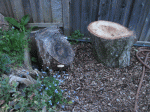
 Close-up of Cacti Caverns in 2010. Low profile above ground. Several small sheltered cavities below ground. Note the applewood tunnel in foreground and the 3-stack thick curved clay roofing tile tunnel in rear. All earthworks are critter approved!
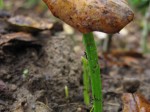
 shows off Tony and his camera gear before being planted.") On with the show! Let’s get this Hummingbird sage (Salvia spathacea) planted and shoot some film.
On with the show! Let’s get this Hummingbird sage (Salvia spathacea) planted and shoot some film.
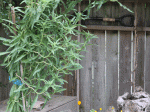
 The two hummingbird sage will be planted between Cacti Caverns habitat and Monica Manzanita Mannequin habitat. Truth be told, the salvias are actually planted above one of Cacti Caverns buried roofing tile cavities.
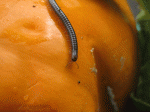
Pics and captions from Tony’s new book, Habitat It and They will Come of Cacti Caverns animal habitat installation (pics):
 Figure 4.52 Property line before Cacti Caverns installed. Zeroscape for miles and miles and miles. Time to change that. Cacti Caverns will provide a little greenery, a little nook and cranny, a little Life is what you make it! to this property line.
 Figure 4.60 Planks held in place by rebar. The sturdy barricade will keep the rock in place during work. A worthwhile effort. Cascading creative ideas and manipulation of the moonscape into Cacti Caverns wonderland won’t have to be interrupted to replace rock landslides.
 Figure 4.72 Flat Clay Roofing Tiles resting on tunnel. Gaps on both sides of the rounded log section will shelter (fill in critters of your choice) . Note shovelful of soil used to anchor tile in place; the soil will be washed down to settle both sides of the tile. Lavastone will rest directly on the tile’s flat surface.
 Figure 4.88 Wala!. Retaining wall planks and rebar supports removed. We’re finished!
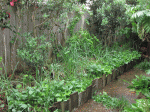
 Figure 4.94 Three Years Later. next pages Cacti Caverns has matured. The cacti have grown paddle upon paddle upon paddle, a delicate flowering ivy has spread throughout, and Sea Creature has silvered (aged gracefully, they say). Wood destined for the garden (in background, out of focus) awaits its turn alongside Cacti Gardens. A wary garter snake has crawled out of the thicket of ivy and cacti, and rests on the fencepost. Even more exciting than the snake itself (in our garden!) was watching it retreat from my pestering photography down into the ivy-obscured entrance of the applewood tunnel.
Happy animal habitat installation. See you tomorrow.
Tony


 hat?”")


.")


 and soil-making trench along our garden path.")


.")
.")