Garden Log (what I did):
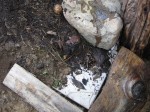
1. Installed an underground watering hole habitat, called Dano’s Great Newt Grotto.
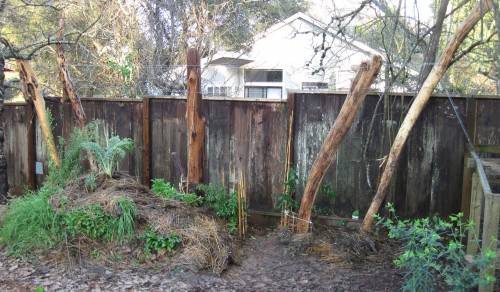
Trellis habitat, House Finch Hideaway. The subterranean habitat, Dano's Great Newt Habitat, was installed while the Center Pole posthole was being backfilled.
You, the Habitat Gardener (reflections):
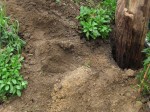
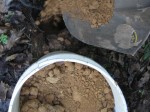
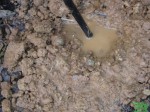
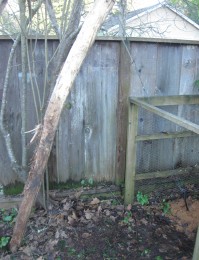
Center Post (2 posts) in ground, yet to be backfilled. The posts were dug in on the back side of Captain Cicada's Buried Treasure, a buried wood pile animal habitat. The adobe soil in the foreground is from the posthole digging and covers the small hill's topsoil.
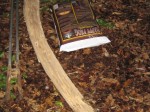
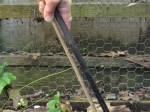
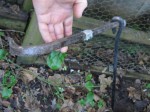
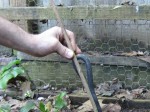
1. The celestial heavens were so kind to me the other day. Dan and I were on our way to completing an awesome garden project — a 6-post two-tier trellis built to grow food and provide privacy. We had just lowered the Center Post (which is actually 2 posts; see House Finch Hideaway — Completed ) into its hole when the noontime lunch whistle blew. Dan was off to follow his stomach’s commands. Cool!, now I have some time to throw in a habitat up against the center posts before the area is backfilled. A quick search of material caches and I was back with a toilet tank top, a small piece of flagstone slate, two old kitchen tiles, a water-catching boulder, and a bucket lid. Habitat here we come!
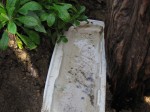
Water. So often when building a habitat, I include a focus of making water, or at least moisture, available for garden critters. Perhaps I am so drawn to water because one of my strongest passions in building animal habitats is to increase amphibian populations in residential gardens. And amphibians LOVE, thrive, and do water well (pun accepted!). This habitat’s major water feature is a toilet tank top rescued from a dumpster. “Help, help, please help!”, I faintly heard coming from the bottom of a commercial renovation project’s 10-yard dumpster. So I took the beautiful uncracked enamel critter swimming pool home with me and vowed to incorporate it in a habitat. Alas, Toilet Tank Top is delivered to the soil and its critters while Dan is off at lunch. A little water in the upside down lid helps me install it level (to hold the most amount of water possible).
The enamel coated top side of the toilet tank lid seals the pottery and enables it to hold water. The underside of the lid, which is pictured holding water, will absorb some of that water because it is not enamel coated. But that’s okay — moisture-loving critters, like insects, snails, slugs, salamanders, frogs and toads, will seek out that cool dampness in the dryer months.
I stand on the upside down lid to press it into the adobe soil at the edge of the posthole and up against the Center Post. It sets in firmly and gives me confidence that it will hold at least some water, that is, stay level, for a long time.
Now to protect the top of the swimming pool to keep it from completely filling with soil. Some soil will likely backfill into the swimming pool, and that’s okay, but we would like some of the upside down toilet lid’s volume to be available for water. Completely sealed off would not be good either — the critters would think the pool is closed. “Oh man, we always come on the wrong day!” A small piece of flagstone slate and kitchen tiles are the strong, non-biodegradable materials I come up with to protect the habitat’s pool of water. Two kitchen tiles are used to add strength and to provide another crevice (between the tiles) that critters can take advantage of. Sure there’s a gap between the tiles and the slate but we’ll deal with that shortly. For now, we’re sitting pretty because the swimming pool was just upgraded to a grotto. How European! The subterranean pool, or grotto, will shelter and feed many a microbe and larger critter that had never dreamed of travelling to such places.
Now to cover the small gap between the tiles. And I just happen to have a bucket lid that will cover that gap. One good thing about the plastic lid is that it will last a zillion years. Sure, some people would cringe about burying plastic in the garden but I figure that the trade-offs here are worth it. If it never breaks down, then some critters will have shelter security. If it does break down, then we are doing our part to return this human-made atrocity to the soil. Hey, why get out of bed in the morning if your rationalization system is not intact?! And now back to the plastic bucket lid on top of the kitchen tiles and the flagstone slate. Yes!, the bucket lid turns out to more helpful than I thought it would be. Not only will it cover the gap, but also it is a coaster (like a table coaster protecting delicate wood) for the brittle tile and crackable slate. Now a good-sized rock, AKA boulder, can be stacked on top of the grotto, tiles, and slate.
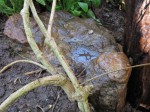
Multi-tasker boulder will 1) keep the materials below it securely in place because of its heavy weight, 2) provide temperature modulation to the habitat, and 3) hold a smidgen of water in the small indentations on its top surface. That’s pretty much the bulk of the habitat, but now I want to take measures to protect this underground waterhole, this subterranean grotto. Because it’s underground, or hidden, foot traffic could easily kick it apart by accident. I grab a couple of fireplace logs and frame the exposed tile corner. That sits pretty but why leave things up to chance?
I take the extra time to secure the downhill side of a log with a hefty wooden stake pounded into the ground. The stake is surely very secure BUT I missed my mark. The stake is a couple of inches away from the fireplace log instead of snugly up against it. Once again, THE PROBLEM IS THE SOLUTION (a permaculture axium). In other words, there’s good to be found here so why not go with that? Lucky for me, I sometimes take my own advice. I snug the firewood log up against the post to expose a gap alongside the habitat. That gap, or couple of inches “off”, will now allow me to throw in some nutritious compost soil. There will be more good soil for the jasmine vine I will plant above this habitat.
Time to plant the jasmine vine that will grow up Center Post and create a thicket on the trellis. The grotto habitat is nearly complete except for planting and cosmetic issues. The jasmine vine’s roots will help secure the “hillside” of soil and help tie together the habitat’s elements. Perhaps those roots will find the grotto and drink its water — hard to say because the roots will not develop in the intended air cavity of the habitat. In the end, though, I vote that the jasmine will be a happy camper as a result of the grotto habitat. If nothing else, the poop factor will benefit the jasmine — there will be so much poop (that feeds the soil) from the snails and slugs that come to vacation at the grotto.
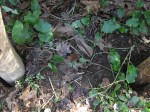
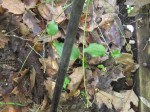
Compost soil is strewn over the habitat and surrounding area. The jasmine vine is wiggled into position next to the boulder and surrounded by as much compost soil as will stay on the little hill of Captain Cicada’s Buried Treasure. Forget-me-not plants that were moved to the side for protection are returned to the hill, above the habitat. Some bamboo stakes are pounded into the ground and strung together to make small fences to protect the area from foot traffic. Lastly, old straw mulch is used to keep the compost soil and plants in place. Also, the old straw mulch will keep the area moist and humus-rich as it breaks down. The decaying straw is a habitat unto itself!
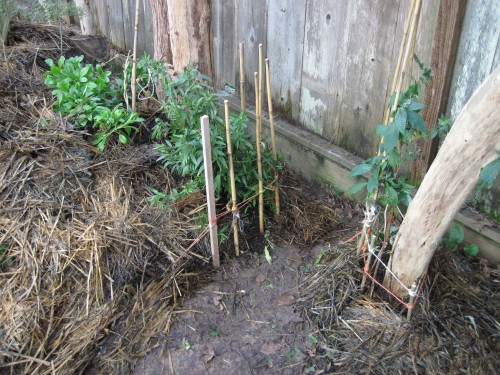
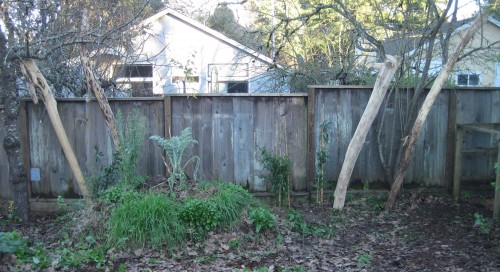
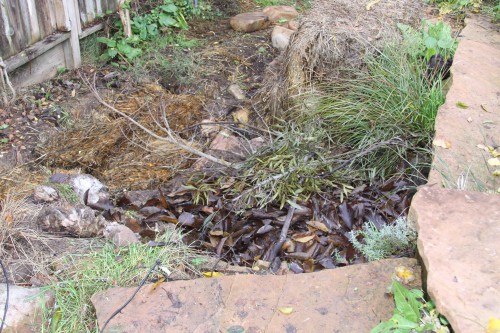
Dano's Great Newt Grotto habitat is buried under old straw mulch (left). Grape cuttings at a post's base for the trellis habitat, House Finch Hideaway.
What a great day! A habitat within a habitat day. Hard work and looking forward to my vacation. See you at The Grotto.
……………………………………………………. Tony
Garden Log (what I did):
1. Completed installation of the trellis habitat, House Finch Hideaway.
You, the Habitat Gardener (reflections):
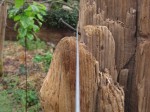
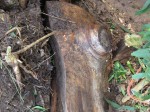
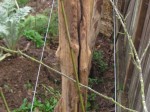
Trellis wire on center post. Note the crevices in the post's wood -- great shelter for small criters willing to make the climb.
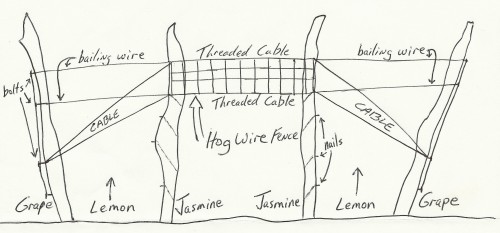
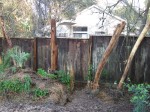
1. Today’s job was to finish the trellis habitat, House Finch Hideaway. For previous entries re this project, see HFH — Installed Posts and HFH — Trellis Wire Installed. To most people, this job would be a trellis installation to create back-fence privacy, period. But for me, this project is a great opportunity to grow food for our table. Also, the trellis will provide food and shelter for critters. I see a thicket of perennial jasmine vines with knock-me-out fragrant flowers, a sun-basking wall of hanging fruit, subterranean crevices and water for amphibians, a ladder system of wood posts for insects and lizards, perches and nesting shelter for birds, and a rising sun backlighting enormous grape and fig leaves.
After laying out and attaching the top wire loop with a Gripple lock, I realized that the wire was not as tight as I wanted it to be. The distance between the two center posts was too long. A 5th post, a true center post, will bridge the gap and prevent the someday vegetation-laden wire from sagging in the middle. All the better to know now that my original plan for four posts was unrealistic. Besides we can milk this mistake. I’ll get the most out of changing the plan by a) charging more for the job, b) installing more beautiful driftwood in the garden, and c) installing a separate animal habitat when digging the hole for the new center post. About a) charging more — Oh well, I forgot this is an unpaid job. About b) more driftwood — YES!!! How better to fix a problem than to pull out the driftwood? Better yet, the center post is a union of two pieces of driftwood. About c) another habitat — Dano’s Great Newt Grotto is born; see my future post (I’m going to bed!).
We want Center Post to rise about a foot above the 7-foot-high top cross wire. That one foot height over the wire will be a critter perch. Perhaps a bird, squirrel, or a very stupid insect or lizard (wanting to be so visible) will use the lookout. Our post is 9 and 1/2 foot long, so that does not leave too much wood to be buried below ground. First off, give up on the one foot and settle for a 6″ perch. Then, the post can be buried 2 feet (9.5-7.5) — way not enough for that heavy piece of tree to stay vertically suspended AND support the heaviest load of the trellis. What to do?
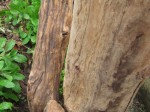
Center post base (left) supporting center post pole (right). Note the available critter shelter between the two pieces of wood.
Another piece of driftwood comes to the rescue. The second piece of wood to become Center Post is a glorious redwood root section. Being of redwood root stock, it is extremely dense, insect resistant and strong. That piece is dug into the ground about 5 feet and snugly holds up the center post pole. In fact, the base piece perfectly cradles the post piece, making a perfect lean forward away from the fence. Perhaps that lean away from the fence will keep the someday rotting posts from crashing through the back fence. Fences make good neighbors AND busting up the fence between you and your neighbor makes for trouble. Therefore, the heavy and strong Center Post has a slight lean away from the back fence.
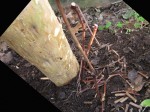
Grape cuttings at left end post. The small "wood chip" pieces of grape vine will make friendly mulch for the soon-to-thrive vines.
Plenty of rocks were used to fill in Center Posts’ hole. The rocks will better pack around the wood posts because they will not compress like soil fill does. Also, the rocks and gravel will help the posts stay dryer in the ground, which will slow down their rotting. Not only will water filter through the gravel better than soil, but also the rocks and gravel will not retain moisture like soil or clay does. Less water retained means dryer posts. I also like the use of the larger rocks because cavities will be created around them during the natural settling process (of the soil, gravel, and rocks). Those cavities will shelter critters.
Compost soil was used to fill in the remaining post bases and grape cuttings were planted at the base of a couple of posts. The Center Post’s habitat, Dano’s Great Newt Grotto, incorporated a healthy transplanted jasmine vine rootball and short vine strands. Those short vine strands will quickly thrive and climb up the waiting stake, to the Center Post, and then off in both directions along the cross wires. Short stake “fences” were made around a couple of the post planting to keep foot traffic from destroying the plants. The planted cuttings were then mulched with old straw to protect the soil from heavy rain.

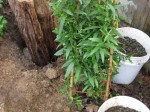
Vines at base of posts -- caged and mulched. Jasmine is far left, next to tallest stake. Grape is right, inside short stake fence.
So exciting to have a planting in place. Training the vines up the posts and weaving a living wall with flower and fruit vines will be fun. What neighbors? Oh yes, we have neighbors to the back of us, behind the vegetation wall.
Enjoy the regeneration of spring.
…………………………………………………………………… Tony

Garden Log (what I did):
1. Strung up top horizontal wire on House Finch Hideaway trellis habitat.
2. Watered front garden, played frog, and surveyed kale bed.
You, the Habitat Gardener (reflections):
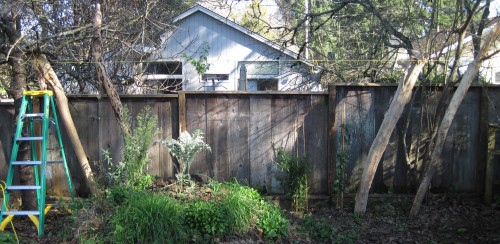
Siting cord (yellow) used to level wire position. Note this temporary cord is a little high on the left. Solution: loosen up left endpost, tighten down right endpost.
1. A few hours of glorious sunshine and time to work the garden today. My goal was to string up one of the horizontal wires of the trellis. The horizontal wires will bear the heavy weight of fruit vines and jasmine flower vines. My first assignment was to assess the bulk of wood each post had at the height I want the top trellis wire to be stretched, which is 7 feet off the ground, or about a foot higher than the back fence height. All four posts look bulky enough to take the bolts I intend to use to keep the cross wire from sliding down. I’m using bolts and not simple fence staples because I feel the bolts are more macho, they will not ever pull out like a staple might, AND they were free; thanx again, Tony, for thinking of me when cleaning out your garage.
As explained in my last post regarding House Finch Hideaway (House Finch Hideaway — Installed Posts), the posts have been left loose in their postholes. In other words, the posts can wiggle and waggle (especially if Pa is strumming his ukulele) in their holes while the end post and cross wires are being tightened. Backfill to secure the posts will come in due time.
End post wires were doubled from the earth anchor eye to the post. Also, each pass of the wire around the post was wrapped twice to distribute tension. The end posts will bear enormous weight/tension from the combined weight of the two inner posts, all the cross wires and all the vines and fruit on those wires. That’s a lot of weight!
I left some slack in the end post wires because the slack can always be taken up, whereas too tight means cutting wire, installing a patch wire, and then reconnecting the Gripple lock.
I guessed the height of the top cross wire on each end post, drilled bolt holes (2 bolts for each end post), and strung a very visble yellow cord to mimic the top wire. Almost level, with the left end just a hair higher. Cool!, level can be reached by pulling down on the right end post — a perfect example why leaving some slack in the end post wires was the patient, wize way to go.
In comparison to an end post wire, the top cross wire has much less weight to bear — it has to deal only with the weight of the one wire itself and only the vines/fruit on that wire. Therefore, the top cross wire will be a simple loop from one end post to and around the other end post. A Gripple lock gathers and holds the two ends of the loop together.
But not so fast young man! Not so easy for me to string up the top cross wire. The 13 gauge vinyard wire did not want to bend around the endposts. Rather, it wanted to spring away from the post, slipping under the bolts meant to support it. Frustrating to repeatedly lose the wire’s top (above the bolt) position till I had an attitude adjustment. Those are long bolts — back them out till the wire is tightened between the posts and then screw them back in. Wala!, all was not lost. The extra long bolts did catch and hold the wire and the top cross wire was installed.
2. This is an exciting time of the year for me. Frogs have started to show up, in the auditory sense, in our neighborhood. How sweet it will be to have a frog or two or three croaking in our garden. Ribbit, ribbit, ribbit — a beautiful way to drift off to sleep. So I took a tour of our front garden today as if I was a visiting frog. “Yes, I could live here.”
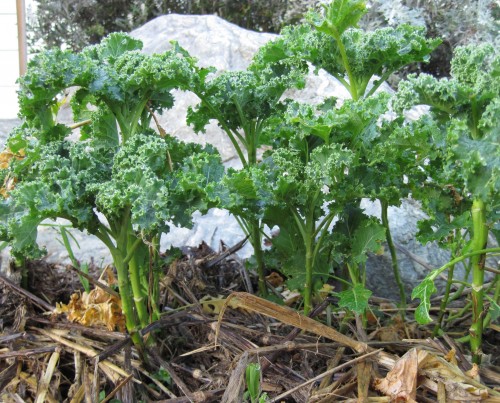
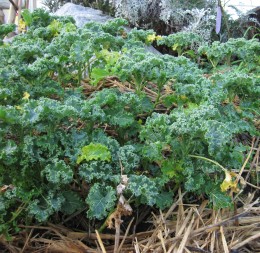
The kale bed struck me as quite beautiful from ground level, from the level of a hopping frog stopping by to live a few months in our garden. Those kale stalks and leaves look like a small forest. And that’s Mount Hood rising behind them. Yes, my neighbors are patient with me.
.
.
.
.
.
.
And then, this evening, my daughter and I heard a frog’s ribbit loud and clear from up against the house, not too far away from Rock Ledge Veggie Bed. How cool is that?! Perhaps my watering the front garden attracted it. Either way, I’ll take such instant gratification.
Ribbit.
………………………………………………………………..Tony
Garden Log (what I did):
1. Watered garlic sprouts in sidewalk veggie bed.
You, the Habitat Gardener (reflections):
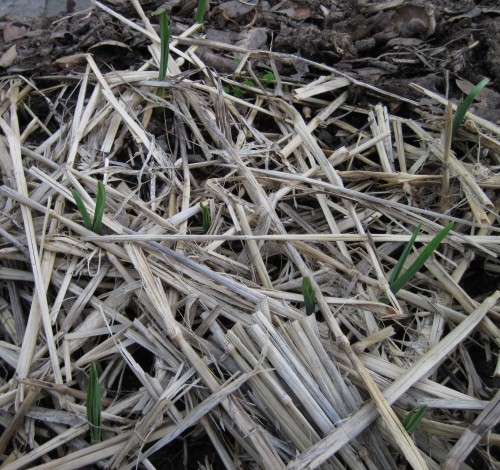
1. Our veggie bed along the sidewalk, Straw Bale Recliner, is sprouting garlic through the straw mulch. Yay!, the garlic bulbs that I got from the supermarket germinated — I was somewhat anxious about whether they would sprout or not because I have been told that sometimes the markets irradiate garlic bulbs to prevent sprouting in the market. Makes sense but I have been successful with the big-market garlic a couple of seasons now. And yes, the supermarket’s price of garlic is more friendly to my gardening budget.
What an easy crop garlic is! So glad that we planted the cloves before the New Year. Nothing was growing in the beds anyway so what could we lose? Come spring we will have both a crop AND soil that was loved all winter long. Soil that was alive! Soil that had a happy exchange of mineral nutrients, microbes, insects, earthworms, snails, slugs, and plant roots. Soil that sent out green stalk ambassadors to capture the sun’s energy, make food with it, and send it to the developing garlic bulbs.
We mulched the newly planted garlic cloves with a light layer of straw. The mulch protects the soil from a heavy rainfall and helps keep moisture in the bed so the garlic does not stop thriving. So easy to lay the thin layer of mulch BEFORE the sprouts reach skyward. What a pain to have plants sprout and then want to mulch the bed. Been there, done that enough times to appreciate getting the mulch down during planting. Not only is mulching after sprouting difficult, but also doing so can damage a recently sprouted plant.
Mulching during planting does present a trade-off, though. If the mulch layer is too thick, the sun will not warm the soil enough, with air and moisture becoming trapped in the soil. The seed/bulb will rot and die. So, moderation prevails when mulching over a planted crop. Hard to say amounts here — too many factors, like soil type, hours of sunlight, type of seed, weather conditions, to say just what that thin layer of mulch ought to look like. Try it! You’re bound to get it right eventually. Yes, even you 🙂 .
Tony
Garden Log (what I did):
1. Installed posts for House Finch Hideaway.
You, the Habitat Gardener (reflections):
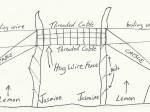
1. A beloved neighbor of mine has very little privacy in her back yard and wants more. Her yard slopes up from the back fence, so her back neighbors have a straight-shot view of her patio sliding door and into the house. What a drag to have to draw the curtains for privacy. But, I want to see the garden! Solution: Create privacy at the fence. Then, even the garden becomes private.
I love trellises. Vertical growing allows stacked vegetation (Ex. = plants on the ground and above) or “stacked functions” [a permaculture term] (Ex. = a clear walkway below and plants above). We will use a trellis to create Beloved Neighbor’s privacy and support for fruit vines. Grape, kiwi, fig, and espaliered lemon all do well growing along trellis wire. However, because our first goal is to create privacy, evergreen plants become our first choice. Of those fruiting vines just mentioned, only the lemon is evergreen. And one drawback to evergreen lemon trees is their relatively slow growth when compared to fruiting vines. Pink Jasmine to the rescue — a fast growing evergreen vine with very fragrant flowers. The jasmine will become a suspended thicket very welcoming to nesting birds and the fragrant flowers will attract bees and hummingbirds during the early spring bloom.
My friend, Jim, an organic apple farmer, took me for a walk in the orchard last spring. He was excited to show me the perimeter fencing that he installed. Jim’s wire fence is a grape trellis, and a couple of thousand feet long. That’s a lot of grapes. He was particularly excited to show me how simple the hardware is. I was sold. Why just put up a fence when the same fence can support a crop? House Finch Hideaway is basically a vinyard fence a few more feet off the ground and not very long. The entire trellis will be 2 end posts with 2 center posts between them.
Yes!, I get to sink driftwood into the ground. I just happen to have a few good-sized driftwood poles left over from last year’s driftwood collecting. The four poles I’ll be using are all well over 10 feet long. They are long enough to secure 5-6 feet in the ground and still reach above the fenceline a few feet. My custom-made posthole digger tool (electric conduit fastened to digging clams) is long enough to do the job and save my back from breaking. And wala!, the first post, the Left end post, is in. I chose to sink that post first because placement next to the cherry tree is more critical than with other elements in the yard. The post was up-ended, in other words, the heavy trunk end was flipped up into the air and the thinner end of the pole was sent into the ground. Art! We want creatures in the garden and what better way to do that than to jog the imagination with tree trunks in the air.
The oddly angled posts present some challenges for this linear wire trellis. Sinking the driftwood posts for allignment of all four posts is part guesswork and part skill. I have worked with driftwood for a long time and can anticipate how pieces will lay, most of the time. Fortuneately for me, I did goof up here by the time I got to the center posts. But that’s part of my skill — to take advantage of goof ups. For instance, I THOUGHT I wanted the center posts perfectly vertical, like a respectable fence ought to be. BUT, I wasn’t thinking clearly and dug the center holes vertically. Well, duh, the two center posts are not straight. In the end, after some trial and error by my lowering them into both holes only to retreive them and switch their position, the posts told me where they belong. And what beautiful gracefulness they are in, with the strength of the trellis magnified by their self-directed position. Specifically, the center posts are also openning outward, as are the end posts, which will better stretch the fruit-laden wires of the trellis. There will be less sagging in the middle of the trellis because of the great tension created by the outward-facing posts. The wood talks!
All four posts have been left loose in their holes, in other words, soil has not been backfilled to secure their position. The posts might want to twist and turn a bit when the wire fenceline is tightened — no sense in counteracting that movement. Then, when the wire tension is appropriate, and the posts have fallen into resting position, the postholes will be backfilled with planting mix and vine starts. What happy plants they will be, with their roots sucking water from the hugh wood posts.
Installing earth anchors for the two end posts is next. Securing the end posts to the ground will help keep them from breaking under the heavy weight of the vines, fruit, wire and center posts.
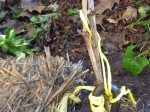
Grape vine cuttings planted with Left earth anchor. Note the highly visible yellow cord to warn passersby.
I don’t want to lose sight of how deep the anchors are so I use a crude stick measurement for the before and after depth of the anchors. A crowbar in the anchor’s eye helps drill the other end’s screw into the soil. Well, that anchor is pretty far down there but I will fill in the hole with heavy adobe clay to increase the weight on the anchor — would be a drag if the vine and fruit loaded trellis and poles were to heave out the anchor some day. Keeping the adobe soaked in the hole will help it pack and maximize it’s volume and weight as it settles.
With both earth anchors in place, now it’s time to wire the end posts to the anchors. 13 gauge galvanized vinyard wire will be secured by Gripple fasteners; see www.gripple.com for how Gripple’s line of agricultural hardware is used.
The endposts are secured with wires angling down to the ground at 45 degrees (90 degrees to the slanting posts). Yet to be done, the horizontal fruit-/vine-bearing wires will be strung between all four posts.
Today I got as far as wiring in the end posts. The horizontal wires will come another day. Stay posted, pun intended.
Tony
Garden Log (what I did):
1. Cold here in Sebastopol, California — well at least for us — with the growing season nearly dormant. We finally got some garlic starts in the ground about a month ago in the front veggie bed along the sidewalk. Maybe this week I’ll plant fava beans there to grow SOMETHING.
2. Harvested hachiya persimmons from a neighbor’s tree.
3. Inspected Salamander Swimhole’s vitality.
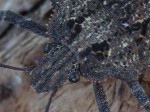
4. Discovered brown marmorated stink bugs on a piece of driftwood in the front garden.
You, the Habitat Gardener (reflections):
1. Our garlic crop in the front bed will be ready next late spring, just in time for us to plant sunflowers. We get garlic; the critters will reap the sunflowers.
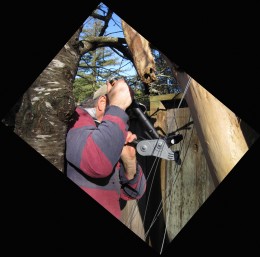
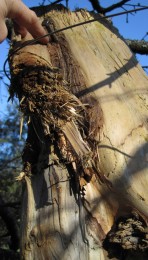
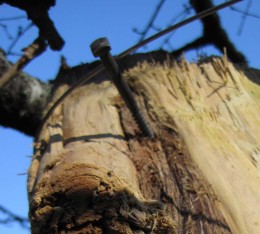
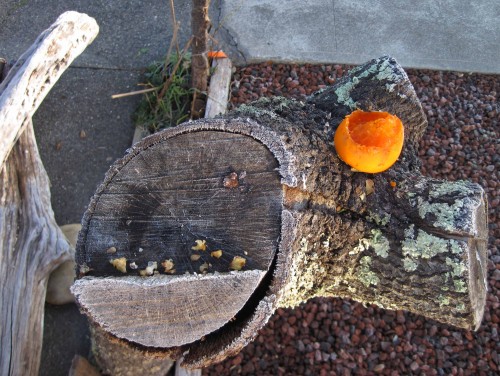
2. The persimmon that was left on Oak Pedestal last night is half eaten. A long deck screw holds the persimmon in place and secure from strong critters, like a squirrel, that might want to eat the persimmon elsewhere. The long screw’s head was snipped off, then that end was impaled into the oak limb’s crotch, leaving the pointy end of the screw skyward.
So easy to screw an apple, a persimmon, a tough piece of food onto the screw and thwart thieving critters. Ha!, I am smarter for once.
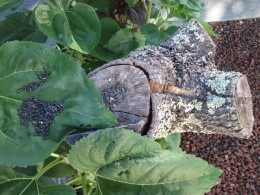
Top view of Oak Pedestal feeder surrounded by a summer crop of sunflower. The black oiled sunflower seeds are bagged birdseed. How fun to place some seeds on the sunflower leaf platters. Note the up-ended deck screw (in the oak limb crotch), which is used to secure apples and other food offerings.
3.Salamander Swimhole, which seemed a lost cause because of foul water (see my November 27, 2010 entry: http://sporelore.com/residential-habitats/garden-pond/) is clearing. The magnolia tree’s leaves have all fallen for a month now so the pond is no longer being overwhelmed with fresh organic matter. Algae is growing faster now that more sunlight is reaching the pond; the magnolia leaves were shading the new pond water. Just-visible microbes are whirling about in the water and the potted plants are showing new growth. The pond will thrive, with luck in time for a pacific tree frog to want to lay eggs in it this spring.
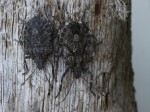
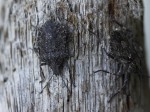
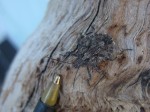
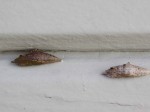
4. Brown marmorated stink bugs ( Halyomorpha halys) are in the insect family Pentatomidae and are known as an agricultural pest in their native range of China, Japan, Korea and Taiwan. Yes, they are not native to our California soil. But they are so cool! Given the species’ alien trait, I’d rather they didn’t exist in our garden BUT three bugs on one small piece of driftwood means there are probably many others entrenched in our neighborhood. What’s a sustainability-minded Master Habitat Landscaper Apprentice like me to do? Nothing, that’s what. Sure, I rather the garden be full of native insects to work the garden and provide food for higher tropic animals. But perhaps alien pollinators (or non-pollinators) will feed some of those higher tropic animals, i.e., animals more sophisticated/more developed. An insect meal might just be an insect meal to a hungry woodpecker during these food-is-sparse short days of winter.
A couple of cool facts about these alien-to-California brown marmorated stink bugs: a) They are actually bugs! “Bug” is often a lay term for “insect”, but “true bugs” are only one order of insect, like “beetle” is another order of insect. b) Stink bugs get their name from a smelly fluid emitted from their thorax when threatened. I was lucky to get the bugs pictured (below) without getting sprayed — surely their sluggishness from the cold was in my favor. c) The term “marmorated” is derived from Latin for “marbled”. Close inspection of the seemingly “brown”/dull-looking wing tips and exoskeleton’s back plates (pronotum, esculetum, elytron) reveals magnificent design and color. Sure wouldn’t want to be an ant when that steel-plated star cruiser crawls overhead.
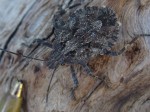
 Enjoy all things, stinky or not.
Tony
Garden Log:
1. Harvested a few purple potatoes from the Bog, a ditch that was filled with planting soil and potato starts in September.
2. Carried citrus to frost protection and illuminated Anna’s Avocado Aviary with a string of white decorative lights.
3. Photographed more caterpillar activity/crysalis formation on our home’s front door wall.
You, the Habitat Gardener:
1. The Bog is a low ditch in the middle of Dragon Spine Ridge in our back yard; it catches water from uphill. The Deva Tub drains directly to the Bog. The Deva Tub’s landscaped bowl — a lush horseshoe of fern, trumpet and jasmine vine, buddleia, ginger, forget-me-not, morning glory, rosemary, canna lily, and fig — also drains to the Bog. Good reason to use organic soap in Deva Tub, and not much of it! The Bog sure appreciates that soapy bath water during the summer and the many plants in the Bog willingly process the greywater. This year we decided to fill the Bog with soil and potato starts to grow potatoes during the dryer months.
During the wetter months, we want the Bog to collect storm water off the slight hill in our back yard. No problem, all we have to do is harvest the potatoes that have been enjoying the temporary planting bed in the Bog. The potatoes will go in our kitchen (or into cold storage) and the Bog’s planting soil will either go into bins for storage or into another planting bed. I bet some of it will go into the garlic bed we want to get started. Yes, we are running late. But we still have some garlic hanging in the kitchen from this fall’s garlic harvest and that can be used with the potatoes coming in now. Garlic potatoes from the garden — gardening has it’s rewards.
2. The string of 300 lights that we are using to minimize the frost damage on our avocado, paw paw, and guava trees use 61.2 watts — equivalent to a medium-sized light bulb. Not every night, just when the frost might be a bit too much for these young trees. Some day we will cut the cord (both electric and umbilical) and the more mature trees will be on there own. Yes, there will be some frost damage but the older trees will be able to recoup strength and leafage in the spring. Shutting off the string of lights after the morning’s warmth has arrived helps us minimize their electric use.
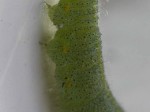
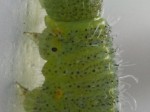
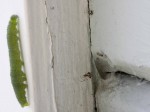
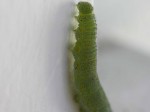
3. There’s been a lot of caterpillar activity on the front wall of our home while we have been warm and cozy inside (just minding our own business, I might add). As I mentioned in “Happy Thanksgiving weekend AND Saving a Pond” ( http://sporelore.com/residential-habitats/garden-pond/ ), these caterpillars are most likely coming to the wall for its warmth and shelter features. Lucky for us today, there was a yet-to-pupate caterpillar looking for its over-wintering site. A fresh, plump, partially transluscent light green caterpillar. Most likely by tomorrow it will have found a cozy nitch to set up camp for the winter.
Enjoy the pics. And if you know what type of caterpillar this is, please drop me a line.
- This active caterpillar has scaled the front wall of our home to window sill height.
- Note the skin’s expansion joints — the transluscent green bands not covered with hair or pigmented with spots like the outter skin.
- Bad hair day for Caterpillar but those hard wisks will keep some predators away. The hairs also most likely provide tactile feedback as Caterpillar crawls about. Gotta love those stubby legs!
- Nice vertical climb! Note the spider that has left its web to watch the parade float go by.
- Caterpillar on house siding. By tomorrow this caterpillar will deposit a silk pad to the house paint surface and secure itself to the pad.
- It’s a chrysalis race! The more colorful chrysalis on the left was probably established by a caterpillar yesterday; some of the caterpillar’s green skin is still visible. The sun-bleached model on the right was pupated 3 weeks ago, on November 26.
Tony
Garden Log:
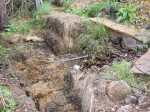
1. Completed slate stacking to bring Zen Canyon Snake Pit’s ceiling flush with surrounding edges, which finished the installation of the habitat.
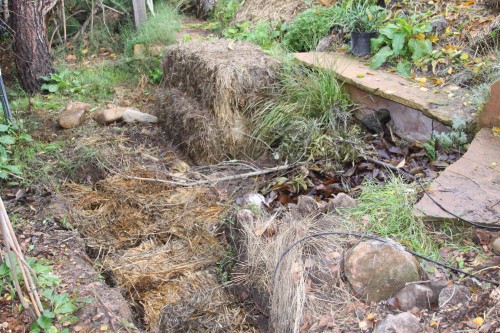
Zen Canyon Snake Pit covered over with soil, leaves and branches. The topmost slate of the slate-layered chamber will support a branch/twig/stump/log pile. That pile of organic material will be a thriving animal habitat as it breaks down, soon to be thrown onto the compost.
2. Dug out soil around irrigation zone #3’s last riser, in corner of back garden, to expose the tee connection. Threw the soil on top of Zen Canyon Snake Pit.
3. Cleaned magnolia leaves off spa deck and on pathways in back garden — thanks Glory! Leaves were dumped on top of fresh soil just thrown on ZCSP.
4. Began stick debris pile on top of Zen Canyon Snake Pit; sticks were from dying birch and miscellaneous piles around the yard.
5. Tossed old straw “tiles” into the trench that was the base of Rock Pile Planter.
6. Harvested persimmon fruit from neighbor’s tree. Thanx for the persimmons, Sunny!
You the Habitat Gardener:
1. What a great session in the garden today. Always a good day when an animal habitat is completed. All the ideas, the what-if’s, the how would that be’s, the plans and sketches, the gathering of materials, the actual work (imagine that!) to manipulate space and materials are over. Sometimes, finishing a habitat installation is anti-climatic, especially one that has been in my mind for months, maybe years. But today’s completion of Zen Canyon Snake Pit brings our back garden to a new stage.
Now that Zen Canyon is bridged over with slate, we can begin to create an organic debris pile (sticks, tree limbs, etc.) on top of it. Debris Pile Food Court is born! Where there once was a hole in the garden, there will be a through-fare for the wheelbarrow and a large-item compost pile, that is, a debris pile. We will keep the debris pile to one edge of the top of the snake pit and have a path for the wheel barrow over the other edge of it. The filled over “canyon” will become the base, or floor, of the debris pile, a new habitat in of itself.
Habitat stacking in the garden — the debris pile will shelter many microbes, insects, snails, slugs, spiders, and small animals feeding on them. Perhaps some of those critters will seek shelter below the debris pile, in the staking of slate and stone or in the two toilet tanks that make up the cracks and crevices of Zen Canyon Snake pit. And all the while the debris pile breaks down we will be making soil. Eventually most of the organic debris pile will be tossed on the nearby compost pile. We’re making soil!
Organic garden debris, too large for the compost pile, will be piled to create the Debris Pile Food Court above Zen Canyon Snake Pit. Perhaps larger critters will live below ground and feed on the debris pile's smaller critters above.
2. Today began the creation of Debris Pile Food Court (Garden Log #2,3,4) — a pile of sticks , logs, stumps, tree limb sections piled above Zen Canyon Snake Pit. The debris pile will stand alone as an animal habitat, friendly to critters from microbes to insects to birds, amphibians, and reptiles. Maybe even a garden snake! Soil was thrown at the base of the pile to help sustain such biodiversity. Maybe some of those microbes working (breaking down) the wood pile will take shelter or food from the soil floor of the pile. Maybe that soil floor will be where the insects, snails, and slugs lay their eggs to keep the explosion of life going. And, that soil floor, rather than the slate floor is was, will also keep water available to further sustain animal life.
3. The magnolia leaves (Garden Log #3) cleared of our spa deck and off our garden slate pathways was thrown on top of Debris Pile Food Court’s soil base. Not great science, just wanted some place to put the leaves till our compost pile area is ready AND the leaves under the wood pile will add to the bio-diverse habitat of the now-planned soil-leaves-wood pile. Note that I said the leaves were only cleared away from the spa deck and the pathway; all other leaves will be left to break down on our small grass patch and in the beds of the back yard. What a mess! But that mess will provide great nutrition, shelter, and insulation for the soil microbes, larger critters, and plants ALL WINTER LONG. And be assured, by spring, the ground cover beds and grass will not only have recovered, but will be thriving and happy.
4. Used straw tiles (Garden Log #5) to fill up the base trench to the demolished Rock Pile Planter. Pulling off a few inches at a time from the end of the bale made nice thick, wet, heavy, partially-decayed slabs, or tiles, of straw. Perfect for filling in the thin trench. Eventually that straw will break down and leave a nutritious layer for the soil. Sure beats the adobe that was in the trench. And, in the meantime, the area has been leveled off and will have wheelbarrow access to the area.
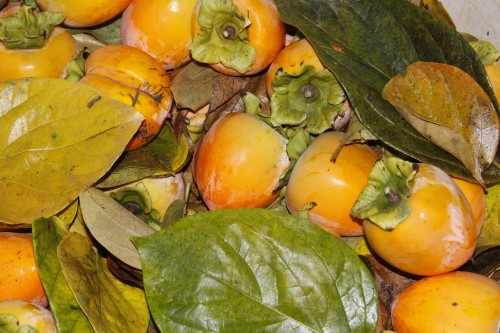
5. Persimmon Harvest (Garden Log #6) is here. The beautiful fruit is ready to pick off of our neighbor’s tree. Enough fruit is left high in the tree, beyond reach with a 12-foot orchard ladder, to treat the birds of the neighborhood. No fruit goes unused — we will throw any harvested damaged fruit into the Earthworm Bin. Had some fun harvesting persimmons this year by using Nature-provided packaging. We used persimmon leaves between layers of fruit — the leaves provided a soft cushion AND are ripe with beauty. Will be fun to pack away some leaves as we pull out the fruit. Now you know what old phone books are good for; they have thin, absorbent paper that easily makes a flower or leaf press.
Competed installing one animal habitat and started another — what a great day!
Tony
