Nov 252012
 
April 2011. Salamander Castle moved to back garden.

First a video  re “Salamander Castle’s Ant Colony”,  then some  pics of Crossroads Compost (below the video):

Garden Tour (Salamander Castle’s Ant Colony) (video):

Crossroads Compost, a brief history (pics):

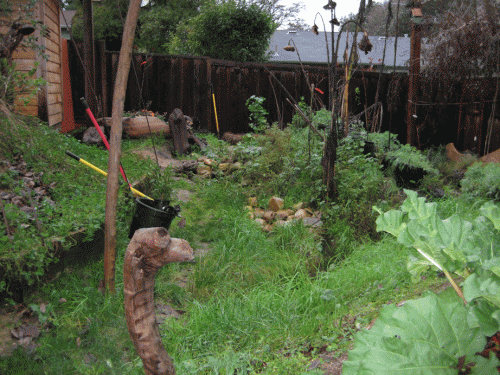
January, 2008.  Crossroads Compost was yet to be born.

January, 2008. Crossroads Compost was yet to be born, but the straw bale at the back of the yard, next to the fence, was the seed waiting to be planted. That bale was allowed to age there, providing habitat for soil critters and enriching the soil as it broke down.


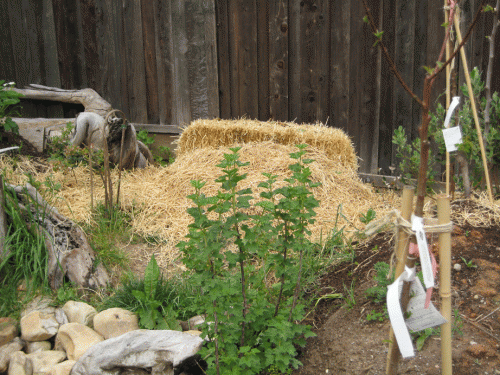
May 2008.  Straw is stored next to the back fence .

May 2008. By now, we are storing straw next to the back fence (but not touching it) at the junction of our garden paths. There is a bale left intact as a seat, habitat, and future source of old straw. Other bales are pulled apart to create a mat over weeds we wanted to eliminate. Note how low ground level is and how young the plants are: currant (foreground), fig (left, supported by hoops), and the pineapple quava (back right).


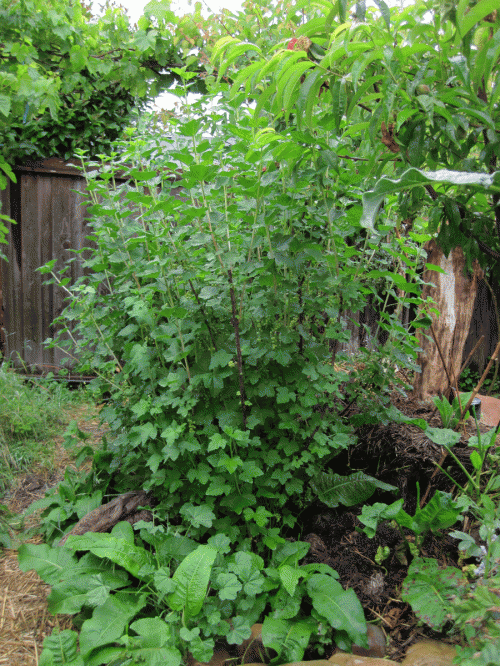
May 2010.  Trellis vines overhead.

May 2010. The ground level is still fairly low; I have not started to stockpile wood chips in Crossroad Compost yet. The currant is larger and sporting green fruit. Fig and grape vine hover on Kiwi Gondola trellis.


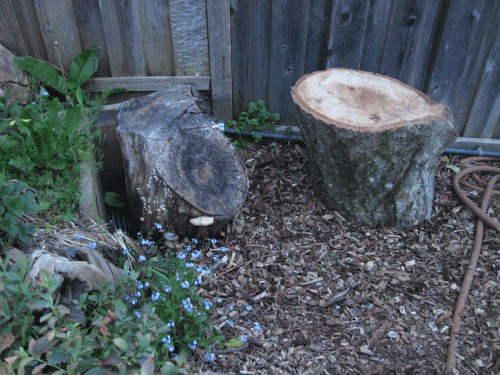
April 2011.  Salamander Castle moved to back garden.

April 2011. Salamander Castle moved to back garden. This lucky oak stump was rescued from our nearby bike path, where the massive tree came down. Work crews cut the tree away from the path and left Salamander Castle off to the side, not knowing that its destiny was to become an animal habitat. Note the beginning of the wood chip pile covering the Crossroads, soon to be buried with other chips 3 feet deep – that’s a whole lotta nutrients and moisture for the fig, grape, kiwi, currant, blueberry, pineapple guava, apricot, lemon to enjoy. Salamander Castle was moved next to the currant stand and wood chips were piled against it.


Happy dusting ants off yourself (from disturbing their nest) and see you tomorrow.

Tony


Nov 242012
 
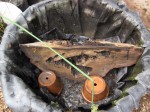
Earthworm Bin tucked away in the protective shade of a tree.

First a video  re “Garden Tour (Earthworms in Bog)”,  then some  pics of earthworms from our Earthworm Bin (below the video):

Garden Tour (Earthworms in Bog) (video):

Earthworms from our Earthworm Bin (pics):


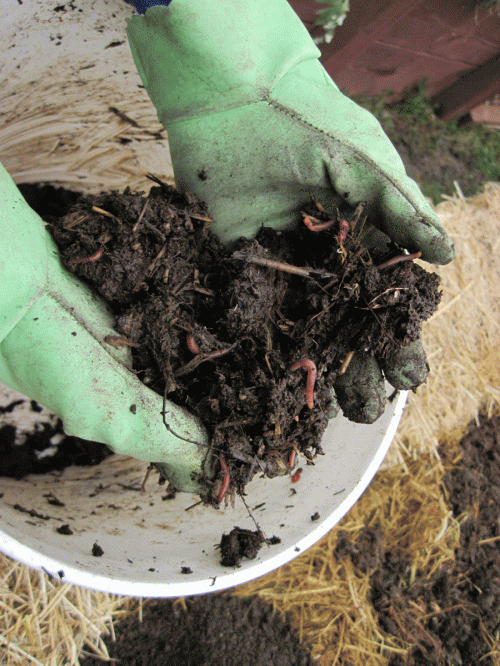
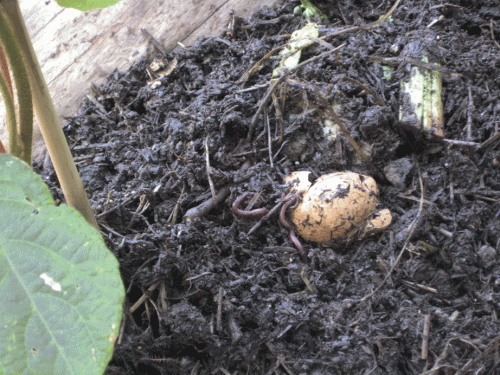
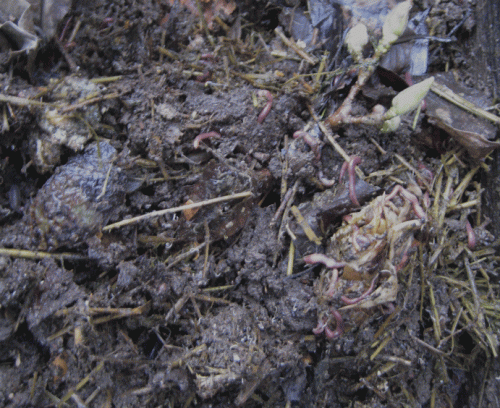
Earthworm bin harvest, rich with red wiggler worms.

Earthworm bin harvest, rich with red wiggler worms, is added to a planting bed.


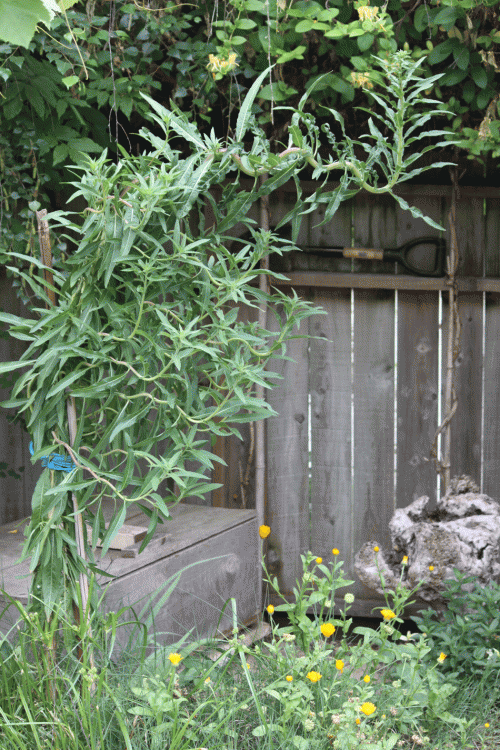
Earthworm Bin tucked away in the protective shade of a tree.

Earthworm Bin tucked away in the protective shade of a tree. Note the brick on top to prevent animals from feasting in the box. Evening primrose flower above; calendula flower below.

Pics and captions from Tony’s new book, Habitat It and They will Come :

Figure 4.143  Earthworm Bin Harvest.  Figure 4.143  Earthworm Bin Harvest.  Worm bin harvest layer over planting mix.  The worms and microbes will continue to feed on the organic matter like the eggshell and rhubarb stalk section shown.  And when all those microbe and crawly critters take a break from eating, they might just breed, or die.  The planting bed has been inoculated with Life — life that translates to nutritious and well-aerated soil for the kiwi vines.


Figure 4.190  With A Little Help From My Friends.

Figure 4.190  With A Little Help From My Friends.  Earthworm bin harvest to be placed at the crown of the tree.  These red wiggler worms, a typical compost pile worm, may not stay in the tree mound and surrounding soil on a long-term basis but they will enrich and aerate the soil till they do leave.


Happy earthworm harvest and see you tomorrow.

Tony


Nov 222012
 
Lemon Pot planted with pac choi.

Day 7 in this 6-day video series (bonus day!): Preparing patio pots for winter veggie planting.

First a video  re “Patio Planting Pots”,  then some pics (below the video):

Patio Veggie Pots 7 of 6 (video):


Patio Planting Pots Sprouting Seedlings  and Ripening Scarlet Runner Bean Seeds (pics):


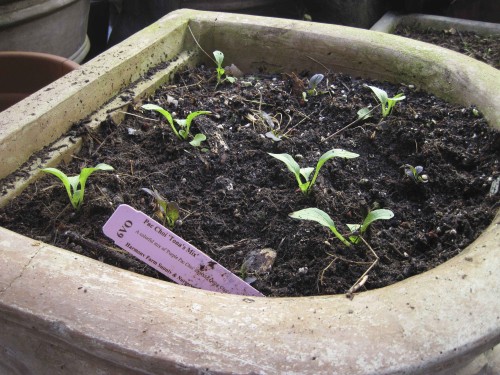
Lemon Pot planted with pac choi.

Lemon Pot planted with pac choi. This is the patio pot that I planted the hugelkultur, a thick layer of weeds and greens, just above the drainage gravel.


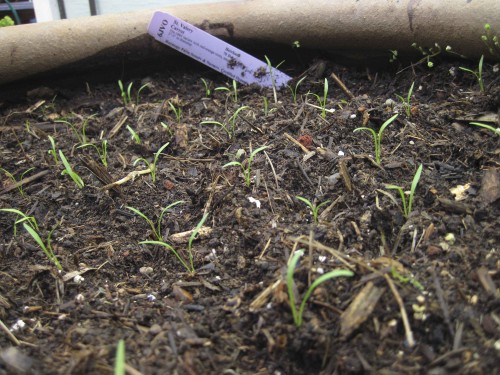
Carrot seedlings in a large patio pot.

Carrot seedlings in a large patio pot.


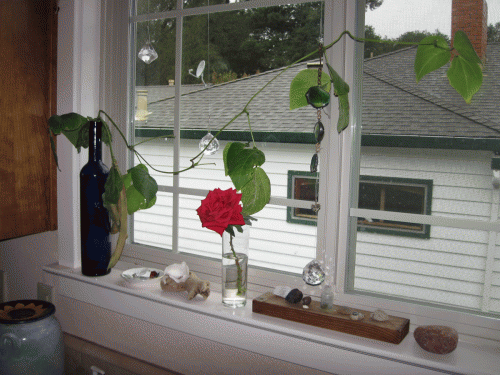
Scarlet runner beans continue to ripen on the kitchen windowsill.

Scarlet runner beans continue to ripen on the kitchen windowsill. These beans were harvested on day 1 (6 days ago) and seem to be ripening (browning) well.

Happy planting veggies on your patio and see you tomorrow (Happy Thanksgiving!).

Tony


Nov 212012
 
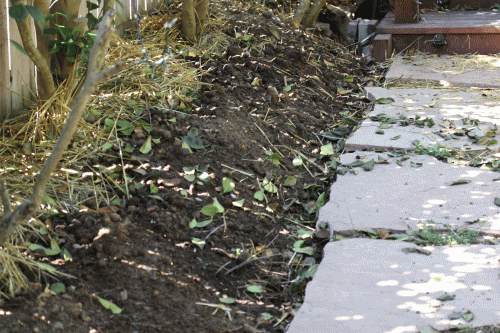
Ground level (critter head height) entrance to Leaf Trench Highway.

Day 6 in this 6-day video series: Preparing patio pots for winter veggie planting.

First a video  re “Leaf Layer Added to Leaf Trench Highway”,  then some animal habitat pics (below the video):

Patio Veggie Pots 6 of 6 (video):

Leaf Layer Added to Leaf Trench Highway (pics):


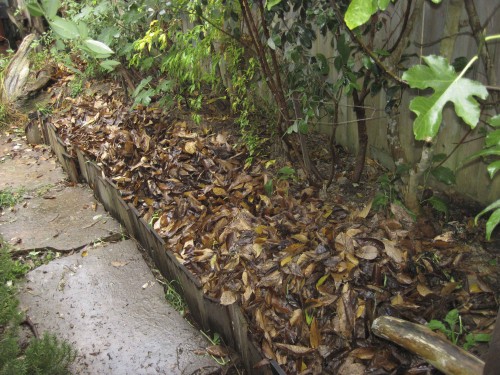
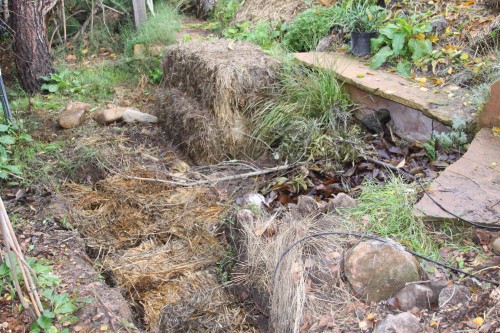
Leaf Trench Highway with a fresh layer of tulip magnolia leaves.

Leaf Trench Highway with a fresh layer of tulip magnolia leaves. The trench along the walkway is three feet deep and filled with different organic/yard debris layers. The layers will break down and form rich compost in about 6 months to a year.


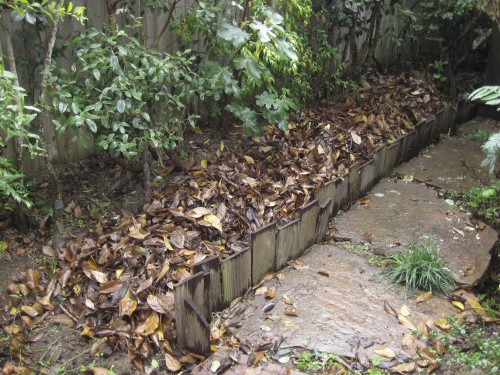
Leaf Trench Highway extends along the back corner of our yard to Salamander Resort (left).

Leaf Trench Highway extends along the back corner of our yard to Salamander Resort (left). Besides storing organic material (twigs, leaves, straw, manure, pulled weeds), the trench also feeds the fedge (food hedge) along our property line. Pineapple guava, fig, and pomegranate trees, as well as annual veggies, grow in the compost-making veggie bed.


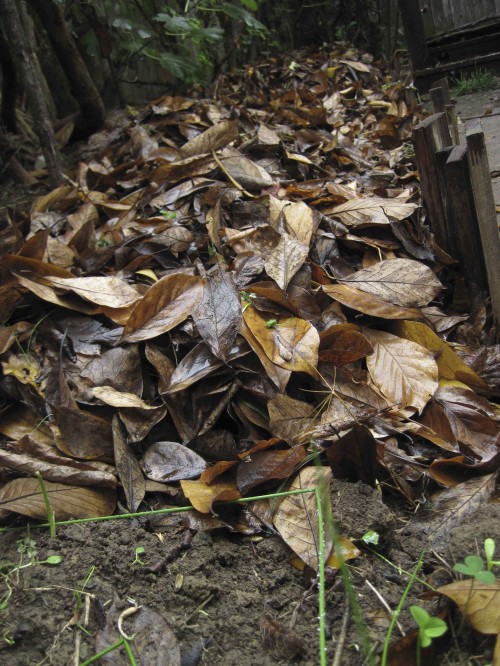
Ground level (critter head height) entrance to Leaf Trench Highway.

Critter level, perhaps the head height of a raccoon, skunk, or possum, of the entrance to Leaf Trench Highway. Personally, if I were a salamander, I would crawl under the leaf litter. Lots of tiny tidbit treats (FOOD!) under those moist leaves.


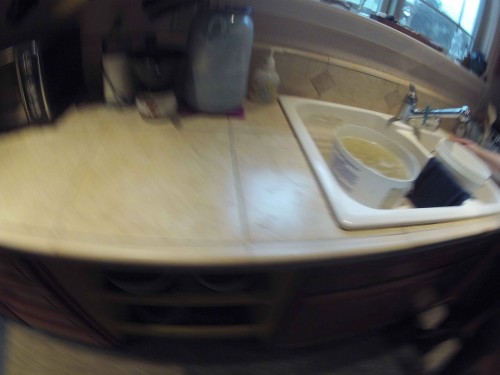
Kitchen dishwater ready for the compost pile.

Dishwater ready for the compost pile. Dishwater with soap and food (left bucket) is considered “blackwater”; rinse water is considered “greywater”. We pour blackwater directly into the compost where microbes and micro-critters will process it. The greywater rinse water makes a fine treat for most of the garden, with care not to pour it directly on fruit/vegetables.


Happy planting veggies on your patio and see you tomorrow (Happy Thanksgiving!).

Tony


Nov 202012
 
Anita dumps a new load of soil critter food.

Day 5 in this 6-day video series: Preparing patio pots for winter veggie planting.

First a video  re “Patio Veggie Pots”,  then some animal habitat pics (below the video):

Patio Veggie Pots 5 of 6 (video):

Soil Making in Leaf Trench Highway (pics):


Horse manure ages in leaf Trench Highway.

Horse manure ages in leaf Trench Highway, on top of many layers of garden debris organics.


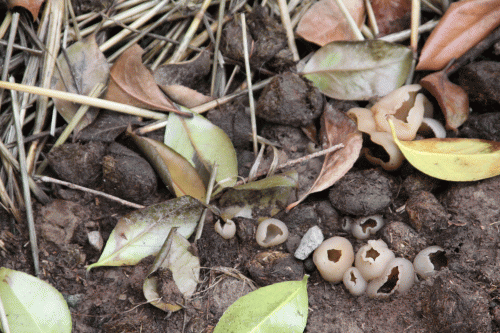
Mushrooms pop out of Leaf Trench Highway’s manure after the first rain.

Mushrooms pop out of Leaf Trench Highway’s manure after the first rain. Good stuff! Having the fungi/mushrooms means the manure will break down faster.


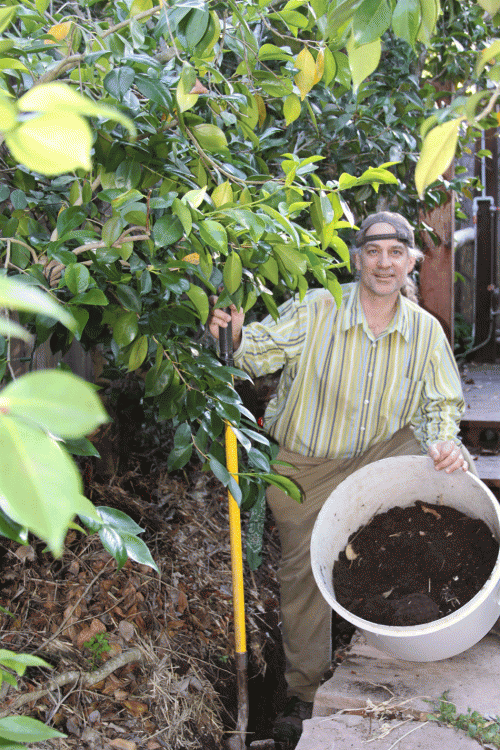
Harvesting compost from Leaf Trench Highway.

Later that year, Tony harvests compost/rich soil from the trench.


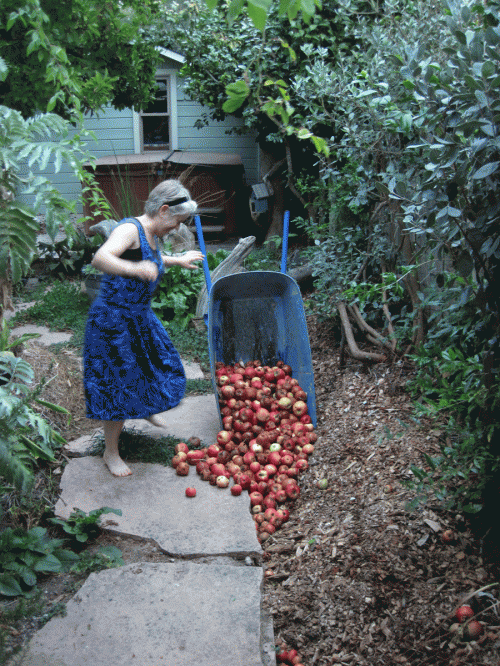
Anita dumps a new load of soil critter food.

Anita dumps a new load of soil critter food. These apples were “debris” for a neighbor that wanted under her tree “cleaned up”. The soil critters and we are sure happy to have the mess!


A short retaining wall is added to Leaf Trench Highway.

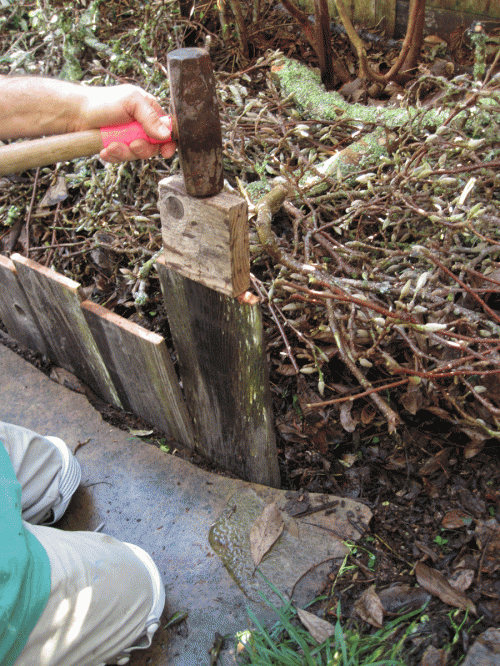
A short retaining wall is added to Leaf Trench Highway. The short wall of re-used fence boards will allow a higher pile of organics to be heaped into Leaf Trench Highway, yet keep the walkway clear. Note how the block keeps the sledge from splitting the dry fence board.


Leaf Trench Highway’s short retaining wall.

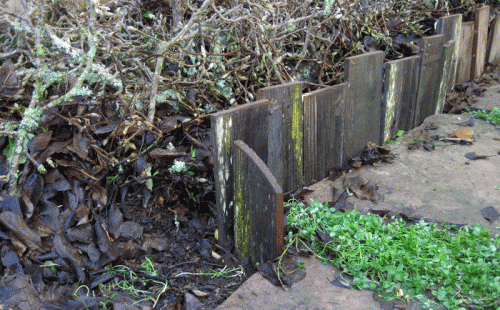
Leaf Trench Highway’s short retaining wall in place, holding back tulip magnolia prunings (limbs and twigs). Lichens, mosses, and algae so abundant! Does life get any better?!


Pics and captions from Tony’s new book, Habitat It and They will Come :

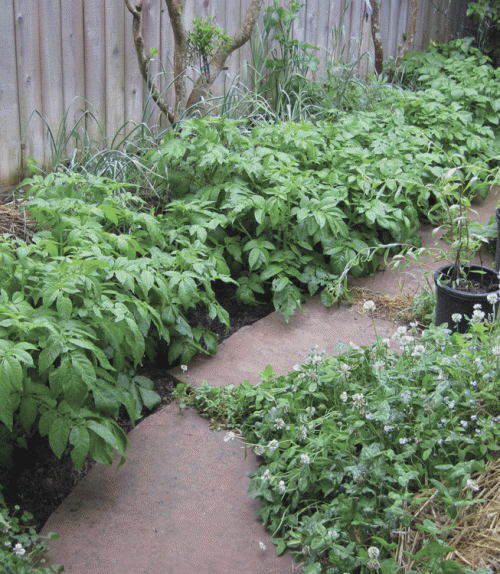
Potato crop in Leaf Trench Highway.Figure 2.11  White Clover and Leaf Trench Highway.  Leaf Trench Highway is about making soil — the 3 foot deep trench is filled with green mulch (for example, a whole lot of pumpkin vine prunings), then covered over with old (cool) manure and compost. Potato starts are dug in. Harvest, 6-9 months later, yields full-grown potatoes PLUS a long, deep trench of beautiful soil to use elsewhere in the garden. The white clover attracts pollinating insects to the potato flowers, adds nitrogen to green mulching, and is a sheltering go-between for critters to travel from one garden bed to another. Laying the slate pavers on soil, and not on sand or cement, allows soil fungi, microbes, and larger animals to pass through the soil, thereby assisting the growth of the clover cover crop.


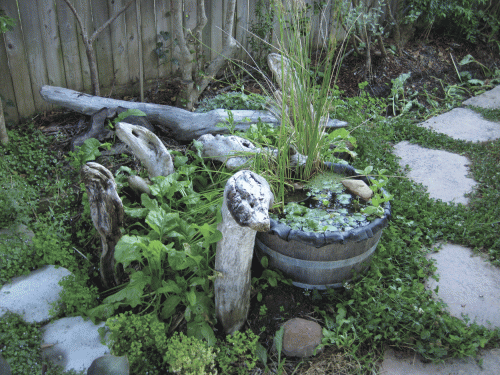
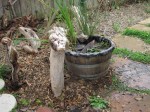
Salamander Resort, the City of Oz for those critters that have travelled the length of Leaf Trench Highway.Figure 3.37  The After of Salamander Resort.  One year later and the resort is still operating.  Driftwood creatures,  a thriving beet crop, and Salamander Sunny Swimhole hide the goings-on eight feet below.  See Figure 3.36 for “The Before”.  Watering the pond waters the beets waters the compost waters the wood chips waters the oak rounds waters tank cavities waters Salamander Shady Shallows, AND waters the adobe clay earth surrounding Salamander Resort.  Water + Cavities + Microbes + Mollusks (slugs and snails) + Worms + Insects =  Happy Salamanders.  The half wine barrel pond, with a 5’ x 5’ sheet of pond liner, was home this spring to Pacific Tree Frogs (and tadpoles).  Many types of insect on the wing visit the pond.  A salamander must be living somewhere in all that!  Note some habitat features: clover on the slate path links this habitat to the rest of the garden, the pond’s surface rocks provide a critter rest stop, the “fedge” (food hedge of fig, pineapple guava, loquat, and pomegranate) along the fence provides flowers and food, and the compost in Leaf Trench Highway at the base of the fedge attracts its own ecosystem of soil makings and critters.


Happy planting veggies on your patio and see you tomorrow.

Tony


Feb 022011
 
The new Olympic-sized swimming pool at Critter Convention Center.

Garden Log (what I did):

1. Installed an underground watering hole habitat, called Dano’s Great Newt Grotto.
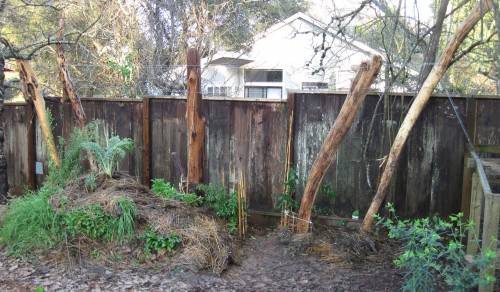
Trellis habitat, House Finch Hideaway.

Trellis habitat, House Finch Hideaway. The subterranean habitat, Dano's Great Newt Habitat, was installed while the Center Pole posthole was being backfilled.

You, the Habitat Gardener (reflections):
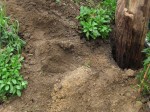
Center Post (2 posts) in ground, yet to be backfilled.

Center Post (2 posts) in ground, yet to be backfilled. The posts were dug in on the back side of Captain Cicada's Buried Treasure, a buried wood pile animal habitat. The adobe soil in the foreground is from the posthole digging and covers the small hill's topsoil.

1. The celestial heavens were so kind to me the other day.  Dan and I were on our way to completing an awesome garden project — a 6-post two-tier trellis built to grow food and provide privacy.  We had just lowered the Center Post (which is actually 2 posts; see House Finch Hideaway — Completed ) into its hole when the noontime lunch whistle blew.  Dan was off to follow his stomach’s commands.  Cool!, now I have some time to throw in a habitat up against the center posts before the area is backfilled.  A quick search of material caches and I was back with a toilet tank top, a small piece of flagstone slate, two old kitchen tiles, a water-catching boulder, and a bucket lid.  Habitat here we come!
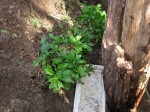
The habitat's tiolet tank top will catch and hold water.

The habitat's toilet tank top will catch and hold water.

Water.  So often when building a habitat, I include a focus of making water, or at least moisture, available for garden critters.  Perhaps I am so drawn to water because one of my strongest passions in building animal habitats is to increase amphibian populations in residential gardens.  And amphibians LOVE, thrive, and do water well (pun accepted!).  This habitat’s major water feature is a toilet tank top rescued from a dumpster.  “Help, help, please help!”, I faintly heard coming from the bottom of a commercial renovation project’s 10-yard dumpster.  So I took the beautiful uncracked enamel critter swimming pool home with me and vowed to incorporate it in a habitat.  Alas, Toilet Tank Top is delivered to the soil and its critters while Dan is off at lunch.  A little water in the upside down lid helps me install it level (to hold the most amount of water possible).
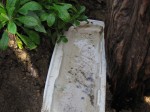
The new Olympic-sized swimming pool at Critter Convention Center.

The new Olympic-sized swimming pool at Critter Convention Center.

The enamel coated top side of the toilet tank lid seals the pottery and enables it to hold water.  The underside of the lid, which is pictured holding water, will absorb some of that water because it is not enamel coated.  But that’s okay — moisture-loving critters, like insects, snails, slugs, salamanders, frogs and toads, will seek out that cool dampness in the dryer months.

I stand on the upside down lid to press it into the adobe soil at the edge of the posthole and up against the Center Post.  It sets in firmly and gives me confidence that it will hold at least some water, that is, stay level, for a long time.
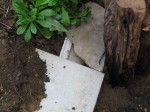
Flagstone and kitchen tile cover the habitat's grotto.

Flagstone and kitchen tile cover the habitat's grotto.

Now to protect the top of the swimming pool to keep it from completely filling with soil.  Some soil will likely backfill into the swimming pool, and that’s okay, but we would like some of the upside down toilet lid’s volume to be available for water.  Completely sealed off would not be good either — the critters would think the pool is closed.  “Oh man, we always come on the wrong day!”  A small piece of flagstone slate and kitchen tiles are the strong, non-biodegradable materials I come up with to protect the habitat’s pool of water.  Two kitchen tiles are used to add strength and to provide another crevice (between the tiles) that critters can take advantage of.  Sure there’s a gap between the tiles and the slate but we’ll deal with that shortly.  For now, we’re sitting pretty because the swimming pool was just upgraded to a grotto.  How European!  The subterranean pool, or grotto, will shelter and feed many a microbe and larger critter that had never dreamed of travelling to such places.
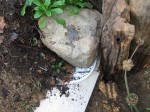
Water-holding boulder sits above the grotto.

Water-holding boulder sits above the grotto.

Now to cover the small gap between the tiles.  And I just happen to have a bucket lid that will cover that gap.  One good thing about the plastic lid is that it will last a zillion years. Sure, some people would cringe about burying plastic in the garden but I figure that the trade-offs here are worth it.  If it never breaks down, then some critters will have shelter security.  If it does break down, then we are doing our part to return this human-made atrocity to the soil.  Hey, why get out of bed in the morning if your rationalization system is not intact?!  And now back to the plastic bucket lid on top of the kitchen tiles and the flagstone slate.  Yes!, the bucket lid turns out to more helpful than I thought it would be.  Not only will it cover the gap, but also it is a coaster (like a table coaster protecting delicate wood) for the brittle tile and crackable slate.  Now a good-sized rock, AKA boulder, can be stacked on top of the grotto, tiles, and slate.
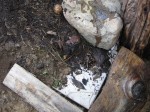
Leveling the boulder to hold water.  Wood frame protects the tile.

Leveling the boulder to hold water. Wood frame protects the tile.

Multi-tasker boulder will 1) keep the materials below it securely in place because of its heavy weight, 2) provide temperature modulation to the habitat, and 3) hold a smidgen of water in the small indentations on its top surface. That’s pretty much the bulk of the habitat, but now I want to take measures to protect this underground waterhole, this subterranean grotto.  Because it’s underground, or hidden, foot traffic could easily kick it apart by accident. I grab a couple of fireplace logs and frame the exposed tile corner.  That sits pretty but why leave things up to chance?
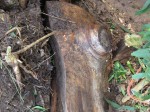
Firewood log staked with gap awaiting compost fill.

Firewood log staked with gap awaiting compost fill.

I take the extra time to secure the downhill side of a log with a hefty wooden stake pounded into the ground.  The stake is surely very secure BUT I missed my mark. The stake is a couple of inches away from the fireplace log instead of snugly up against it.  Once again, THE PROBLEM IS THE SOLUTION (a permaculture axium).  In other words, there’s good to be found here so why not go with that?  Lucky for me, I sometimes take my own advice.  I snug the firewood log up against the post to expose a gap alongside the habitat.  That gap, or couple of inches “off”, will now allow me to throw in some nutritious compost soil. There will be more good soil for the jasmine vine I will plant above this habitat.
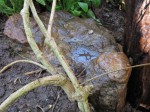
Jasmine vine planted above Dano's Great Newt Grotto.

Jasmine vine planted above Dano's Great Newt Grotto.

Time to plant the jasmine vine that will grow up Center Post and create a thicket on the trellis.  The grotto habitat is nearly complete except for planting and cosmetic issues.  The jasmine vine’s roots will help secure the “hillside” of soil and help tie together the habitat’s elements.  Perhaps those roots will find the grotto and drink its water — hard to say because the roots will not develop in the intended air cavity of the habitat.  In the end, though, I vote that the jasmine will be a happy camper as a result of the grotto habitat.  If nothing else, the poop factor will benefit the jasmine — there will be so much poop (that feeds the soil) from the snails and slugs that come to vacation at the grotto.

Compost soil is strewn over the habitat and surrounding area.  The jasmine vine is wiggled into position next to the boulder and surrounded by as much compost soil as will stay on the little hill of Captain Cicada’s Buried Treasure.  Forget-me-not plants that were moved to the side for protection are returned to the hill, above the habitat.  Some bamboo stakes are pounded into the ground and strung together to make small fences to protect the area from foot traffic.  Lastly, old straw mulch is used to keep the compost soil and plants in place.  Also, the old straw mulch will keep the area moist and humus-rich as it breaks down.  The decaying straw is a habitat unto itself!
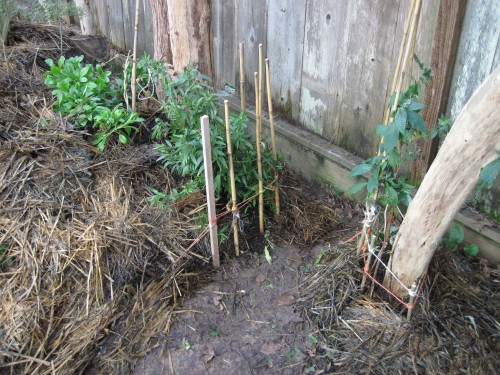
Dano's Great Newt Grotto habitat is buried under old straw mulch (left).

Dano's Great Newt Grotto habitat is buried under old straw mulch (left). Grape cuttings at a post's base for the trellis habitat, House Finch Hideaway.

What a great day!   A habitat within a habitat day.  Hard work and looking forward to my vacation.  See you at The Grotto.

……………………………………………………. Tony
Jan 302011
 
trellis habitat House Finch Hideaway

Trellis habitat House Finch Hideaway will support a thicket of vines.

Garden Log (what I did):

1. Completed installation of the trellis habitat, House Finch Hideaway.

You, the Habitat Gardener (reflections):

Trellis wire on center post.

Trellis wire on center post. Note the crevices in the post's wood -- great shelter for small criters willing to make the climb.

1. Today’s job was to finish the trellis habitat, House Finch Hideaway.  For previous entries re this project, see HFH — Installed Posts and HFH — Trellis Wire Installed.  To most people, this job would be a trellis installation to create back-fence privacy, period.  But for me, this project is a great opportunity to grow food for our table.  Also, the trellis will provide food and shelter for critters.  I see a thicket of perennial jasmine vines with knock-me-out fragrant flowers, a sun-basking wall of hanging fruit, subterranean crevices and water for amphibians, a ladder system of wood posts for insects and lizards, perches and nesting shelter for birds, and a rising sun backlighting enormous grape and fig leaves.

Top cross wire loosely in place (before stapled).

Top cross wire loosely in place (before stapled). Note the post's lean away from the back fence.

After laying out and attaching the top wire loop with a Gripple lock, I realized that the wire was not as tight as I wanted it to be.  The distance between the two center posts was too long.   A 5th post, a true center post, will bridge the gap and prevent the someday vegetation-laden wire from sagging in the middle.  All the better to know now that my original plan for four posts was unrealistic.  Besides we can milk this mistake.  I’ll get the most out of changing the plan by a) charging more for the job, b) installing more beautiful driftwood in the garden, and c) installing a separate animal habitat when digging the hole for the new center post.  About a) charging more — Oh well, I forgot this is an unpaid job.  About b) more driftwood — YES!!!  How better to fix a problem than to pull out the driftwood?  Better yet, the center post is a union of two pieces of driftwood.  About c) another habitat — Dano’s Great Newt Grotto is born; see my future post (I’m going to bed!).

Base of center post yet to be backfilled with rock, gravel, and soil.

Base of center post yet to be backfilled with rock, gravel, and soil.

We want Center Post to rise about a foot above the 7-foot-high top cross wire.  That one foot height over the wire will be a critter perch.  Perhaps a bird, squirrel, or a very stupid insect or lizard (wanting to be so visible) will use the lookout.  Our post is 9 and 1/2 foot long, so that does not leave too much wood to be buried below ground.  First off, give up on the one foot and settle for a 6″ perch.  Then, the post can be buried 2 feet (9.5-7.5) — way not enough for that heavy piece of tree to stay vertically suspended AND support the heaviest load of the trellis.  What to do?

Center post base (left) supporting center post pole (right).

Center post base (left) supporting center post pole (right). Note the available critter shelter between the two pieces of wood.

Another piece of driftwood comes to the rescue.  The second piece of wood to become Center Post is a glorious redwood root section.  Being of redwood root stock, it is extremely dense, insect resistant and strong.  That piece is dug into the ground about 5 feet and snugly holds up the center post pole.   In fact, the base piece perfectly cradles the post piece, making a perfect lean forward away from the fence.  Perhaps that lean away from the fence will keep the someday rotting posts from crashing through the back fence.  Fences make good neighbors AND busting up the fence between you and your neighbor makes for trouble.  Therefore, the heavy and strong Center Post has a slight lean away from the back fence.

grape cuttings at left end post

Grape cuttings at left end post. The small "wood chip" pieces of grape vine will make friendly mulch for the soon-to-thrive vines.

Plenty of rocks were used to fill in Center Posts’ hole.  The rocks will better pack around the wood posts because they will not compress like soil fill does.  Also, the rocks and gravel will help the posts stay dryer in the ground, which will slow down their rotting.  Not only will water filter through the gravel better than soil, but also the rocks and gravel will not retain moisture like soil or clay does.  Less water retained means dryer posts.  I also like the use of the larger rocks because cavities will be created around them during the natural settling process (of the soil, gravel, and rocks).  Those cavities will shelter critters.

Compost soil was used to fill in the remaining post bases and grape cuttings were planted at the base of a couple of posts.  The Center Post’s habitat, Dano’s Great Newt Grotto, incorporated a healthy transplanted jasmine vine rootball and short vine strands.  Those short vine strands will quickly thrive and climb up the waiting stake, to the Center Post, and then off in both directions along the cross wires.  Short stake “fences” were made around a couple of the post planting to keep foot traffic from destroying the plants.  The planted cuttings were then mulched with old straw to protect the soil from heavy rain.

Vines at base of posts -- caged and mulched.

Vines at base of posts -- caged and mulched. Jasmine is far left, next to tallest stake. Grape is right, inside short stake fence.

So exciting to have a planting in place.  Training the vines up the posts and weaving a living wall with flower and fruit vines will be fun.  What neighbors?  Oh yes, we have neighbors to the back of us, behind the vegetation wall.

Enjoy the regeneration of spring.

…………………………………………………………………… Tony

Dec 102010
 
Zen Canyon Snake Pit -- slate stacking completed

Garden Log:

1. Completed slate stacking to bring Zen Canyon Snake Pit’s ceiling flush with surrounding edges, which finished the installation of the habitat.

Zen Canyon Snake Pit covered over with soil, leaves and branches.

Zen Canyon Snake Pit covered over with soil, leaves and branches. The topmost slate of the slate-layered chamber will support a branch/twig/stump/log pile. That pile of organic material will be a thriving animal habitat as it breaks down, soon to be thrown onto the compost.

2. Dug out soil around irrigation zone #3’s last riser, in corner of back garden, to expose the tee connection.  Threw the soil on top of Zen Canyon Snake Pit.

3. Cleaned magnolia leaves off spa deck and on pathways in back garden — thanks Glory!  Leaves were dumped on top of fresh soil just thrown on ZCSP.

4. Began stick debris pile on top of Zen Canyon Snake Pit; sticks were from dying birch and miscellaneous piles around the yard.

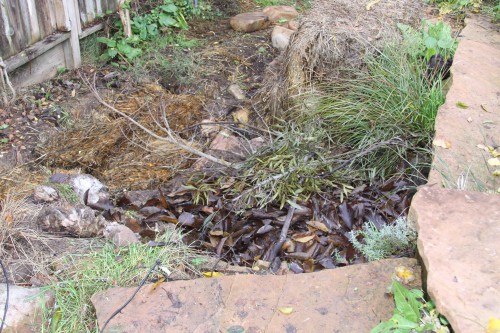
5. Tossed old straw “tiles” into the trench that was the base of Rock Pile Planter.

6. Harvested persimmon fruit from neighbor’s tree.  Thanx for the persimmons, Sunny!

You the Habitat Gardener:

1. What a great session in the garden today.  Always a good day when an animal habitat is completed.  All the ideas, the what-if’s, the how would that be’s, the plans and sketches, the gathering of materials, the actual work (imagine that!) to manipulate space and materials are over.   Sometimes, finishing a habitat installation is anti-climatic, especially one that has been in my mind for months, maybe years.  But today’s completion of Zen Canyon Snake Pit brings our back garden to a new stage.

Now that Zen Canyon is bridged over with slate, we can begin to create an organic debris pile (sticks, tree limbs, etc.) on top of it.  Debris Pile Food Court is born!  Where there once was a hole in the garden, there will be a through-fare for the wheelbarrow and a large-item compost pile, that is, a debris pile.  We will keep the debris pile to one edge of the top of the snake pit and have a path for the wheel barrow over the other edge of it.  The filled over  “canyon” will become the base, or floor, of the debris pile, a new habitat in of itself.

Habitat stacking in the garden — the debris pile will shelter many microbes, insects, snails, slugs, spiders, and small animals feeding on them.  Perhaps some of those critters will seek shelter below the debris pile, in the staking of slate and stone  or in the two toilet tanks that make up the cracks and crevices of Zen Canyon Snake pit.  And all the while the debris pile breaks down we will be making soil.  Eventually most of the organic debris pile will be tossed on the nearby compost pile.  We’re making soil!

Debris Pile Food Court above Zen Canyon Snake Pit

Organic garden debris, too large for the compost pile, will be piled to create the Debris Pile Food Court above Zen Canyon Snake Pit. Perhaps larger critters will live below ground and feed on the debris pile's smaller critters above.

2. Today began the creation of  Debris Pile Food Court (Garden Log #2,3,4) — a  pile of sticks , logs, stumps, tree limb sections piled above Zen Canyon Snake Pit.  The debris pile will stand alone as an animal habitat, friendly to critters from microbes to insects to birds, amphibians, and reptiles.  Maybe even a garden snake!  Soil was thrown at the base of the pile to help sustain such biodiversity.  Maybe some of those microbes working (breaking down) the wood pile will take shelter or food from the soil floor of the pile.  Maybe that soil floor will be where the insects, snails, and slugs lay their eggs to keep the explosion of life going.  And, that soil floor, rather than the slate floor is was, will also keep water available to further sustain animal life.

3. The magnolia leaves (Garden Log #3) cleared of our spa deck and off our garden slate pathways was thrown on top of Debris Pile Food Court’s soil base.  Not great science, just wanted some place to put the leaves till our compost pile area is ready AND the leaves under the wood pile will add to the bio-diverse habitat of the now-planned soil-leaves-wood pile.  Note that I said the leaves were only cleared away from the spa deck and the pathway; all other leaves will be left to break down on our small grass patch and in the beds of the back yard.  What a mess!  But that mess will provide great nutrition,  shelter, and insulation for the soil microbes, larger critters, and plants ALL WINTER LONG.  And be assured, by spring, the ground cover beds and grass will not only have recovered, but will be thriving and happy.

4. Used straw tiles (Garden Log #5) to fill up the base trench to the demolished Rock Pile Planter.  Pulling off a few inches at a time from the end of the bale made nice thick, wet, heavy, partially-decayed slabs, or tiles, of straw.  Perfect for filling in the thin trench.  Eventually that straw will break down and leave a nutritious layer for the soil.  Sure beats the adobe that was in the trench.  And, in the meantime, the area has been leveled off and will have wheelbarrow access to the area.

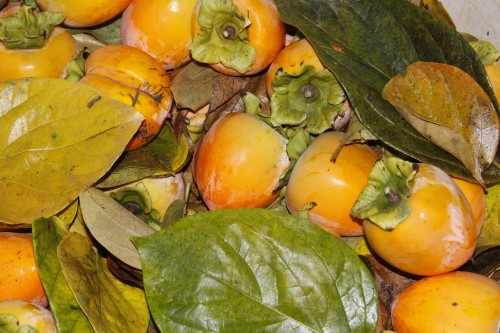
5. Persimmon Harvest (Garden Log #6) is here.  The beautiful fruit is ready to pick off of our neighbor’s tree.  Enough fruit is left high in the tree, beyond reach with a 12-foot orchard ladder, to treat the birds of the neighborhood.  No fruit goes unused — we will throw any harvested damaged fruit into the Earthworm Bin.  Had some fun harvesting persimmons this year by using Nature-provided packaging.  We used persimmon leaves between layers of fruit — the leaves provided a soft cushion AND are ripe with beauty.  Will be fun to pack away some leaves as we pull out the fruit.  Now you know what old phone books are good for; they have thin, absorbent paper that easily makes a flower or leaf press.

Hachiya persimmon fruit and leaves

Hachiya persimmon fruit and leaves, pulled in from the cold (some frost on fruit).

Competed installing one animal habitat and started another — what a great day!

Tony

Nov 272010
 
Salamander Sunny Swimhole remodelled and flushed

Happy Thanksgiving weekend all!

So nice to have a little more focus on what we have to be grateful for.

Garden Log:

1. Emptied the kitchen compost into the Earthworm Bin.

2. Emptied the kitchen wash basin onto Salamander Resort.

3. Removed leaves and sunken oak wedge from Salamander Sunny Swimhole, the pond over Salamander Resort.  Flushed pond water.

4. Potted red currant and jostaberry starts that were saved during the demolition of Rock Pile Planter.

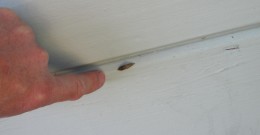
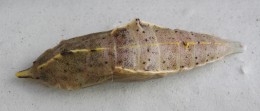
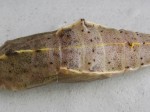
5. Photographed what was a caterpillar yesterday and is a pupa today.  Just outside our front door, where the sun’s warmth is wind-sheltered, a caterpillar was crawling along the siding yesterday.  In just about the same space today — “You haven’t gotten very far Little One, have you?”  Well duh!  That caterpillar may be there all winter.  In fact, it’s not even a caterpillar any more.  It’s a chrysalis, attached to the siding with a sticky silk ball.

Butterfly chrysalis on wood siding.

Butterfly chrysalis on wood siding.

Close-up of butterfly chrysalis

Close-up of butterfly chrysalis. Yesterday it was a plump, cylindrical, light-green, soft-skinned caterpillar. Today it is forming angular, hard ridges (natural I-beams) and a dark, thick crust.

You the Habitat Gardener:

1. The nights are getting chilly, even for cold-blooded invertebrates.  I like to use planty of straw in the Earthworm Bin to keep it well insulated and to create a compost-breaking-down situation.  All the die-hard microbes will generate heat, that will allow the straw and kitchen food to breakdown (from the microbes, of course), which puts off still more heat.  The bottom will fall out of this Pyramid Scheme when we run out of kitchen scraps to add to the compost — “Quick!, gather up those rotten fallen apples and feed them to the worms.”

2. The Salamander Resort, our 6-foot-deep habitat hole/cavern/rock, wood, and soil pile, still has an unplanted surface.  Intense soil making for now.  The surface has been covered with different layers of organics, including manure soil, oak leaves, wood chips, magnolia leaves, straw.  Great place to dump the kitchen washbasin, which is considered blackwater.  “Blackwater” is a notch more ecologically volatile than greywater because of either sewage (toilet) or food particles from the kitchen sink.  Sewage or food — all the same to a microbe.  So for our garden, we purposefully wash our dishes in a half bucket, let it cool, then dump it in non-food areas or on the ground being careful to stay away from any leafage or root crops.  Food particles and nitrogen-based “Earth-friendly” soap.  [Pill Bug to his family]: “Soup’s on!”  When in doubt, spread any greywater/kitchen water around then garden so you won’t drastically inundate any one plant.  And don’t forget to save the bottom of the wash basin for one of your favorite plants.  “Who will get all this yummy oatmeal flake- and baked eggplant polenta-infused water today?  Who’s been good?

3. My heart broke this week.  All the hard work I did to set up a cooler-than-cool pond habitat in Salamander Sunny Swimhole turned out to be a flop.  A cold snap, with some nights as low as 26 degrees (well, after all, this is sunny California!) set in and forced a lot of falling leaves.  Between the shorter days of low-angled sun, the flood of organics falling out of the air (leaves), and the lower temps, the half-barrel pond ecosystem could not keep up.  Murky water filled with fallen leaves AND a touch of “oil slick” on the surface.  It was the slick that told me this pond is going anaerobic — it’s being starved of oxygen.  All the precious muck that I saved during the the relocation plus the current conditions were just too much for it to keep up, for it to recycle life from the decaying matter being quickly added to it.  A note about the shiny, multicolored slick:  it’s a sign that there’s too high a concentration of nitrogen in the water, usually from muck on the bottom.

Sure, there’s some lesson to be learned here about our pond that went flop.  But the bigger picture lesson I want to convey is how freeing it is to learn from a mistake and to feel the satisfaction of having corrected it.  My heart broke not because the pond wasn’t working.  My heart broke because I was WRONG.  Don’t you just hate that!  I was so jazzed to include a neat piece of wood (a freshly cut oak wedge with rotted out holes) when setting up the pond.  What design, what art!  All my visions of tadpoles and other aquatic critters meandering through the wood’s passages, perhaps escaping a foraging raccoon, gone up in smoke.  How couldn’t this be Paradise?

Daily cleaning out of some of the fallen magnolia leaves postponed more effective action.  Luckily, I was smart enough to finally give up the ghost and hauled the wood wedge out of the pond.  Smelly!  Foulness that bespoketh rotteneth (Old English, so old that they may not even know about it).  Clearly an inorganic situation, AKA anaerobic, going on in the pond.  How cool once the wood wedge was out.  More water could be added to make up for the displaced wood.  Also, I was able to scoop out leaves and muck more easily.  Then I gave the pond a good flushing with fresh water.

Be careful when flushing a pond, especially if you are flushing with city water which might contain health-related additives in it.  Those additives, like fluorine and chlorine, will bubble out if you let them sit overnight.  But straight from the city-water hose to the pond in an excessive amount might overwhelm some critters and kill them.  But back to Tony’s state-of-the-art foul pond.  For our pond, it was already foul, so I flushed it, flushed it, and then flushed it some more.   Hey, we’re starting over, both me and the pond.  The pond will recoup and achieve it’s ecosystem.  I will find something to be right about, again, some day.

Stay posted — I’ll post a pic of the pond’s success as it comes.

Tony

Oct 222010
 

Garden Log:

  1. Fed Mexican lime, Kaffir lime, and Lemon Guava kitchen scraps before mulching with earthworm harvest, wood chips, granular spore, and a sprinkle of water.
  2. Chop and drop throughout the back garden.
  3. dock and comfry grown for "chop and drop"

    Western Fence Lizard Liar with dock (left) and comfry (back right) grown for "chop and drop". Insects will come to eat the red currant berries (taller green plants alongside slate) and lizards from the rockpile habitat will feast on the insects.

    Wood chip mulched Hister Beetle Huckleberry Habitat, apple and pear trees, and Sea Lion Splash’s kiwi vine.

  4. Harvested white clover mulch from under Norwegian Hill Basket to seed/mulch Salamander Redwood Lodge with white clover.
  5. Digging in SSSC’s Lower Chamber, slowly but surely. Lined waiting toilet tanks with cardboard over holes in bottom. Filled tanks with wood chip.
  6. Prepared 15 gallon tubs with layered alfalfa and clay from SSSC. Tubs stored near Earthworm Box and will be used to mix material into box contents. Also layered 15 gallon tubs under deck that wick water to jasmine and grape; top layer is adobe so rotting alfalfa does not stink too bad.
  7. Tied string around split trunk of huckleberry.

To you, the Habitat Gardener:

  1. About those 15 gallon nursery pots used to wick water (#6, above), that’s my solution to not having drip irrigation EVERYWHERE. Sure, everywhere would be most efficient, but I do wallow in procrastination at times. The wicking pots, also provide a place to make poor soil good soil, as the mulch breaks down AND it’s habitat. All that soil/clay/mulch/wood chips/water — you know there’s a multicultural neighborhood going in those pots.
  2. “Chop and Drop” (#2, above) is about carbon farming — plants grown for their ability to harness the sun’s energy and turn it into green leafage.  Both the comfrey and the dock in your garden can be grown “as weeds”, leafing out wherever you want to build soil.  The plant grows, you chop it down, NOT PULL IT OUT.  That dock or comfrey plant will grow back, you will chop it again, Pete and repeat.  The beauty of your labor will be making soil.  As the plant grows, it will send out roots.  Chop to ground level, and those roots die back AND, in the process of dieing back, leave organic matter in your soil.  Not only has the plant busted its root down into the soil, but also it will leave some of the water and organic matter in it behind when the above-surface life is cut from it.  And even better, the comfrey will also nitrogen fix the soil.  In other words, the rhizomes clinging to the comfrey roots will release nitrogen into the soil when the root dies back.   Emphasis on “when” there because most gardeners that grow comfrey as companion plants in their gardens don’t realize that significantly more nitrogen is released when the rhizome dies back.  Chop to the ground, release nitrogen to the subsoil, mulch the surface with the nitrogen-rich leaves, and know that that comfrey plant will thrive again, to be chopped again.  You might want to get to the comfrey before it goes to seed; controlling the rhizome spreading plant is challenging enough.  Also note that the comfrey is a very medicinally useful plant.  As for dock, the very young (inner) leaves are tasty raw by themselves and in salads.  Don’t forget that mega salad you’ve got growing in the back of the garden, AKA “the compost pile” — dock greens are a great way to jumpstart the pile.
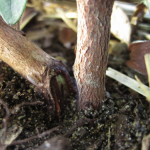
  3. For huckleberry trunk repair (#7, above), I used 1/2 of garden twine (knotted one end and split the string open) to create a thin strand that will decay by the time the plant is ready to bust loose from the bondage. I had thought that the huckleberry shrub was dying from a water issue but then found that the trunk was split during planting. Since planting this spring, the wound seems to have healed partially and the plant has bulked up — it’s going to live! The berries will be enjoyed by many critters, including me and the birds. Check out the pics to today’s repair job for that split huckleberry trunk below or at: BEFORE and AFTER.

Save a life (yes, plants count), enjoy a berry or two.

Tony