
Trellis habitat House Finch Hideaway will support a thicket of vines.
Garden Log (what I did):
1. Completed installation of the trellis habitat, House Finch Hideaway.
You, the Habitat Gardener (reflections):

Trellis wire on center post. Note the crevices in the post's wood -- great shelter for small criters willing to make the climb.
1. Today’s job was to finish the trellis habitat, House Finch Hideaway. For previous entries re this project, see HFH — Installed Posts and HFH — Trellis Wire Installed. To most people, this job would be a trellis installation to create back-fence privacy, period. But for me, this project is a great opportunity to grow food for our table. Also, the trellis will provide food and shelter for critters. I see a thicket of perennial jasmine vines with knock-me-out fragrant flowers, a sun-basking wall of hanging fruit, subterranean crevices and water for amphibians, a ladder system of wood posts for insects and lizards, perches and nesting shelter for birds, and a rising sun backlighting enormous grape and fig leaves.
.")
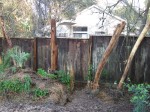
Top cross wire loosely in place (before stapled). Note the post's lean away from the back fence.
After laying out and attaching the top wire loop with a Gripple lock, I realized that the wire was not as tight as I wanted it to be. The distance between the two center posts was too long. A 5th post, a true center post, will bridge the gap and prevent the someday vegetation-laden wire from sagging in the middle. All the better to know now that my original plan for four posts was unrealistic. Besides we can milk this mistake. I’ll get the most out of changing the plan by a) charging more for the job, b) installing more beautiful driftwood in the garden, and c) installing a separate animal habitat when digging the hole for the new center post. About a) charging more — Oh well, I forgot this is an unpaid job. About b) more driftwood — YES!!! How better to fix a problem than to pull out the driftwood? Better yet, the center post is a union of two pieces of driftwood. About c) another habitat — Dano’s Great Newt Grotto is born; see my future post (I’m going to bed!).

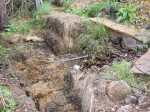
Base of center post yet to be backfilled with rock, gravel, and soil.
We want Center Post to rise about a foot above the 7-foot-high top cross wire. That one foot height over the wire will be a critter perch. Perhaps a bird, squirrel, or a very stupid insect or lizard (wanting to be so visible) will use the lookout. Our post is 9 and 1/2 foot long, so that does not leave too much wood to be buried below ground. First off, give up on the one foot and settle for a 6″ perch. Then, the post can be buried 2 feet (9.5-7.5) — way not enough for that heavy piece of tree to stay vertically suspended AND support the heaviest load of the trellis. What to do?
 supporting center post pole (right).")
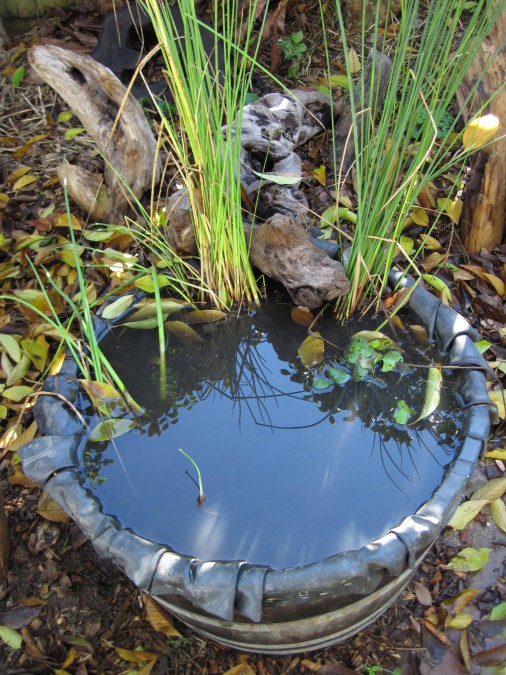
Center post base (left) supporting center post pole (right). Note the available critter shelter between the two pieces of wood.
Another piece of driftwood comes to the rescue. The second piece of wood to become Center Post is a glorious redwood root section. Being of redwood root stock, it is extremely dense, insect resistant and strong. That piece is dug into the ground about 5 feet and snugly holds up the center post pole. In fact, the base piece perfectly cradles the post piece, making a perfect lean forward away from the fence. Perhaps that lean away from the fence will keep the someday rotting posts from crashing through the back fence. Fences make good neighbors AND busting up the fence between you and your neighbor makes for trouble. Therefore, the heavy and strong Center Post has a slight lean away from the back fence.

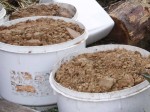
Grape cuttings at left end post. The small "wood chip" pieces of grape vine will make friendly mulch for the soon-to-thrive vines.
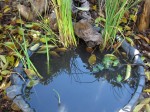
Plenty of rocks were used to fill in Center Posts’ hole. The rocks will better pack around the wood posts because they will not compress like soil fill does. Also, the rocks and gravel will help the posts stay dryer in the ground, which will slow down their rotting. Not only will water filter through the gravel better than soil, but also the rocks and gravel will not retain moisture like soil or clay does. Less water retained means dryer posts. I also like the use of the larger rocks because cavities will be created around them during the natural settling process (of the soil, gravel, and rocks). Those cavities will shelter critters.
Compost soil was used to fill in the remaining post bases and grape cuttings were planted at the base of a couple of posts. The Center Post’s habitat, Dano’s Great Newt Grotto, incorporated a healthy transplanted jasmine vine rootball and short vine strands. Those short vine strands will quickly thrive and climb up the waiting stake, to the Center Post, and then off in both directions along the cross wires. Short stake “fences” were made around a couple of the post planting to keep foot traffic from destroying the plants. The planted cuttings were then mulched with old straw to protect the soil from heavy rain.

Vines at base of posts -- caged and mulched. Jasmine is far left, next to tallest stake. Grape is right, inside short stake fence.
So exciting to have a planting in place. Training the vines up the posts and weaving a living wall with flower and fruit vines will be fun. What neighbors? Oh yes, we have neighbors to the back of us, behind the vegetation wall.
Enjoy the regeneration of spring.
…………………………………………………………………… Tony