Feb 142014
 
Golden Crowned Sparrow in Tulip MagnoliaTwig Pile

Twisty Toad Tunnel is a hugelkultur wildlife habitat in our Northern California garden.  I severely pruned back a lichen-covered and overgrown tulip magnolia tree and stuffed the cut-down limbs, prunings, and cutting into The Bog — a hole in our garden where we make soil by winter and grow crops by summer.  Much of the magnolia cuttings are elegantly draped with lichens, surely a beneficial source of wildlife shelter and food for animals microscopic to crawling to larger.

The beginning of this post focuses on video installations of Twisty Toad Tunnel.

The last paragraph provides you with a link to learn more about Twisty Toad Tunnels’ rich lichen contribution to out wildlife habitat hugelkultur.

Installation of Twisty Toad Tunnel


Learn more about Twisty Toad Tunnels’ rich lichens

Today (the 14th) is my monthly blog post at Native Plants and Wildlife Gardens.  This month, my blog article discusses how lichens support wildlife habitat in our residential gardens.

Enjoy!  And please comment me under my NP & WG article if you have any comments or questions.

Tony

Jan 142014
 
Lizard Oak Tunnel and Cellar Wildlife Habitat Installation supplies

Lizard Oak Tunnel and Cellar Wildlife Habitat Installation supplies.

What a lot of fun I had today, working with my daughter, and installing two habitats.


To see the blog post of these installations, go to my monthly blog post at Native Plant and Wildlife Gardens.


To see some video of the installations, click away!:

Lizard Oak Tunnel 1 of 5

Lizard Oak Tunnel 2 of 5

Lizard Oak Tunnel 3 of 5

Lizard Oak Tunnel 4 of 5

Lizard Oak Tunnel 5 of 5

Enjoy your wildlife habitat and food forest garden.

Tony

Dec 142013
 
Earthworm Box surounded by leaf pile

Earthworm Box surounded by leaf pile. The organic leaf pile will help keep the Earthworm Box a few degrees warmer during the winter months.

As I discuss in my monthly Native Plants and Wildlife Gardens blog article, “Over-Wintering Insects in Insulating Leaf Pile“, I wanted to insulate our earthworm boxes to take a little of this winter’s chill off the critters inside the boxes.  Surrounding the boxes with leaves accomplish 2 goals: 1) insulating the boxes to keep them warmer, and 2) provide more over-winter leaves to provide more wildlife habitat in our garden.   Here are 4 videos of the project.  Enjoy!

20131211 Earthworm Box Insulation Barricades 1 of 4

Tony McGuigan discusses his plan to keep outdoor earthworm boxes warmer by surrounding them with leaves and straw.  The organic fluff, (leaves and straw) will create an insulation barrier on the outside of the earthworm boxes.  Over-wintering insects will thrive in organic pile and move to the boxes, becoming food for the chickens when they are treated to the opened boxes.  Come warmer weather, the frame to hold the leaves/straw in place will be removed. ***Toast and Marmalade, Tony and Anita’s two Bard Rock hens, visit the earthworm boxes BEFORE construction.***

20131211 Earthworm Box Insulation Barricades 2 of 4

An in-process video of the construction project.  The frame is up; leaves are yet to be filled into the insulating spaces.

20131211 Earthworm Box Insulation Barricades 3 of 4

A pile of leaves is worked into the insulating spaces alongside the earthworm boxes.

20131211 Earthworm Box Insulation Barricades 4 of 4

***Toast and Marmalade, Tony and Anita’s two Bard Rock hens, visit the earthworm boxes AFTER construction.  Construction is approved by Toast and Marmie!***     Savouring the winter garden, enjoying anticipation of the coming spring’s wonder,

Tony

Aug 032013
 
Cozy Cottage Egg Farm 1st Egg

Cozy Cottage Egg Farm's 1st egg, layed by our Bard Rock hen, Marmalade. The coins are used for relative size: a Norwegian 5 kroner coin and a U.S. quarter (25 cents) coin. The eggshell was very thin and split open in the coop. Still yummy out of the fry pan!

Cozy Cottage Egg Farm 1st egg was layed!

Watch the video:


Happy habitat food forest!

Tony

Nov 132012
 
Great Green Bush Cricket on amaranth leaf.


You have landed on Day 2 in this 3-day series of videos depicting  amaranth seed collecting.  Enjoy!


First a video  re “Amaranth Seed Collecting”.   Today’s video is part 2 of 3 (1/day) for the series!   THEN some amaranth pics (below the video):


Amaranth Seed Collecting 2 of 3 videos

Amaranth in Tony’s Garden (pics):


Amaranth growing on Dragon Spine Ridge.

Amaranth growing on Dragon Spine Ridge. Note how the vibrant red-purple stands out in an otherwise green landscape. Note the "edge effect" provided by the amaranth plant -- it fills in the shrubbery between the overhead pine tree and the lower vegetation.


Great Green Bush Cricket on amaranth leaf.

Great Green Bush Cricket on amaranth leaf. Be careful -- look closely enough and YOU may go cross-eyed, too.


Amaranth growing next to Birdbath Beach.

Amaranth growing next to Birdbath Beach. Birds eat amaranth's ripe seeds. Note the wood perches that allow the birds a look-see before hopping down into Birdbath Beach. The rock and slate shard in the birdbath allow insects and birds to find their own "shallow end" to the pool.


Amaranth on the web:

I like the page “Growing Amaranth and Quinoa” at:

http://www.seedsanctuary.com/articles/growing-power-foods.cfm

Seed and Plant Sanctuary for Canada

                                                                                                      For chicken lovers: “Feeding the Flock from the Homestead’s Own Resources: Part Two”

http://www.themodernhomestead.us/article/Growing-Poultry-Feeds-2.html

Feeding the flock


Happy seed collecting and see you tomorrow.

Tony


Aug 202010
 

Garden Log:

1) Took a break from digging SSSC today but did water the clay in barrels and bins along the garden path. 2) Finally found the “missing” plans to Chicken Haven coop and pen

To you, the Habitat Gardener:

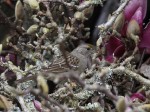
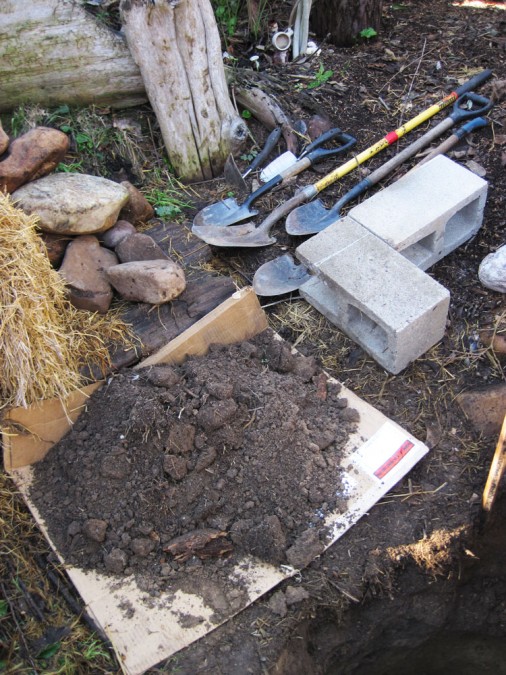
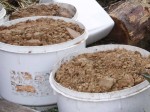
adobe clay from habitat installation awaiting fill stage

1) About the watering of the clay: A lot of that clay will go back into the hole that will become Salamander Shady Shallows Cellar. Some will get stored away for a future habitat installation. But for now, we want to keep the clay moist so it is usable — the hot sun will turn it into rock if it drys out. Not too much water, though. Too much water will drown the microbes and create an anaerobic (no oxygen) situation on the bottom of the containers. Smelly!, that’s anaerobic; think about decay, sulphur, methane, pew! So a light sprinkle of water will be just enough to offset the sun’s heat for a while. My plan so far (changes daily, and isn’t that fun!) is to install habitat features in the enormous hole waiting for our creativity. Oh, how I love being vague — “habitat features” could be anything, maybe even the kitchen sink. Actually that’s just a lead-in to what we will be using — enamel tiolet tanks. Yes, tiolet tanks saved from the dumpster at a water-reducing project I happened upon. Sounds like a fairy tale, doesn’t it? But better than a fairy tale, these enamel tanks will last FOREVER under ground. A lasting tribute to the amphibian world in the form of stone-like caverns with organic bedding. Dig hole. Fill hole with tiolet tanks packed with wood chips, tree limbs that jut out of the hole, cardboard tubing, straw bale “tiles”, and lots more wood chips. Pour in liquified clay (INGREDIENTS: clay, water. Not an approved source of daily nutrition!). Let it sit, and sit, and sit. Serves 500-1000 amphibians, and trillions of microbes! But why the liquified clay? Thanks for asking.

The vaulted Lower Chamber of Salamander Shady Shallows Cellars

Liquified clay will refill the hole and allow it to self support itself. The hole is large enough that although The Lower Chamber is vaulted, we wouldn’t want to run the risk of having it collapse. A collapse of any magnitude would change the surrounding garden features. This is a small garden (that’s why we are going underground!) and we don’t want the nearby slate path or planting beds to collapse. And what fun to visualize the liquid clay solidifying and creating structure to the hole. The sides, and the vaulted lower chamber, will become one again with the same clay that was dug, scooped, and shaved from the hole. The liquid clay will tightly fill around the wood chip-filled tiolet tanks and the rising tree limbs. Once the toilet tank wood chips and tree limbs decay (yes, will take years), hollows and tunnels, respectively, will be created. The hollows will have soft, moist organic bedding and the tunnels, installed at a climbable slope, will have critter-friendly soft, moist organic footing. A pond on top of the filled-in hole will allow salamanders, toads and frogs to breed in our garden. True, a small pond, but at least it’s wet, it’s water. Water — the g

iver of Life. And from that pond, perhaps an amphibian or two will seek refuge and everlasting happiness below in Salamander Shady Shallows Cellars. I love happy endings.

2) Check out my plans for Chicken Haven below.

Chicken Haven plans -- East view

Chicken Haven plans -- Top view

Chicken Haven plans -- South view

Chicken Haven plans -- West view

Chicken Haven plans -- West view and notes

Chicken Haven plans -- North view

Dream, and record it!

Tony