Nov 172012
 
Fennel Pond – a critter’s pondside dream resort.

Day 2 in this 6-day video series: Preparing patio pots for winter veggie planting.

First a video  re “Patio Veggie Pots”,  then some patio veggie planting pics (below the video):

Patio Veggie Pots 2 of 6 (video):


Patio Veggie Planting (pics):


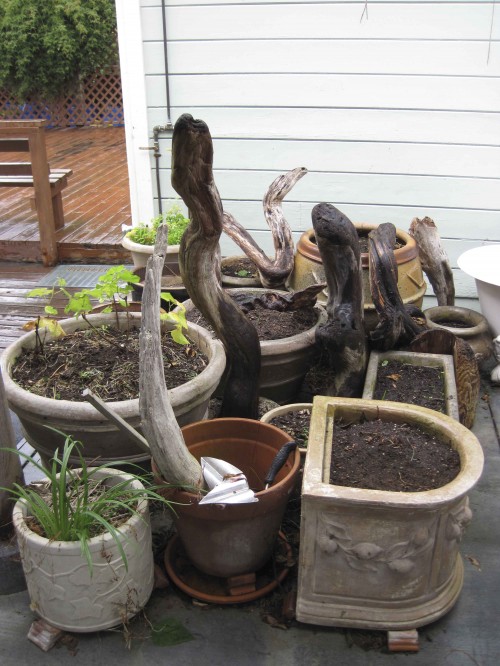
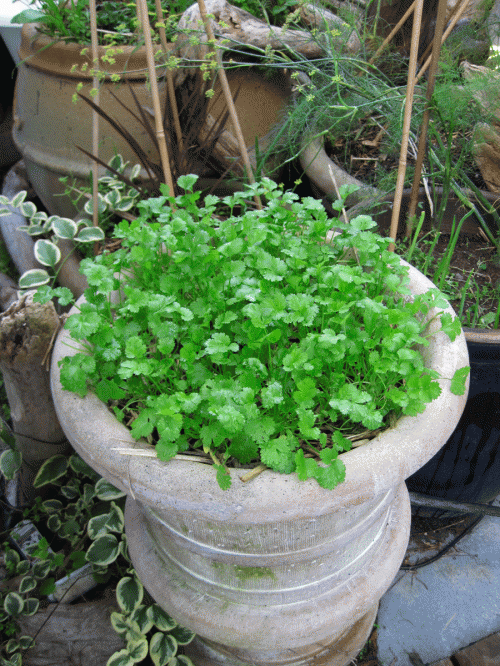
Patio Planting Pots patiently wait for seeds and seedlings.

Patio Planting Pots patiently wait for seeds and seedlings.


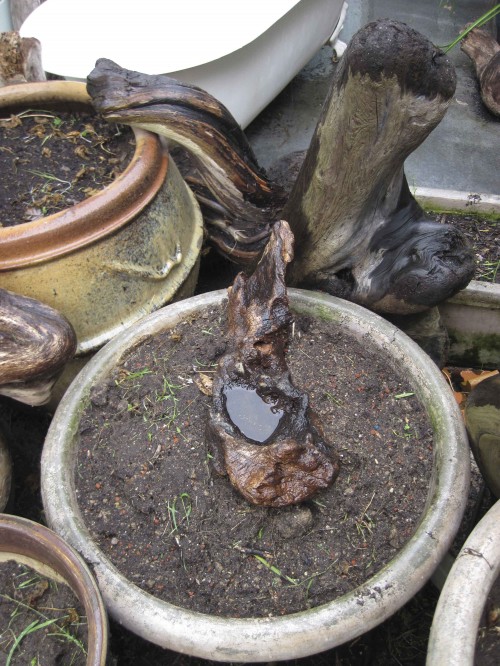
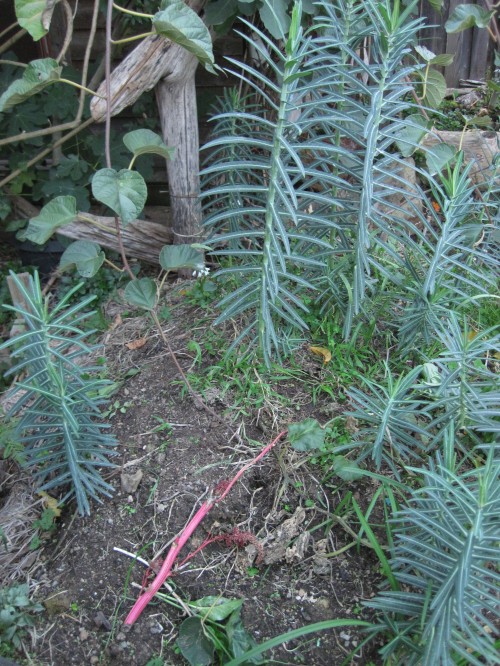
Fennel Pond sits high up in the clouds of fresh soil.

Fennel Pond (the spent fennel was just removed) sits high up in the clouds of fresh soil. Think like a critter!


Fennel Pond provides critters with water.

Fennel Pond provides critters with water. AND, some microbes and aquatic creatures call Fennel Pond home!


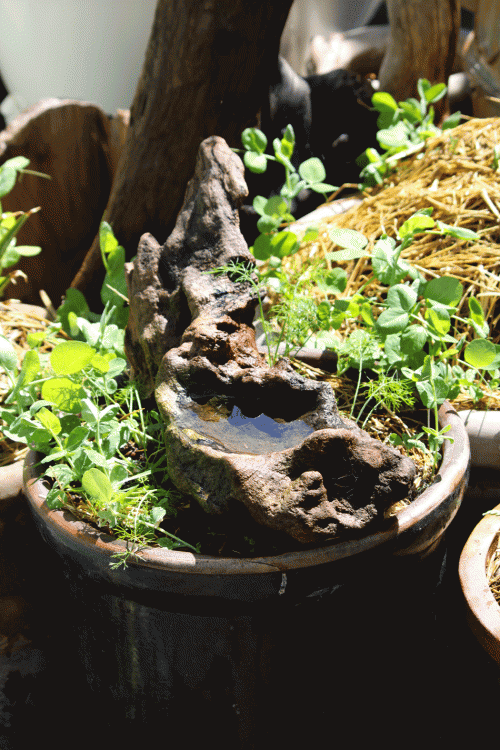
Fennel Pond – a critter’s pondside dream resort.

LIFE comes to Fennel Pond, a critter’s pondside dream resort, in older times. Imagine you, the kneeling child, lost in the wonder of whirling Life in the shallow pool of Fennel Pond.


Happy planting veggies on your patio and see you tomorrow.

Tony


Nov 162012
 
Zone 1 Herb Garden means quick access for the kitchen.

Day 1 in this 6-day video series: Preparing patio pots for winter veggie planting.

First a video  re “Patio Veggie Pots”,  then some patio veggie planting pics (below the video):

Patio Veggie Pots 1 of 6 (video):


Patio Veggie Planting (pics):


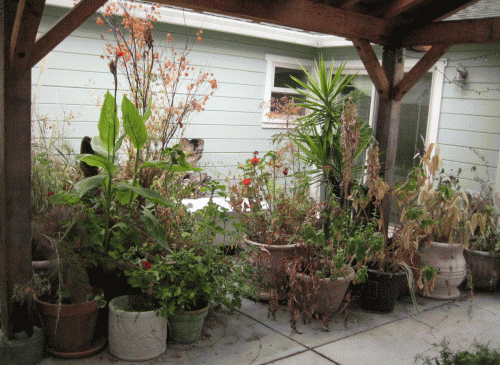
A past life – a patio filled with non-native, non-food-producing plants.

A past life – a patio filled with non-native, non-food-producing plants. Most of these plants were eventually removed to make way for growing veggies; especially those pots on the left were replanted.


Zone 1 Herb Garden means quick access for the kitchen.

Zone 1 Herb Garden means quick access for the kitchen. Permaculture practice at work: the herbs are within easy reach. They will be used more often and will receive more love.


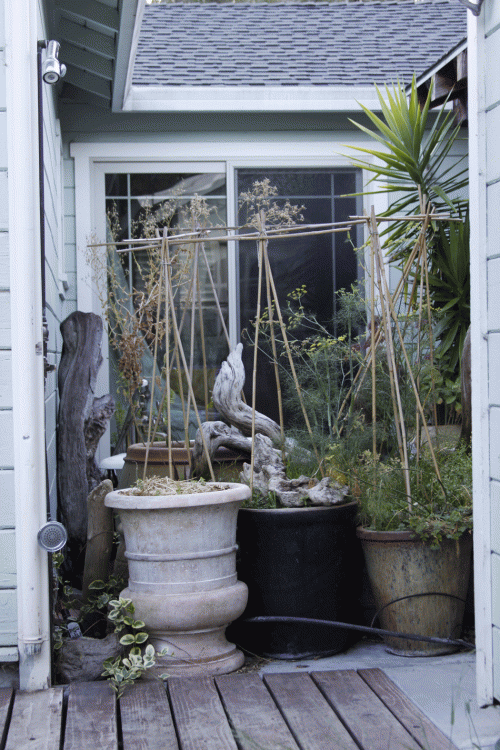
The end of the vegetable growing season in the patio pots.

The end of the vegetable growing season in the patio pots. Note the fennel gone to seed. Also note the privacy trellis made of bamboo teepees, a fun course for vining snap peas.


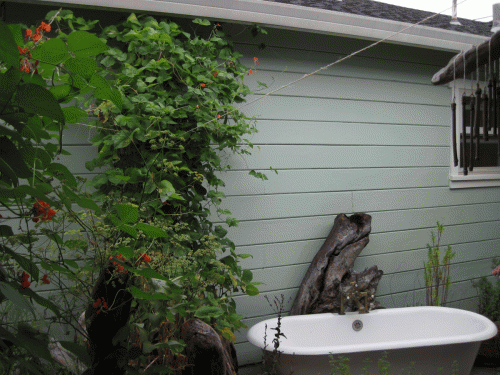
Patio Veggie Pots in their glory.

Patio Veggie Pots in their glory with mature fennel and still-flowering scarlet runner beans.

Happy planting veggies on your patio and see you tomorrow.

Tony


Nov 142012
 
Food For Thought, Sonoma County Aids Food Bank, Forestville, California

Day 4 in this 3-day series of videos (BONUS video!!!) depicting amaranth seed collecting.  Today’s video is a field trip to Food For Thought, the Sonoma County Aids Food Bank, in Forestville, California.

First a video  re “Amaranth Plants at Food For Thought”,  then some amaranth pics (below the video):

Amaranth Plants at Food For Thought:


Amaranth in Food For Thought’s Garden (pics):


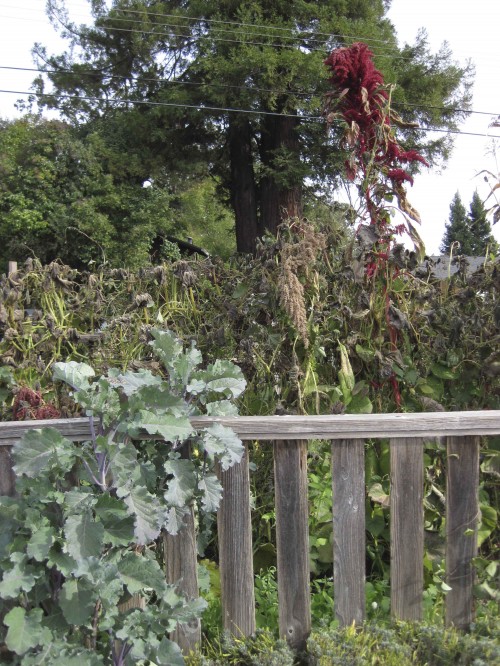
Amaranth (red and green) along a fence.

Amaranth (red and green) along a fence. 8 feet high!


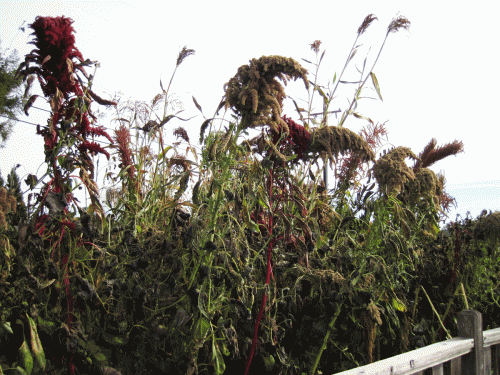
Close-up view of red and green amaranth varieties.

Close-up view of red and green amaranth varieties. Swayin’ in the wind, waiting for harvest.


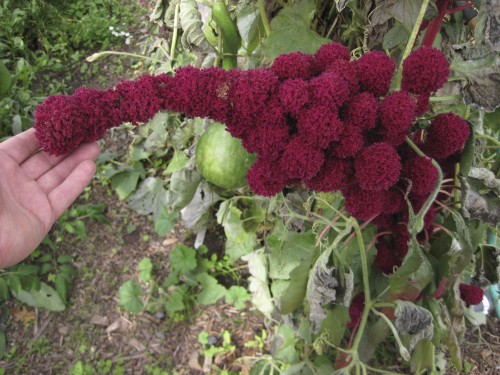
Elephant head amaranth (Amaranthus gangeticus).

Elephant head amaranth (Amaranthus gangeticus). This species grows 2-3 feet.


Close-up of elephant head amaranth.

Close-up of elephant head amaranth in the Food For Thought garden.


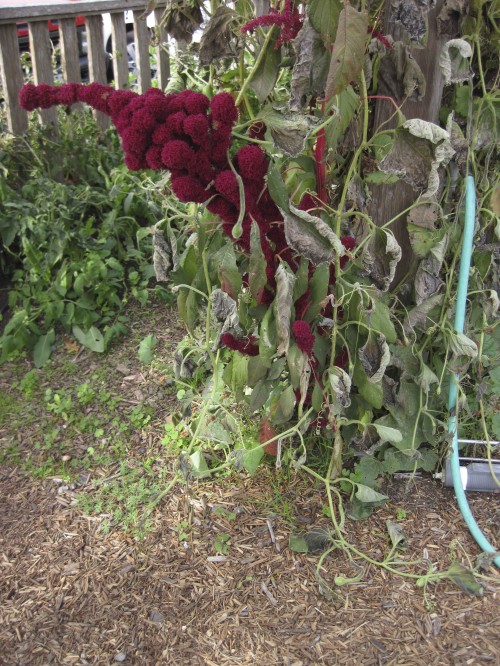
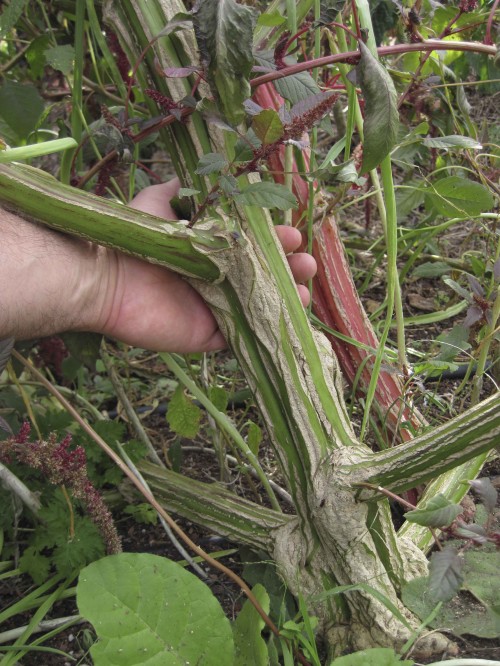
Massive red amaranth with green stalk.

Massive red amaranth with green stalk leans over. A shrub! Note the stalk's ridges which give it girder-like support. Also note the small offshoots that display the red flowers.


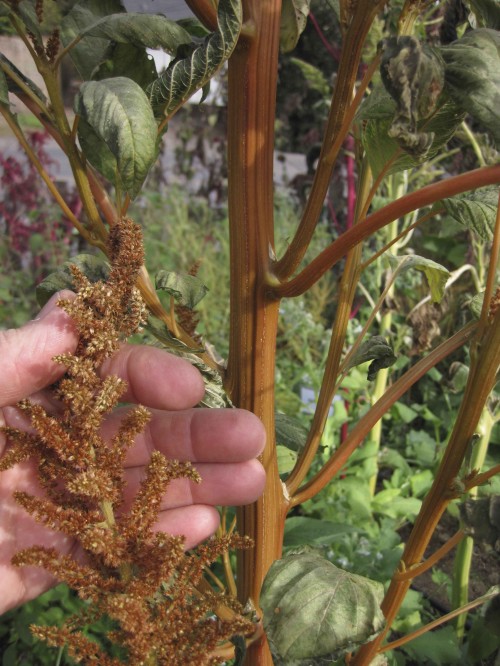
Amaranth with golden stalk and flowers.

Amaranth with golden stalk and flowers.


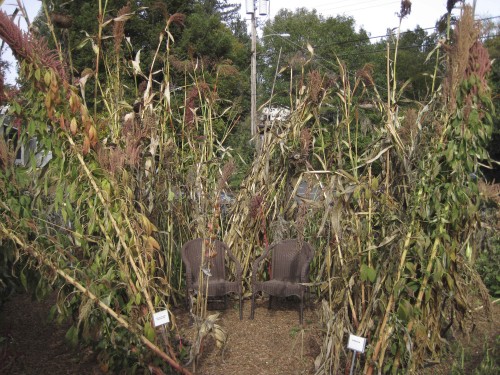
Garden at Food For Thought

Relaxing, restoring, rejoicing with amaranth, sunflower, and garden love.


Food For Thought, Sonoma County Aids Food Bank, Forestville, California

Food For Thought, Sonoma County Aids Food Bank, Forestville, California. Food bank for the community, with a lush food-rich and critter-happy garden. http://fftfoodbank.org/


Want to learn about Food For Thought?  Go to:


Happy amaranth and see you tomorrow.

Tony


Nov 142012
 
Mom’s chair oversees the amaranth seed harvest.

You have landed on Day 3 in this 3-day series of videos depicting  amaranth seed collecting.  Enjoy!


First a video  re “Amaranth Seed Collecting”.   Today’s video is part 3 of 3 (1/day) for the series!   THEN some amaranth pics (below the video):


Amaranth Seed Collecting 3 of 3 videos


Amaranth in Tony’s Garden (pics):

Amaranth Seedlings (left of sunflower)

Amaranth Seedlings (left of sunflower). Note how thin and frail they are in comparison with the also very young sunflower seedling.


Young Amaranth Plant

Young amaranth plant. Note the structurally supportive leaf veins.

Amaranth stalk overwintering in Norwegian Hill Basket.

Amaranth stalk overwintering in Norwegian Hill Basket. This stalk was thrown into this veggie bed for the winter; perhaps some young plants will emerge in the spring. An experiment!


Tony’s Last Amaranth Seed Harvest:

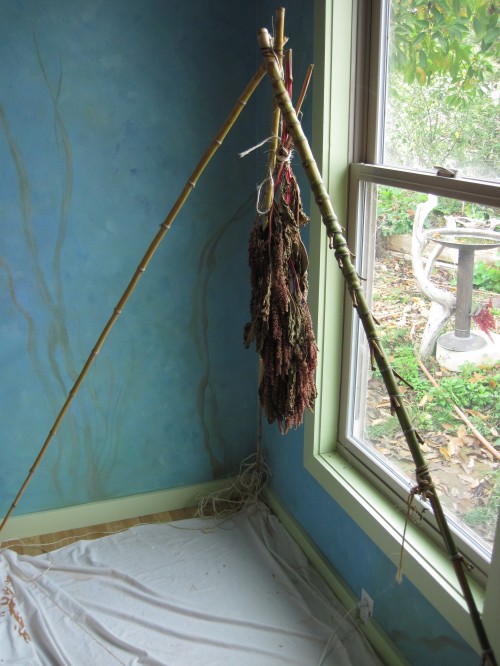
Stalk-hanger tripod in shop.

The stalk-hanger drying tripod was moved into the shop a week ago, to eek out the last of the amaranth plant’s seeds. The father plant is just outside the window, growing alongside Birdbath Beach.


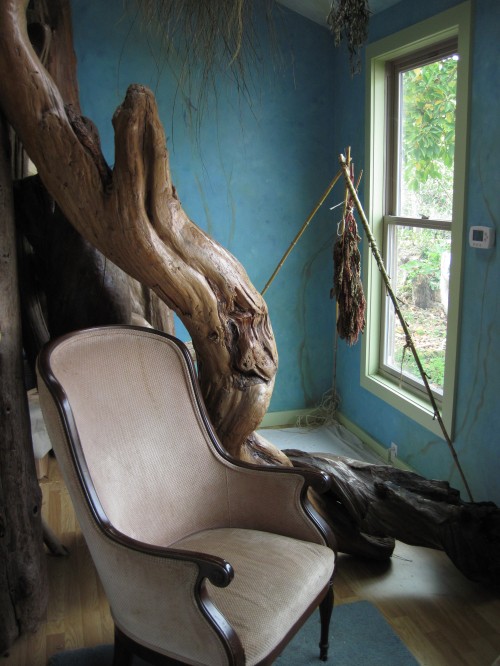
Mom’s chair oversees the amaranth seed harvest.

Mom’s chair oversees the amaranth seed harvest. As she, Ann, would say, "This place is the cat's meow!"


Happy seed collecting and see you tomorrow.  Good night, Mom.

Tony


Nov 132012
 
Great Green Bush Cricket on amaranth leaf.


You have landed on Day 2 in this 3-day series of videos depicting  amaranth seed collecting.  Enjoy!


First a video  re “Amaranth Seed Collecting”.   Today’s video is part 2 of 3 (1/day) for the series!   THEN some amaranth pics (below the video):


Amaranth Seed Collecting 2 of 3 videos

Amaranth in Tony’s Garden (pics):


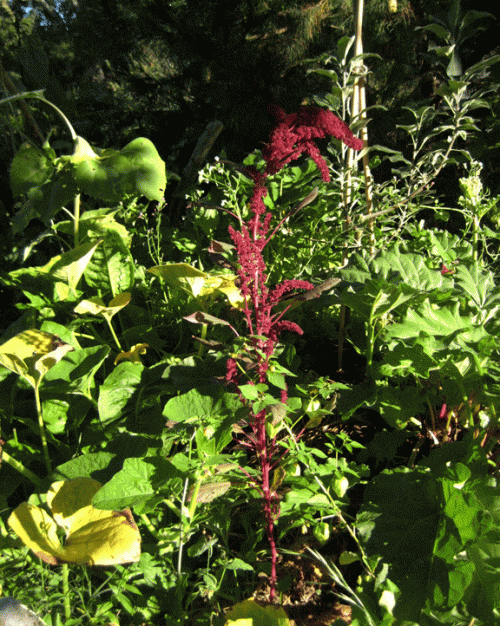
Amaranth growing on Dragon Spine Ridge.

Amaranth growing on Dragon Spine Ridge. Note how the vibrant red-purple stands out in an otherwise green landscape. Note the "edge effect" provided by the amaranth plant -- it fills in the shrubbery between the overhead pine tree and the lower vegetation.


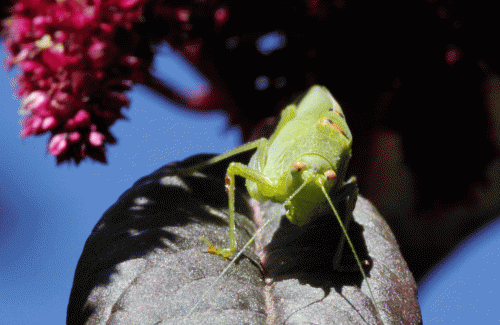
Great Green Bush Cricket on amaranth leaf.

Great Green Bush Cricket on amaranth leaf. Be careful -- look closely enough and YOU may go cross-eyed, too.


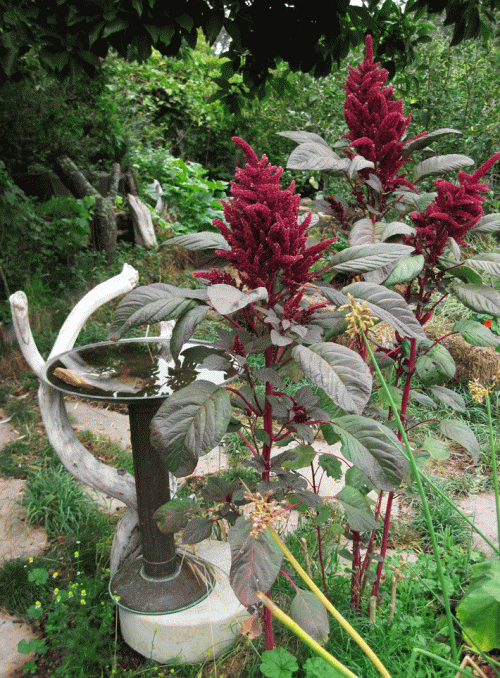
Amaranth growing next to Birdbath Beach.

Amaranth growing next to Birdbath Beach. Birds eat amaranth's ripe seeds. Note the wood perches that allow the birds a look-see before hopping down into Birdbath Beach. The rock and slate shard in the birdbath allow insects and birds to find their own "shallow end" to the pool.


Amaranth on the web:

I like the page “Growing Amaranth and Quinoa” at:

http://www.seedsanctuary.com/articles/growing-power-foods.cfm

Seed and Plant Sanctuary for Canada

                                                                                                      For chicken lovers: “Feeding the Flock from the Homestead’s Own Resources: Part Two”

http://www.themodernhomestead.us/article/Growing-Poultry-Feeds-2.html

Feeding the flock


Happy seed collecting and see you tomorrow.

Tony


Nov 122012
 
Collected and dried amaranth seed.


You have landed on Day 1 in this 3-day series of videos depicting  amaranth seed collecting.  Enjoy!


First a video  re “Amaranth Seed Collecting”.   Today’s video is part 1 of 3 (1/day) for the series!   THEN some amaranth pics (below the video):


Amaranth Seed Collecting 1 of 3 videos

Amaranth in Tony’s Garden (pics):


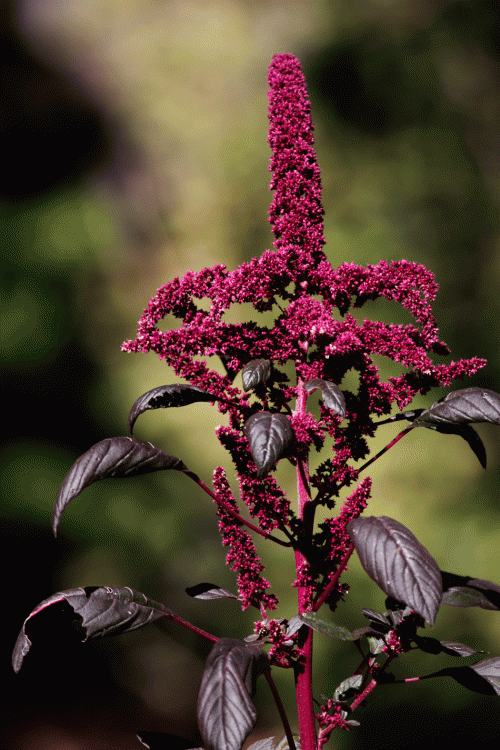
Amaranth plant (Amaranthus sp. L.)

Amaranth plant (Amaranthus sp. L.) can grow to 8 feet tall. A stunning plant in the garden, adding color and critter habitat AND a food source for the gardener.


Collecting seed AND giving insects/spiders time to escape.

Collecting seed AND giving insects/spiders time to escape.


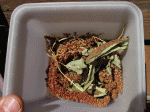
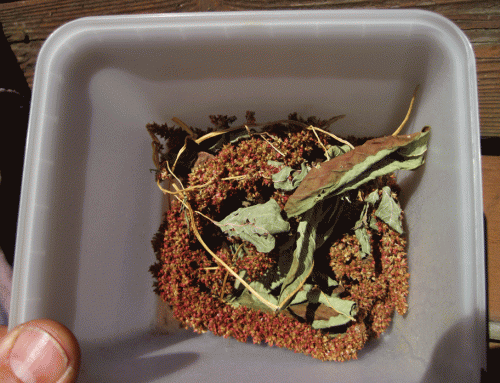
Collected and dried amaranth seed.

Collected and dried amaranth seed with dried flowers and leaves. The seeds are yet to be separated out of the dried plant.


Amaranth on the web:

Found this site, for some concise info: http://www.vurv.cz/altercrop/amaranth.html

amaranth from http://www.vurv.cz/altercrop/amaranth.html


Amaranth leaves and grain can be eaten; see The Dinner Garden for cooking instructions: http://www.dinnergarden.org/summerProduce.html

Amaranth plant by The Dinner Garden, http://www.dinnergarden.org/summerProduce.html


Happy seed collecting and see you tomorrow.

Tony


Oct 032012
 
Carabid Carapice Cabanas animal habitat installation.

Carabid Carapace Cabanas animal habitat installation completed.

Carabid Carapace Cabanas was about planting Jerusalem sage in the thin strip of poor soil between our driveway and the property line fence.  Our neighbors want low maintenance.  We want a thriving animal habitat, food forest, critter wonderland.  Tall order for a 12″-wide strip of soil, destined to be a low-water hydrozone.  We had the plants — the Jerusalem sage was from a pruning debris (debris, HA!!!) pile on street in front of a local park.  Got to do somethin’ with this plant.

The Before

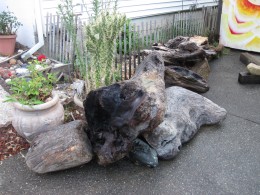
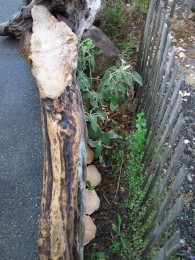
Area for planting, habitat installation -- the Before. Note the intentional low-water zone with cacti, potted plants, and tree "boulders".

The Jerusalem sage had been freshly pruned and was fairly vibrant, full of life.  I knew that it was a fairly drought-tolerant plant, so I wanted to get it established now in some organic mass, only to be able to leave it be in future years.  I had some wood chips on hand from a local arborist friend (thank you, Tom!); they would work well to mulch the area.  I scraped out , loosened the topmost layer of crud (you call this soil?!) and worked the sage cuttings down a couple of inches.  The cuttings came from a large bush, perhaps 6-8 feet wide at the base.  They were about 3 feet long — a long flat curve for at least 18″, then swept up.  What a hassle to plant these cuttings with a 90 degree bend in them.  Orrrrrrrrrrrr, how lucky am I?  Yes, the right-angle-shaped cuttings were perfect for starting these cuttings.

Because the Jerusalem Sage cuttings were to be transplanted at the end of our dry season, they needed every possible advantage to create roots and thrive.  Being able to horizontally plant the first 18″ of the cuttings under moist mulch was such an advantage.  So be it — the cuttings were scratched in, the stalk ends were positioned pointing skyward, and mulch was used to snug them into place. But I want MORE MULCH.  How rockin’ is this project?!  More finally gets to be better!

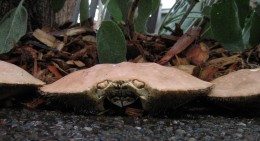
And, in order to get more wood chips and surrounding oh-so-natural duff on top of the unstable sage stalks, I will want something to build up along the driveway, a higher edge to be able to pile up the mulch.  Thinking.  Thinking, still.  Yes!  Those dungeness crab carapaces that I have been drying on top of the refrigerator are finally going to make it into the garden.  All those come-and-get-it calcium and sea mineral-rich shells have finally qualified for an animal project, an animal habitat.  “Habitat?”, you ask.

We are still not home.

We have left for the day. Please leave any packages with our neighbor, Mrs. Pill(bug), at carapace number 3. (The Beetles)

This installation, Carabid Carapace Cabanas, is not merely about planting, saving, giving a new lease on Life to some forgotten Jerusalem sage plants.  We (I love to include innocent people) have jumped to Art in the Garden.  Sea Life in the garden.  Cool looking, I-want-a-car-like-that looking, scary-even-when-dead looking gifts from Nature!  There must be some hint of an animal habitat here somewhere.

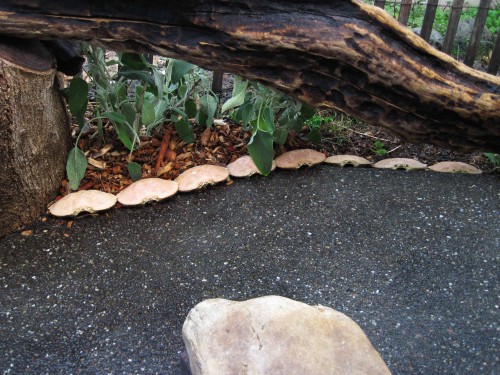
Of course!  Critters will live, thrive, make house, set up neighborhood in the crab shells.  Here we go, then.  The carapaces are lined up along the edge of the driveway next to the cuttings’ planting area.  More mulch and wood chips are worked around the sage stalks and up against the crab shells.  The carapaces/shells are hunkered down into their embankment, albeit only an inch or two high, of mulch/chips.  We got our MORE organic matter around the stalks, onto the planting area.  That much more nutrients and moisture will be available for the sage cuttings.  Peace on Earth sings loudly.

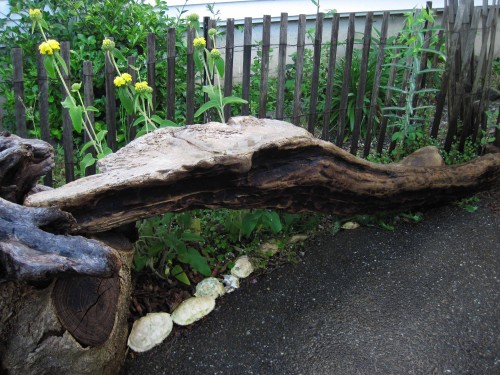
Carabid Carapace Cabanas completed -- the After

Carabid Carapace Cabanas animal habitat completed -- the After.

Mulch surrounding Jerusalem sage cuttings

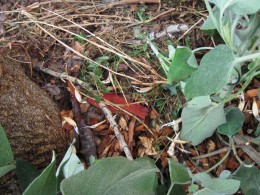
Wood chips hold the Jerusalem sage cuttings in place. Duff gathered from the immediate surroundings soften the just-planted look AND provide an inoculation of microbes for the new planting.

Planting of sage complete

Planting of the Jerusalem sage is complete. Note how thin the strip of available planting space is and how the neighbors' yard is about growing pea gravel. The drought tolerant sage was grown on our side of the fence to minimize water on their side of the fence. More water = more weeds, and we don't wish that for our neighbors wanting low-maintenance.

The planting bed, that is, the mulch and wood chips and sage cuttings, were kept moist for a couple of weeks.  And the cuttings made it!  They lived happily ever after in their little corner of the driveway.  The wet winter season was a boon for the newly developing roots.

By spring, the plants were vibrant and boasting blooms.

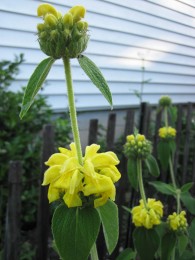
Jerusalem sage blooms in May

Jerusalem sage blooms in May.


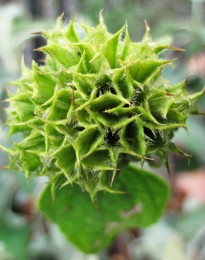
Jerusalem sage flowerhead without petals

Jerusalem sage flowerhead without petals. This spring vibrant green flowerhead will become a dry brown cluster of seeds come summer.

And the blooms kept coming.  Very nice that by spring and early summer, this transplant was so obviously thriving.  But then, tragedy.

I walked out the front door one day to find the row of cabanas had been DISTURBED!  What is this?!  Whooooooo did this?!  What has the culprit done to our fine art project?  (You should be upset, too.)  Oh, how disappointing.

A breath.  Another breath.  A glimmer of light coming.  Possible okayness working its way into my carapace of a brain.  A quick swirl of positive possibility.  Sure.  Why not?  This could be a good thing.


Who ate my oatmeal?!!!

Animal habitat, complete with animals. Last fall's art has become this spring's microbe mix.

That was close.  I nearly forgot why we had installed this animal habitat in the first place — to attract critters and give them a place to thrive in.  And now we have it; we have success.  There are messy, slimy, uncouth critters here on our driveway, in the smack middle of suburbia.  How great!

Last night’s critter was looking for food.  That very smart critter was looking through the line of cabanas because it knew that insects and mollusks (slugs and snails) live in the cabanas.  My bet is that the dinning critter got some meal because of the extensive disruption of the crab shells.  And, the diner left us a gift.

Every time a critter visits your garden, it leaves a trace of microbes.  That’s good critter etiquette.  And those gifted microbes will introduce themselves (microbe etiquette) to the fauna also, previously, in your garden.  And there will be biodiversity, and there will be happiness throughout the land.

Tony


Sep 202012
 
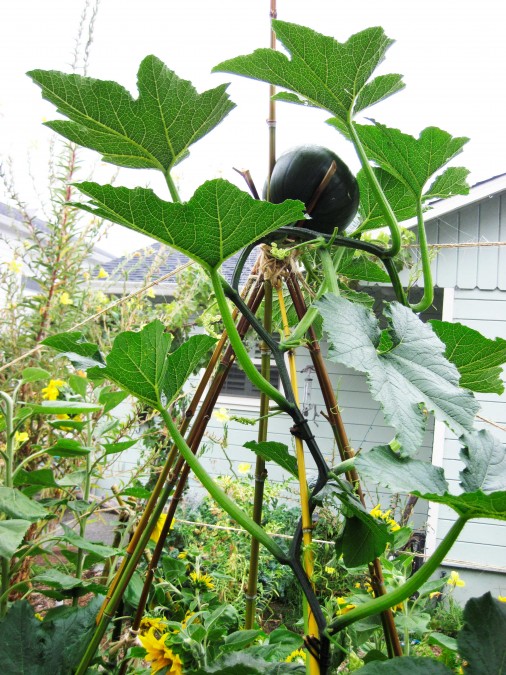
Pumpkin Atop the World

My birthday present from my daughter this year was some help in the garden. We constructed a bamboo trellis for pumpkin vine and a twine corral for sidewalk-side sunflowers. The pumpkin vine has grown beyond the teepee apex and a young pumpkin sits in the apex crotch of bamboo. And, IT’S GROWING! The sunflowers below are, for the most part, contained within the garden twine "fencing" provided by the rectangular-shaped bamboo pole corral. Read on!

Nap, anyone?

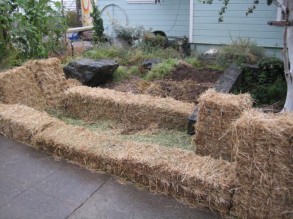
Straw Bale Recliner Bed in 2008

The planting bed alongside our driveway is named Straw Bale Recliner Planting Bed, or Straw Bale Recliner, for short.  I gave the 20′ x 10′ bed that name because straw bales were used to frame it.  To start the bed, 3 feet of adobe soil was removed the entire 200 square feet — many wheel barrow fulls of adobe carted away, some to our back yard, some down the sidewalk to a neighbor looking for clean fill.  Then, rice bales (less germination than wheat) were used to make a rectangular shaped box.  Some bales were stood on end; that much more organic material to rot in place and make soil and home for decaying straw-loving creatures.  Alfalfa straw was used to line the bed – yummy nitrogen-rich straw that would enrich the soon-to-be soil.  One side of the rectangle had bales propped up at an angle – that was the “recliner” side.  Comfy place to hang out till we started to fill it.

Then the planting hole was filled with yard debris from wherever it could be found, but no ivy, please.  Months of adding organics and soil mixes.  Months of growing green manure only to chop and drop it in place – pumpkin/squash is my favorite expendable green manure.  Such luscious large leaves later lacerated to litherines.  (poetic license with a capital L!)Squash for chop-and-drop soil making.

Soil making mix — juicy sugar-laden fresh plants, fallen oak leaves from down the block, hedge trimmings, magnolia limbs, fruit tree harvests, miscellaneous weeds and grasses, last year’s old straw.  Mix it, turn it, water it, AND REPEAT.  Crop after crop, a labor of love to add organic matter to the soil and encourage soil microbes, soil critters, and even critters that might leave the soil.  Hey, who brought this warthog home?!

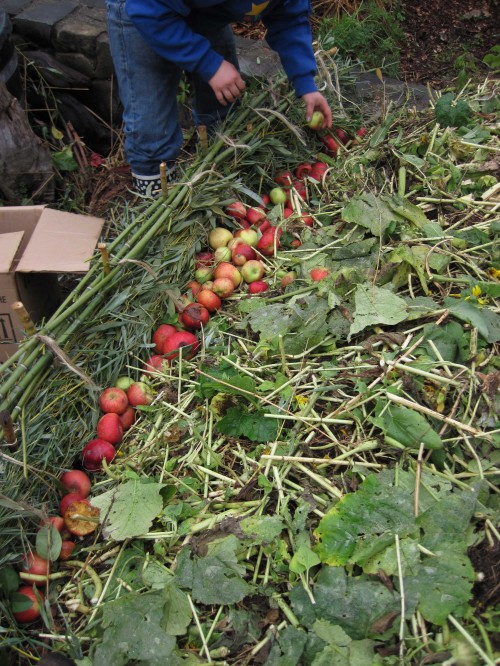
Apples and greens to feed the new crop

Apple harvest and squash greens to feed upcoming garlic crop.

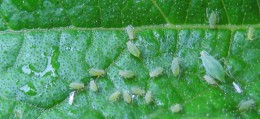
Four years of garlic by winter, sunflowers by summer and now we have rich soil.  We also have a healthy crop of aphids and other insects enjoying Straw Bale Recliner Bed.  Are aphids a problem?  Of course not – they are sugar and protein packets stuffed with bacteria.  Alive aphids are food to some critters; many insects feast on aphids.  Amphibians, reptiles, and birds will feast on those insects.  Dead aphids are also food to other critters – insects and soil microbes to the rescue!  So, those aphids-abundant (no, not “infested”) squash leaves will be all that more nutritious when churned into the soil.

aphids on squash leaf

Aphids contribute to a rich soil's environment.

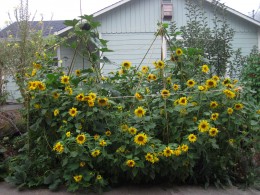
This year’s sunflower crop is stunning.  Would have loved to plant earlier than the first week of July, but such is life.  BUT, this year, a pumpkin vine emerges from the bowels of Sunflower Earth and winds its way toward the sky.  There are actually two pumpkin vines growing up the two teepee trellises; the left vine is both more substantial and has a larger pumpkin at its end.

Sunflowers and pumpkin vine.

Happy sunflowers and a trellis cradled-pumpkin.


For each of the two “chosen” pumpkin vines (one right and one left), the vine was trimmed of off-shoot vines as it climbed up the bamboo trellis.

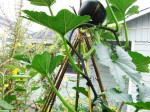
Pumpkin sitting pretty in top of left trellis.

A pumpkin wedges itself tightly atop the left trellis.

Trimming off competing vines ensured faster and stronger growth up the pole for the chosen vine.  The vine was also twirled around the poles and through garden twine to keep it from falling back into the bed.  All flowers, both male and female (the females usually have a small pumpkin already starting to grow) were plucked off.  No competition, please; we have a pumpkin to grow at the top of this trellis!

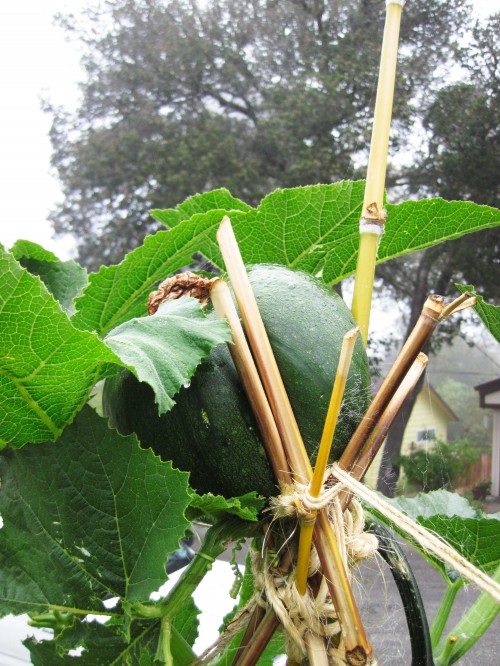
tight squeeze!

A pumpkin grows between trellis poles. The locked-in configuration of the pumpkin will probably keep it from falling to the ground.


Have a great Halloween.

Peace on Earth.

Tony

Jan 112012
 
20120108-LTH-retaining-wall

Garden Log (what I did):
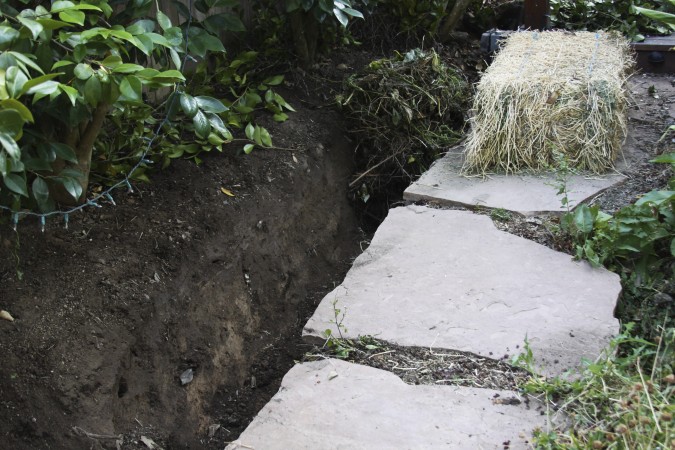
071509 LTH -- soil harvest

071509 Leaf Trench Highway. Soil has been harvested from the trench, between the slate walk path and the planting bed. The trench will be prepped for more soil making, starting with a base of straw from the awaiting bale. Since this picture, lots of organics have been composted onto and into the trench. Those organics include: tree prunings, wheat straw, alfalfa straw, oak leaves, carbon harvest (for example, pumpkin vines), twigs and stout tree limbs, wood chips, and horse manure. Beautiful, rich, high quality tilth soil has been harvested several times from the trench.

1. Constructed a low retaining wall to increase the soil volume of a planting bed, Leaf Trench Highway.  Leaf Treanch Highway got its name back in 2007 when we were installing irrigation supply to our garden’s back corner.  The water supply was trenched along a walk path, buried about three (3) feet and encased in 3″ perforated plastic drainpipe.  The depth and casement were to allow “mistakes” in the garden — a shovel could graze the drainpipe and might not break through and bust the water supply.  Lots of digging since then, and no busted trench pipe, yet.  The trench was called a “highway” because, when filled with leaves, or other organics, it’s a corridor for critters to move about the garden.

So, there we were, in 2007, with a sizeable 3-foot deep trench running along the property line’s planting bed.  We decided to use the trench to make soil; we would use the trench to turn compostable material into planting soil.
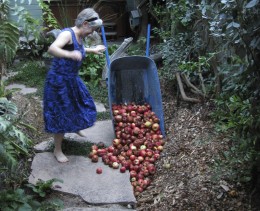
20110929-LTH-Apples

"Opps! Did I spill that?" No, Anita, Leaf Trench Highway is getting a rotten apple harvest -- Sebastopol's finest for our dear soil-making critters.

About every six months, the trench is dug up for a soil harvest.  That harvested soil is then used to amend the soil in the gardens.  And yes, sometimes waiting the six months or so is difficult.  But having fresh, new, teeming-with-microbe, alive! soil on hand when we do harvest is all that much more a treat after the wait.
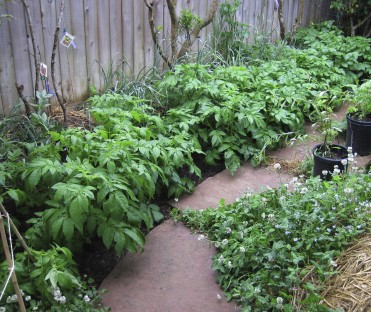
20100604 LTH -- potatoes

Potato (broad-leaved), garlic (along fence), red and white clover grow in Leaf Trench Highway in the summer of 2010. The red and white clover serve as both insectary and nitrogen-fixing plants.

This time around,  in 2012, I want to grow a crop above the composting trench.  I want us to produce a garlic and vegetable crop WHILE the trench is composting.  I have also found that new crop love a good compost under it.  BUT, the compost can not be too hot or the new crop will burn.  For this planting, there is a good base of wood chips, green manure, oak leaves, and a recent magnolia tree pruning.  Especially with the magnolia twigs and limbs, those bulky organics will supply microbes, miosture, and nutrients to the growing crop.  Also, as the crop plants grow, their roots will travel the moist, nutrient-rich paths along the decaying wood.  Great mulch for the coming dryer months.  Throughout the spring, we will harvest salad from the composting trench.  By July, the garlic will be ready to be dug up — harvest garlic, harvet soil.  Garlic for the kitchen, soil for the garden.
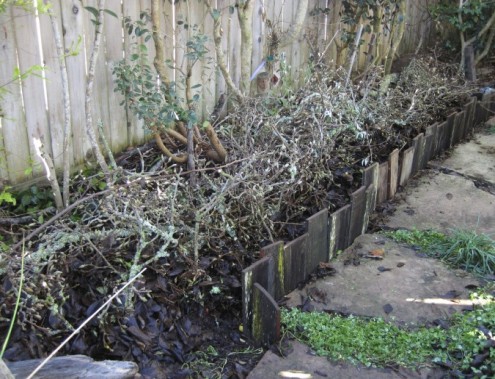
20120108-LTH-retaining-wall

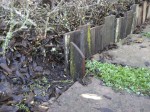
Low retaining wall built to increase the soil capacity of Leaf Trench Highway's planting bed. Old redwood fence boards were cut in two-foot lengths and pounded into the gap between the planting bed and the vertical slate border. Using a wood block between the fence board and the sledgehammer kept the fence boards from splitting.
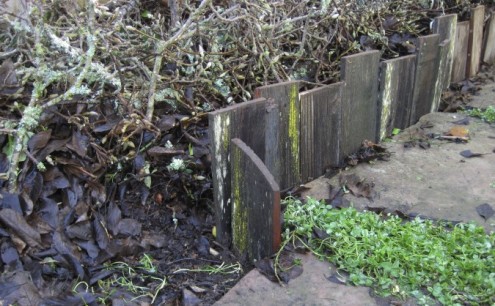


20120108-LTH-retaining-wall, close-up

20120108-LTH-retaining-wall, close-up. Note the beautiful mosses and lichens on the old fence board. Not only is this FREE!!! redwood fence board functional (it will last many years in the soil), it is also beautiful. Moist soil from the planting bed was rubbed into the board cuts to instantly age those fresh-cut surfaces -- we are talking art here! I am interested to see if that soil smear will promote moss growth on the top edges of the boards. Stay tuned.

2. Manure run.  Collected both hot (fresh) and cold (old) horse manure from my secret source (nothing personal).  The hot manure was laid down at the bottom of the fence boards to create a little heat for the wintering crops.  The cold manure, which is pretty much a sandy loam soil because it has broken down for so long, was thrown on top of the bed.  That cold manure was thrown into and on top of the magnolia tree prunings, enough of it to plant the crops in.
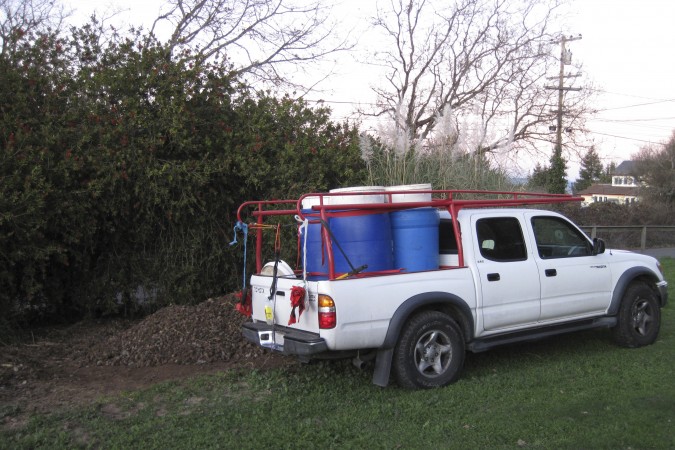
20120107-manure-collecting

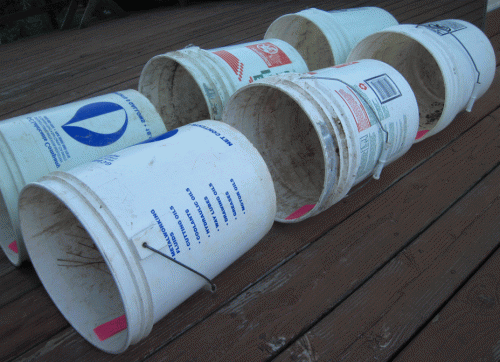
Collecting horse manure from a neighbor's pile. The bins/barrels help keep the job cleaner and easier. Using the barrels, my truck does not have to be washed afterwards and the manure can sit in the bins until ready for use. Sure is nice to load it once (into the barrels) but not have to clear it out of my truck's bed the same day. Note the looseness of the fresh (hot) pile at the rear of the truck. That pile was moved twice -- once to get it out of the way so the buried old (cold) manure could be harvested, then again to fill up the hole that cold manure harvest left. Perhaps in 6 months, that filled in hole will be cold manure soil itself. Just another example of our wondrous revolving World at work.
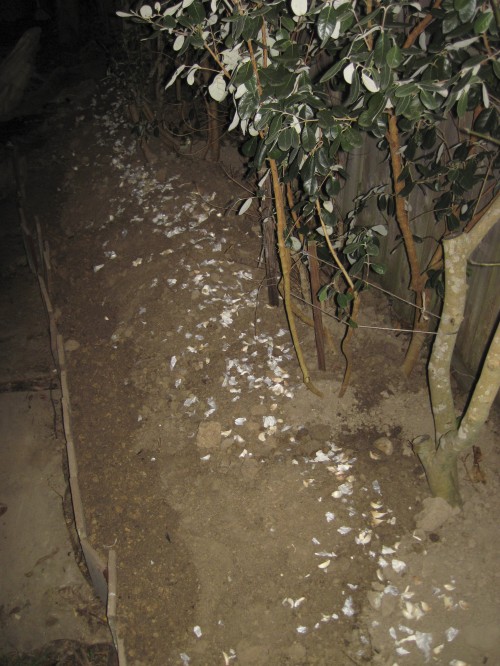
20120110-LTH-garlic-planting-2

It's late, but the garlic is in. Come tomorrow, I will throw a thin mulch of rice straw over the veggie seeds and garlic starts. Note how the low retaining wall of recycled (reused) fence board allowed enough soil to be added to the bed to cover most of the magnolia prunings. Will be exciting to see what crops actually do rise out of the straw mulch and to see how well they thrive in this compost, soil-making bed. Oh, did I tell you -- it's an experiment. 🙂

You, the Habitat Gardener (reflections):

1. Leaf Trench Highway is a major no-toll pathway in our garden.  True, there is often construction along this roadway, but the improvements are always worth it.  This year’s road upgrades include last year’s woodchip pile from Santa Rosa’s waterways cleanup (oak and willow), oak leaves from the neighborhood, our ridiculous Jack-in-the-Beanstalk pumpkin patch green manure, the magnolia tree’s prunings, hot manure, and cold manure soil.  Microbes party down!  All insects and amphibians welcomed.  Just add water, as the soon-to-come rains will do, and the entire length of Leaf Trench Highway will be a mess of healthy fungi, vegetables, flowers, microbes, crawly critters, and birds.  And that’s just at ground level.  The length of the trench, along the fence, is a fedge — food hedge, a permaculture term.  That hedge planting includes fig, pineapple quava, loquat, and pomegranate.

2. Our soil gets better every year as we grow more food each year.  And we share — without an atom of pesticide, herbicide, or fungicide, the trench and fedge will take on a natural balance.  The critters will get some of the planted crop, but by far, we will get our fair abundant share.

Happy soil making to you.

                                                            Tony


The Next Day and Night:

1. More cold manure soil was added to the bed tocover the garlic and to give the veggie seeds more soil to establish themselves in.
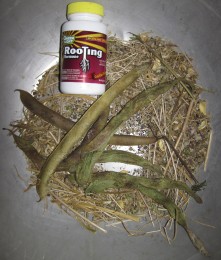
20120111-LTH-veggy-planting

Bowl-O-Seeds. Rooting powder was used to help the seeds germinate, a tall task during these wintery days.

2. The vegetable seeds were all mixed together with rooting powder (only because I didn’t have any mycorizzae spore on hand).  Life is good!, especially when I get to open dozens of seed packets that I prepared throughout last growing season.  Round and round, mixed in a large stainless bowl, or bucket, and dusted with a little love (spore or rooting powder).  Then I’ll carefully toss the seeds out onto a prepared planting bed — a dash here, a dash there, some over my right shoulder, some underhanded between my legs.  Most importantly, I get to have fun being ridiculous.  I get to plant way too many seeds.  Yes, I work hard to collect seeds all year long so that I can have a Chia Pet garden.  Too many plants that grow too much means I will eventually get to havest them, in whole or in part, and reap the green manure they are.  I will be harvesting carbon — all that alive, green plant material is merely bottled up sunshine to be poured onto the compost pile.  Sun >>> plants >>> photosynthesis >>> juicy packets of carbon >>> Tony’s compost >>> SOIL MAKING.  And with that carbon-rich soil, we will grow more STUFF, whether it be flowers, food, or fodder.  And we will live happily ever after.

The seeds I grew and collected and mixed together are cilantro, parsley, Queen Anne’s lace, bok choy, gopher plant, impatiens, fennel, round zuccini, calendula, “Primo” danelion, and chard.  Store-bought seeds that also became part of the mix are broccoli, cauliflower, and lettuce.  SOMETHING ought to grow!

3. The seeded bed, also with its garlic starts, was mulched with rice straw to keep critters away from the seeds and to keep the seeds moist for germination.  The mulch will also help the seeds receive waterings and/or rain without being washed out of the planting bed.  Perhaps too heavy a cover of straw to be left on the young sprouts.  BUT, I will keep an eye on the bed and will thin off some of the straw in a week or two.  I will be curious to see what plants actually do come up during these frosty nights and cool days.  Nice to have some ground warm perculating upward toward the seeds from the hot manure below.  Even if nothing were to germinate now, surely some seeds will germinate further down the year when the sun warms the soil and spring rains moisten it.  How fun to wait and see.
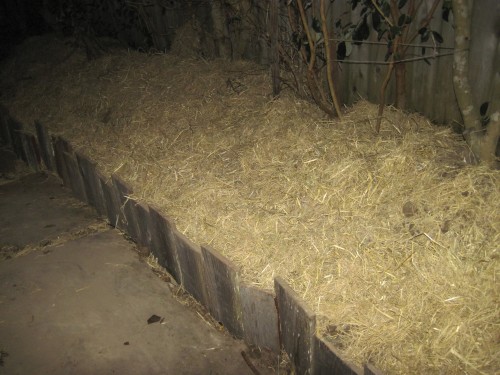
20120111-LTH-veggy-planting-mulched

The seeds have been sown and the rice straw mulch is in place. A little water. A lot of waiting. Soon enough, though, a forest of food and flowers.
 

Feb 212011
 
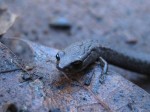
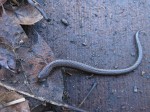
Close-up of black bellied slender salamander.

Garden Log (what I did):

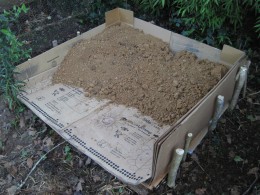
3-sided carboard storage bin for adobe soil.

3-sided carboard storage bin for adobe soil.

1. Made a 3-sided cardboard box for storing adobe (clay) soil.

You, the Habitat Gardener (reflections):

1. Time to get to some serious gardening in during these wonderful warm days of winter.  First that comes to mind, after the long list of jobs that I am procrastinating, is to get some better soil on hand.  Many ways for me to improve our garden’s soil — fetching oak leaves from the curb, collecting fallen leaves and rotten fruit from under a neighbor’s persimmon tree, hauling a truckload of free horse manure, or buying a truckload of mycellium-rich compost from a mushroom farmer.  Those are just a few ways that are currently easiest for me.  As with the infinite wonder of soil, how to improve it is also infinite.  Yes, I do like to gravitate to the FREE, or at least fairly inexpensive, sources of material.

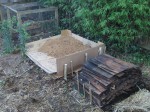
The adobe bin between stacked roofing shakes and the compost bin.

The adobe bin between stacked roofing shakes and the compost bin.

I will want to empty the 55-gallon plastic drums that I use for collecting soil/manure/compost material.  Right now, half of those bins/barrels are filled with excavated adobe soil from the depths of Salamander Resort (see Watered Clay).  What to do with the adobe?  Lucky for me, we have some extra room next to our compost bins.  We’ll pile the adobe there and feed the compost with it over the years.  Adobe by itself is a tough sell for plants.  But mix that adobe into already rich compost and wala!, you have a superb mix of soil tilth (consistency) and nutrition.  A back-the-truck-up visit to our town’s cardboard dumpster and gathering some pruned shrub limbs is all the supplies we’ll need to create an outdoor storage bin for the adobe.

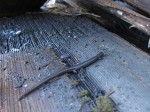
A slender salamander discovered between wooden roofing tiles (shakes).

A slender salamander discovered between wooden roofing tiles (shakes).

Clearing a space in this out-of-the-way part of the yard proved interesting.  First off, you should know that the immediate yard was reclaimed by ivy, thick ivy.  Sheet mulching a couple of years ago has proven effective in keeping down the ivy.  And when clearing away the stack of roofing shakes that were next to the compost, I found out just what a great habitat the back yard is.  Salamander Haven!  Sheets and sheets of moist cardboard covered under decaying straw — the black bellied slender salamanders (Batrachoseps nigriventris) of our neighborhood have thrived here.  Dozens were under and in the small roofing shake pile that I re-organized to make room for the adobe bin.

Black Bellied Slender Salamander

Black Bellied Slender Salamander. Note the minimal front AND back limbs.

I wanted a flat surface to create the cardboard adobe bin/box.  Getting the surface flat mostly meant sorting through some ivy vines (no sheet mulching here) and the crumbly wood shakes that were at the bottom of the pile.  Lots of salamanders to avoid hurting, too.  After piking out the shakes worth saving, I made a pile of the old scraps and some rich soil to house some of the salamanders not insulted out of their habitat.  All that was then covered with the thickest cardboard to form the bottom of the bin.

Close-up of black bellied slender salamander.

Close-up of black bellied slender salamander found in wooden roofing tile stack.

True, perhaps a very rough day for some relocated salamanders, that is, those that went off into the surrounding vegetation to escape the upheaval of their Roofing Tile Palace.  But, also a good day for those that will stay in the immediate area.  Not only do those local salamanders get new accommodations in a well-stacked highrise apartment complex, but also they get yearly renewable membership to Anita’s Adobe Assembly.  Actually, the salamanders will probably not be too interested in the adobe clay pile itself.  My guess is, though, that the moist underneath and sides of the clay pile will be this summer’s, and many summers to come, happenin’ place if you’re a sally.  The clay pile will keep cool and moist long after the surrounding soil dries up from warmer weather.  That moisture-laden microenvironment will attract much food and shelter for the salamanders.  So, salamanders, sorry for the unannounced housing move — hope the neighborhood improvements make up for any inconvenience.
Adobe anyone?

…………………………………………………………Tony