Nov 082012
 
Transplanting tree collard cutting - 2

You have landed on Day 3 in this 5-day series of videos depicting propagation of tree collard cuttings.  Enjoy!


First a video  re “Collard Propagation”.   Today’s video is part 3 of 5 (1/day) for the series!   THEN some collard tree pics (below the video):


Tree Collard Propagation — 3 of 5 videos


Transplanting Tree Collard Cuttings for Propagation (pics):

Transplanting tree collard cutting - 1

Transplanting tree collard cutting - 1 of 4. Note the bend in the cutting. Could be very difficult to stab this cutting into the ground and keep the leaves off the soil-mulch surface. But working with what we have, we'll lie the cutting on its side. The extra length of cutting (not pruning it back because of the bend) will allow more root development and better ensure propagation.


Transplanting tree collard cutting - 2

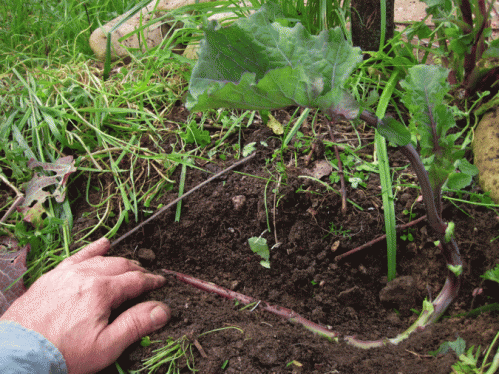
Transplanting tree collard cutting 2 of 4. Perfect fit for this tree collard cutting that has two 90-degree bends in it. Permaculture principle #1 = the problem is the solution. Because of its twists and turns, this cutting has primo real estate in the topsoil layer – look at how well the cutting, or new root system travels horizontally, along the rich microbe-abundant topsoil layer.


Transplanting tree collard cutting - 3

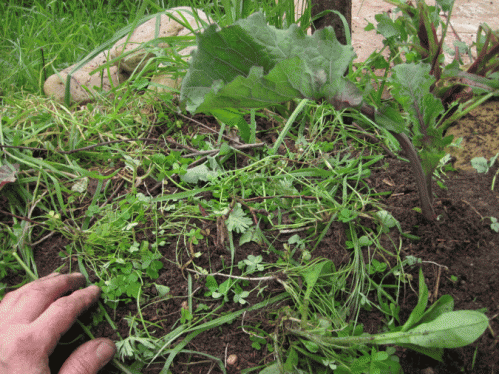
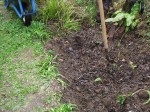
Transplanting tree collard cutting - 3 of 4. The topsoil layer is returned over the cutting. Leave it as you found it. The soil microbes have had a heck of a day (I hate moving!), but they will get a second chance at thriving, alongside the transplanted tree collard cutting. The green manure (boring people call them “weeds”) are also pushed back into place with the lightly packed topsoil. Those plants/greens are going to be mulched over (next pic) so they will boost the existing community of soil microbes. And the soil microbes and the tree collard cutting’s new roots will live happily ever after.


Transplanting tree collard cutting - 4

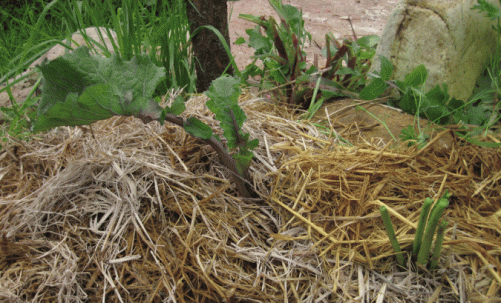
Transplanting tree collard cutting - 4 of 4. Rice straw (old, perhaps last year's bale) is used to mulch over the tree collard cutting. Moisture retention is critical while the cutting decides to thrive or not. Note the chop-and-drop'ed dock plant (lower right); see text below re chop-and-drop.

Note the chop-and-drop’ed dock plant in the above pic (lower right).  Sure it could have been ripped out while I was digging in the transplant.  BUT, I would rather have the dock plant’s large, voluptuous leaves soak in the sun’s rays, create carbon (sugars) and other organic matter in the form of more leaves and a more developed root system.  THEN, I will come along again (for the umpteenth time!) and demand that the plant start all over.  Besides perhaps emotionally scarring Dock, the leaves I’ve collected can be used to make mulch, compost, or salad.  The root system that was supporting all that leaf growth dies back; the leaves are no longer feeding it.  Those died-back roots then become food for the soil as well as organic material that retains moisture for the new roots to come as the dock plant regrows.

Chop and drop video by TrevorsGarden.

Happy collard propagation and see you tomorrow.

Tony


Nov 052012
 
Weevils Trapped In Holyhock Seed Bag

You have landed on Day 5 in this 6-day series of videos depicting the fine art of collecting/processing/storing pumpkin seeds.  Enjoy!


First some pumpkin pics:

Day 1 = flowers

Day 2 = vine

Day 3  = new fruit

Day 4  = green manure

Today = seed saving

Day 6  = seed planting


THEN a video  re “Saving Happy Halloween Pumpkin Carving Seeds”.   6 videos (1/day) for the series!


Seed Saving

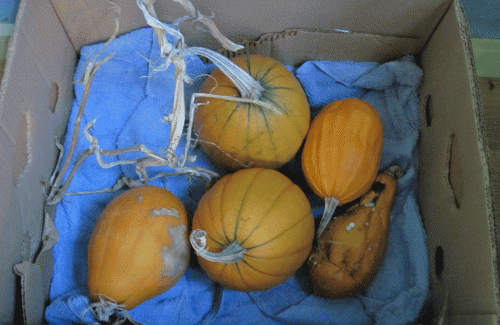
Cold Storage Pumpkin
Cold Storage Pumpkin.   These pumpkin have been stored a few months since harvested last fall.   Each pumpkin has seeds, so if the fruit does not look edible, perhaps it will provide good seed in a month.   That fresh, viable seed can be dried, then planted.   Note how the pumpkins were stored in an apple box; its pocket-hole liner allowed good ventilation UNDER the fruit.


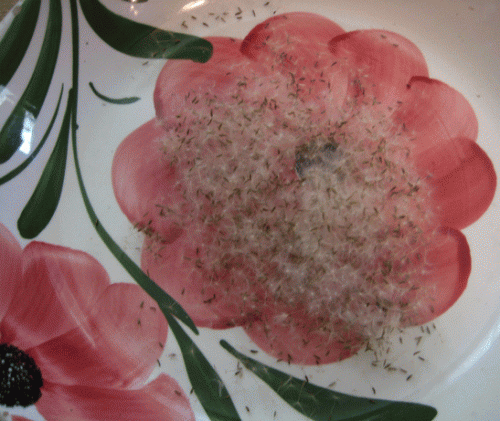
Dandelion seed in bowl
Dandelion seed in bowl. A high-sided bowl was used to dry this light, easy-to-blow-away seed.


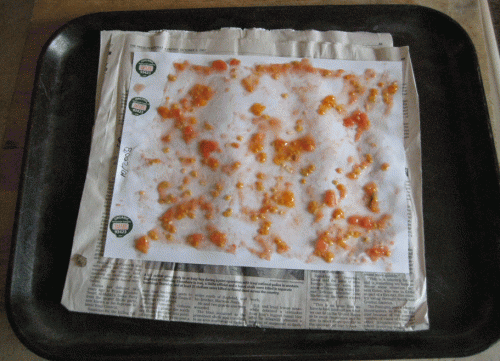
Drying Tomato Seed
Drying Tomato Seed.   A lot of moisture here; to protect the bookshelf (tray of seeds will be stored above to dry) a plastic cafeteria tray, newspaper, and office paper are used to soak up the tomato’s juices.   Note the use of the fruit labels for easy labeling.


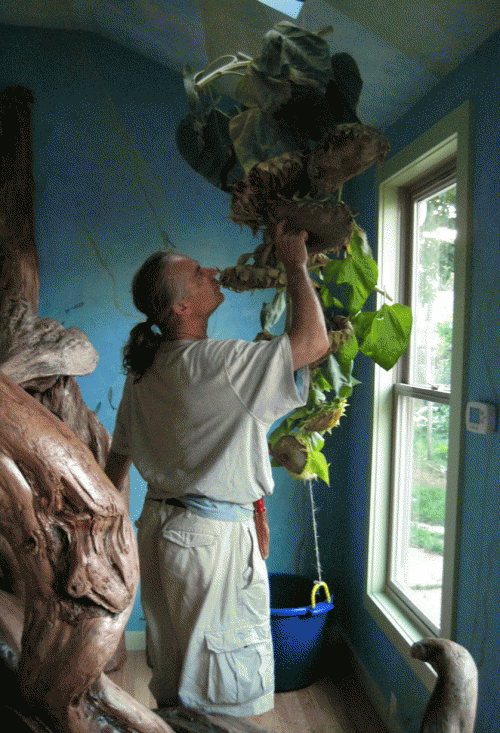
Sunflower drying over winter.
Sunflower drying over winter. A corner of this room is used to dry the sunflower because A LOT of debris will fall to the ground. A dropcloth under the drying stalks makes cleanup/harvesting fallen seed easier.


Am I smiling?   (Oh, that game again!)
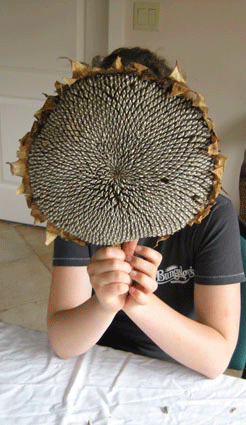
Sunflower head, dried, ready to have its seeds harvested.


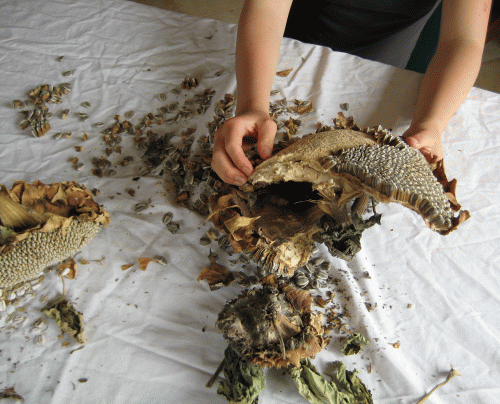
Harvesting Sunflower Seed
Harvesting Sunflower Seed.   I like to also harvest the dry pulp from the head and mix it in with the seed before planting.   Benefit unknown re mixing in the pulp, but my gut likes the idea.


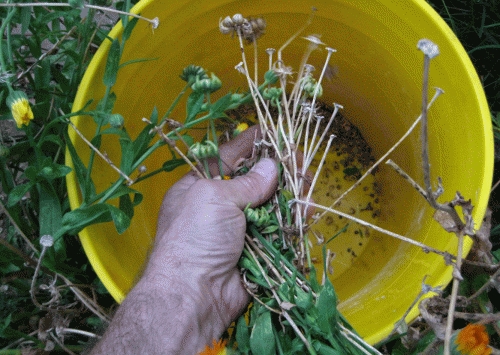
Harvesting Callendula Seed
Harvesting Callendula Seed in a bucket.   The still-alive and well plant is leaned into the bucket so that those seeds that are ready to fall will will not scatter and be lost (unharvested).


Yes, seed collecting is fun.  And, don’t forget partly why we do it — to increase food producion and increase biodiversity.  So what happens to those critters that get captured during our seed harvesting?  Start by giving them a break!


Allowing critters to escape from seed harvesting
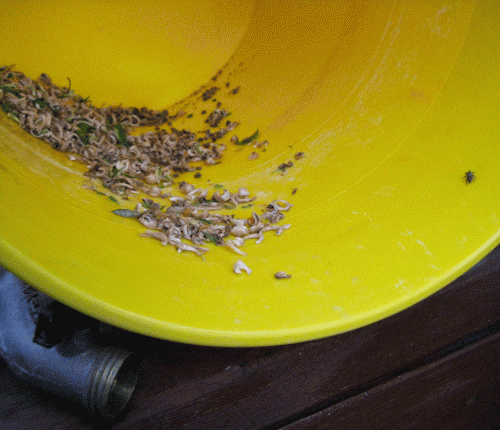
Allowing critters to escape from seed harvesting might be as easy as providing them access out. In this example, the bucket was rested on its side to allow critters to crawl out. Note the tucked-up-against-the-bucket hose bib. Nice to give the critters a chance to escape, but would be a bummer to have a breeze roll the bucket and dump all the seed — Nature’s way of saying, “These seeds belong HERE!”   Note the escaping Thompson Jumper spider on the right.


Weevils Trapped In Holyhock Seed Bag
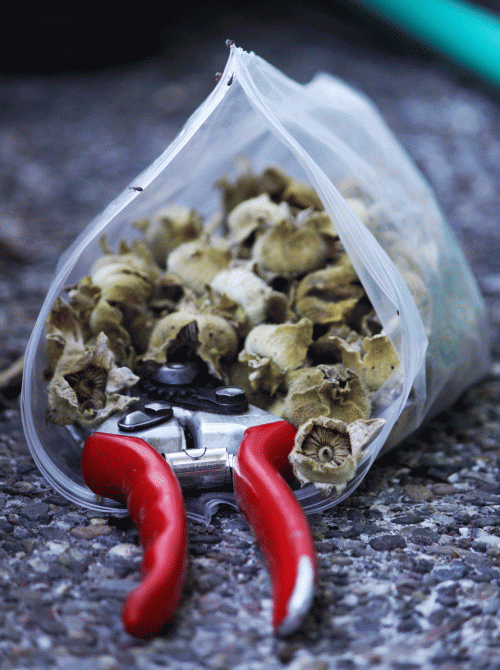
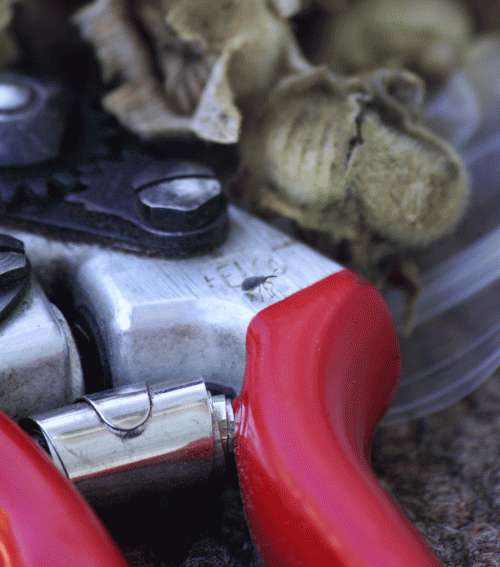
Weevils Trapped In Holyhock Seed Bag. The pruners are being used to keep the trapped weevils from having to spend months in a plastic bag. Besides clearing my conscious (one of the weevils could be Grandpa Tony!), I also want to free these glorious ambassadors of biodiversity because they pollinated the holyhock in the first place.


Weevils Trapped In Holyhock Seed Bag close-up
Hey gang! I found it — this is the way out.


Saving Happy Halloween Pumpkin Carving Seeds — 6 of 6

Happy seed saving and see you tomorrow.

Tony


Jan 112012
 
20120108-LTH-retaining-wall

Garden Log (what I did):
071509 LTH -- soil harvest

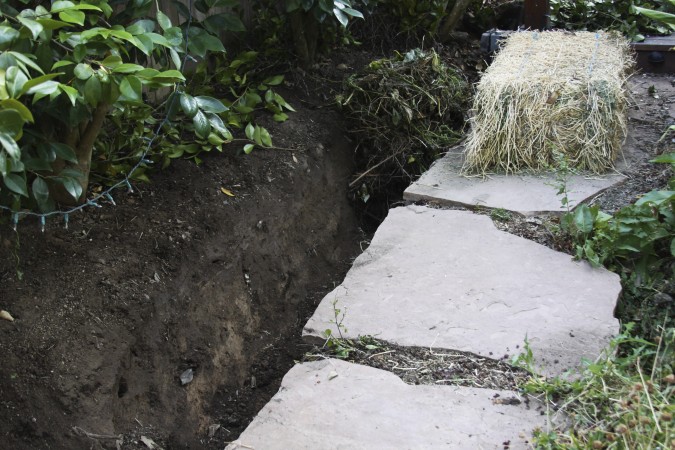
071509 Leaf Trench Highway. Soil has been harvested from the trench, between the slate walk path and the planting bed. The trench will be prepped for more soil making, starting with a base of straw from the awaiting bale. Since this picture, lots of organics have been composted onto and into the trench. Those organics include: tree prunings, wheat straw, alfalfa straw, oak leaves, carbon harvest (for example, pumpkin vines), twigs and stout tree limbs, wood chips, and horse manure. Beautiful, rich, high quality tilth soil has been harvested several times from the trench.

1. Constructed a low retaining wall to increase the soil volume of a planting bed, Leaf Trench Highway.  Leaf Treanch Highway got its name back in 2007 when we were installing irrigation supply to our garden’s back corner.  The water supply was trenched along a walk path, buried about three (3) feet and encased in 3″ perforated plastic drainpipe.  The depth and casement were to allow “mistakes” in the garden — a shovel could graze the drainpipe and might not break through and bust the water supply.  Lots of digging since then, and no busted trench pipe, yet.  The trench was called a “highway” because, when filled with leaves, or other organics, it’s a corridor for critters to move about the garden.

So, there we were, in 2007, with a sizeable 3-foot deep trench running along the property line’s planting bed.  We decided to use the trench to make soil; we would use the trench to turn compostable material into planting soil.
20110929-LTH-Apples

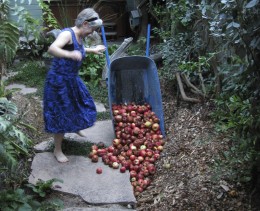
"Opps! Did I spill that?" No, Anita, Leaf Trench Highway is getting a rotten apple harvest -- Sebastopol's finest for our dear soil-making critters.

About every six months, the trench is dug up for a soil harvest.  That harvested soil is then used to amend the soil in the gardens.  And yes, sometimes waiting the six months or so is difficult.  But having fresh, new, teeming-with-microbe, alive! soil on hand when we do harvest is all that much more a treat after the wait.
20100604 LTH -- potatoes

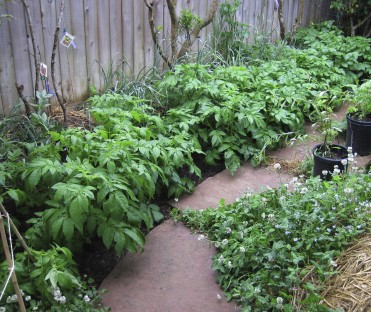
Potato (broad-leaved), garlic (along fence), red and white clover grow in Leaf Trench Highway in the summer of 2010. The red and white clover serve as both insectary and nitrogen-fixing plants.

This time around,  in 2012, I want to grow a crop above the composting trench.  I want us to produce a garlic and vegetable crop WHILE the trench is composting.  I have also found that new crop love a good compost under it.  BUT, the compost can not be too hot or the new crop will burn.  For this planting, there is a good base of wood chips, green manure, oak leaves, and a recent magnolia tree pruning.  Especially with the magnolia twigs and limbs, those bulky organics will supply microbes, miosture, and nutrients to the growing crop.  Also, as the crop plants grow, their roots will travel the moist, nutrient-rich paths along the decaying wood.  Great mulch for the coming dryer months.  Throughout the spring, we will harvest salad from the composting trench.  By July, the garlic will be ready to be dug up — harvest garlic, harvet soil.  Garlic for the kitchen, soil for the garden.
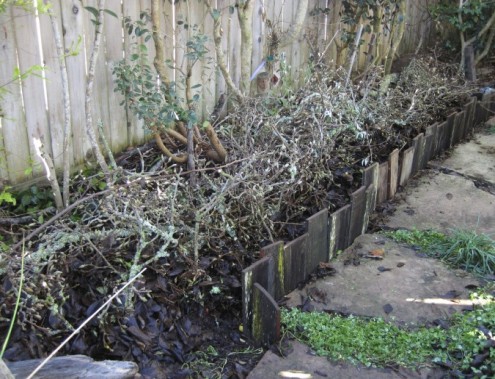
20120108-LTH-retaining-wall

Low retaining wall built to increase the soil capacity of Leaf Trench Highway's planting bed. Old redwood fence boards were cut in two-foot lengths and pounded into the gap between the planting bed and the vertical slate border. Using a wood block between the fence board and the sledgehammer kept the fence boards from splitting.
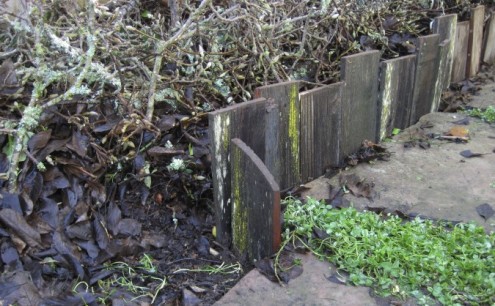


20120108-LTH-retaining-wall, close-up

20120108-LTH-retaining-wall, close-up. Note the beautiful mosses and lichens on the old fence board. Not only is this FREE!!! redwood fence board functional (it will last many years in the soil), it is also beautiful. Moist soil from the planting bed was rubbed into the board cuts to instantly age those fresh-cut surfaces -- we are talking art here! I am interested to see if that soil smear will promote moss growth on the top edges of the boards. Stay tuned.

2. Manure run.  Collected both hot (fresh) and cold (old) horse manure from my secret source (nothing personal).  The hot manure was laid down at the bottom of the fence boards to create a little heat for the wintering crops.  The cold manure, which is pretty much a sandy loam soil because it has broken down for so long, was thrown on top of the bed.  That cold manure was thrown into and on top of the magnolia tree prunings, enough of it to plant the crops in.
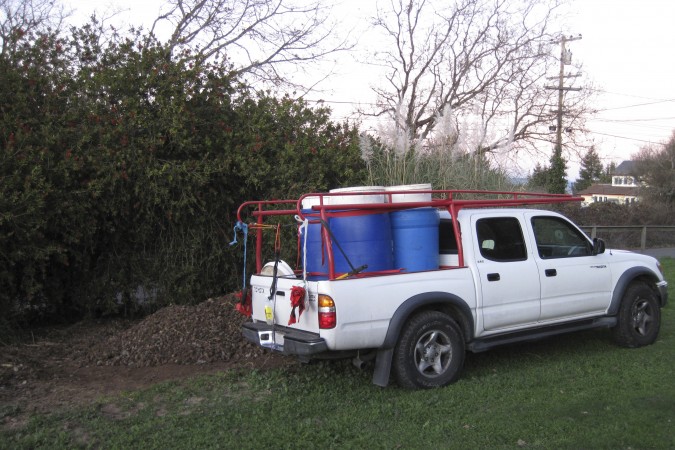
20120107-manure-collecting

Collecting horse manure from a neighbor's pile. The bins/barrels help keep the job cleaner and easier. Using the barrels, my truck does not have to be washed afterwards and the manure can sit in the bins until ready for use. Sure is nice to load it once (into the barrels) but not have to clear it out of my truck's bed the same day. Note the looseness of the fresh (hot) pile at the rear of the truck. That pile was moved twice -- once to get it out of the way so the buried old (cold) manure could be harvested, then again to fill up the hole that cold manure harvest left. Perhaps in 6 months, that filled in hole will be cold manure soil itself. Just another example of our wondrous revolving World at work.
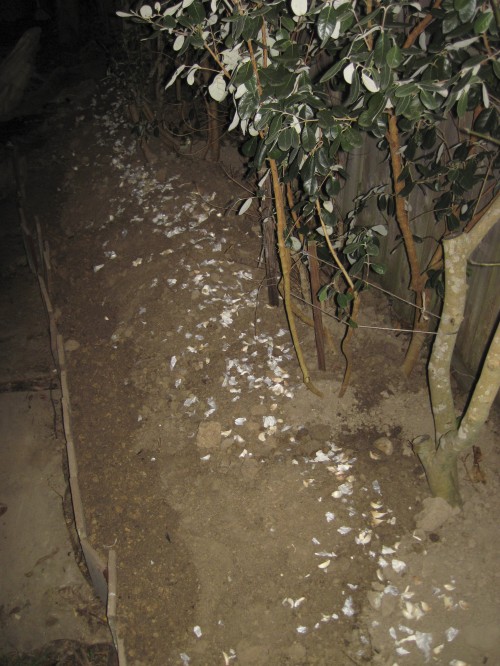
20120110-LTH-garlic-planting-2

It's late, but the garlic is in. Come tomorrow, I will throw a thin mulch of rice straw over the veggie seeds and garlic starts. Note how the low retaining wall of recycled (reused) fence board allowed enough soil to be added to the bed to cover most of the magnolia prunings. Will be exciting to see what crops actually do rise out of the straw mulch and to see how well they thrive in this compost, soil-making bed. Oh, did I tell you -- it's an experiment. 🙂

You, the Habitat Gardener (reflections):

1. Leaf Trench Highway is a major no-toll pathway in our garden.  True, there is often construction along this roadway, but the improvements are always worth it.  This year’s road upgrades include last year’s woodchip pile from Santa Rosa’s waterways cleanup (oak and willow), oak leaves from the neighborhood, our ridiculous Jack-in-the-Beanstalk pumpkin patch green manure, the magnolia tree’s prunings, hot manure, and cold manure soil.  Microbes party down!  All insects and amphibians welcomed.  Just add water, as the soon-to-come rains will do, and the entire length of Leaf Trench Highway will be a mess of healthy fungi, vegetables, flowers, microbes, crawly critters, and birds.  And that’s just at ground level.  The length of the trench, along the fence, is a fedge — food hedge, a permaculture term.  That hedge planting includes fig, pineapple quava, loquat, and pomegranate.

2. Our soil gets better every year as we grow more food each year.  And we share — without an atom of pesticide, herbicide, or fungicide, the trench and fedge will take on a natural balance.  The critters will get some of the planted crop, but by far, we will get our fair abundant share.

Happy soil making to you.

                                                            Tony


The Next Day and Night:

1. More cold manure soil was added to the bed tocover the garlic and to give the veggie seeds more soil to establish themselves in.
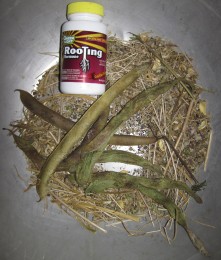
20120111-LTH-veggy-planting

Bowl-O-Seeds. Rooting powder was used to help the seeds germinate, a tall task during these wintery days.

2. The vegetable seeds were all mixed together with rooting powder (only because I didn’t have any mycorizzae spore on hand).  Life is good!, especially when I get to open dozens of seed packets that I prepared throughout last growing season.  Round and round, mixed in a large stainless bowl, or bucket, and dusted with a little love (spore or rooting powder).  Then I’ll carefully toss the seeds out onto a prepared planting bed — a dash here, a dash there, some over my right shoulder, some underhanded between my legs.  Most importantly, I get to have fun being ridiculous.  I get to plant way too many seeds.  Yes, I work hard to collect seeds all year long so that I can have a Chia Pet garden.  Too many plants that grow too much means I will eventually get to havest them, in whole or in part, and reap the green manure they are.  I will be harvesting carbon — all that alive, green plant material is merely bottled up sunshine to be poured onto the compost pile.  Sun >>> plants >>> photosynthesis >>> juicy packets of carbon >>> Tony’s compost >>> SOIL MAKING.  And with that carbon-rich soil, we will grow more STUFF, whether it be flowers, food, or fodder.  And we will live happily ever after.

The seeds I grew and collected and mixed together are cilantro, parsley, Queen Anne’s lace, bok choy, gopher plant, impatiens, fennel, round zuccini, calendula, “Primo” danelion, and chard.  Store-bought seeds that also became part of the mix are broccoli, cauliflower, and lettuce.  SOMETHING ought to grow!

3. The seeded bed, also with its garlic starts, was mulched with rice straw to keep critters away from the seeds and to keep the seeds moist for germination.  The mulch will also help the seeds receive waterings and/or rain without being washed out of the planting bed.  Perhaps too heavy a cover of straw to be left on the young sprouts.  BUT, I will keep an eye on the bed and will thin off some of the straw in a week or two.  I will be curious to see what plants actually do come up during these frosty nights and cool days.  Nice to have some ground warm perculating upward toward the seeds from the hot manure below.  Even if nothing were to germinate now, surely some seeds will germinate further down the year when the sun warms the soil and spring rains moisten it.  How fun to wait and see.
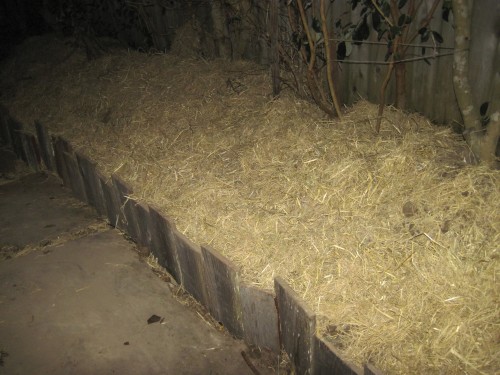
20120111-LTH-veggy-planting-mulched

The seeds have been sown and the rice straw mulch is in place. A little water. A lot of waiting. Soon enough, though, a forest of food and flowers.
 

Jan 142011
 
Last season's artichoke is overwintering insect habitat.

Garden Log (what I did):

1. Scattered red and white clover seeds and fava beans on Straw Bale Recliner Bed in front garden.  Harvested potato crop soil from The Bog; see http://sporelore.com/food-forest-gardening/caterpillar-winter-resort-next-to-our-front-door/.

2. Pruned the gravenstein apple tree in our front yard.

3. Staked up rotting artichoke stalks (last season’s crop).

You, the Habitat Gardener (reflections):

red and white clover seeds with fava bean

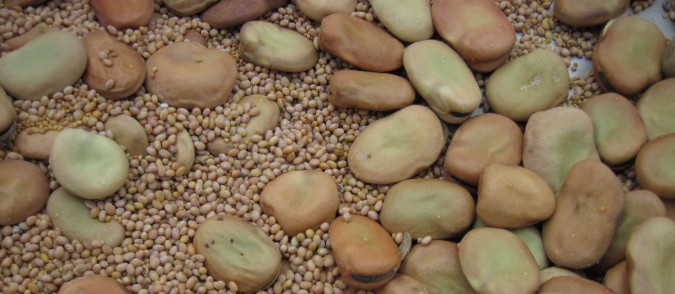
Red clover (small brown), white clover (small yellow) seeds with fava bean (large flat).

1. A light, misty rain this afternoon.  Time for me to get another crop in the ground.  Last season’s green mulch supplies are still on hand; might as well use the seeds up while they are still viable.  Found paper bags with fava bean and both red and white clover seed in our cold storage (sealed plastic bin in unheated shop).  Perfect!  The fava bean will both enhance the soil and provide veggies in the spring.  The red and white clover will also nitrogen fix the veggie bed’s soil AND the insects will love the flowers.  Bees and other polinator insects will be buzzin’ in the front garden — our little pollinator helpers to ensure all those fava bean flowers develop into pods.
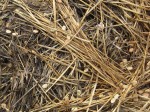
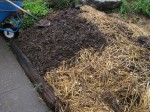
fava bean, red and white clover on straw mulchThe front veggie bed was just recently half planted with garlic cloves.  It was then covered with a light mulch of old straw.  Even though that straw mulching was mostly to protect the garlic starts and the new soil that was used to plant the garlic, the entire bed was mulched with straw — even the unplanted half of the bed was mulched.  I figured that the straw layer over the unplanted half would bulk up the organic matter in the bed and be ready and waiting for a new crop.  Well, now that new crop is here.  I mixed all three seed types (fava, red and white clover) in a large bowl and sprinked them out onto the bed’s unplanted half, the half alongside the sidewalk.

potato soil harvest from The BogA thin layer of soil over the beans and seeds will suffice as “planting” them.  Luckily, the rich soil from our harvested potato crop is avalable to throw over the planted bed.soil layer over beans and seeds on straw

I’ll feel lucky when the garlic on the other half of the bed comes up.  We used straw to mulch over the planted cloves and soil layer.  The expected hard rains demanded that the soil be covered, that is, not exposed and vulnerable to harsh rainfall.  The downside of that mulch is its insulating nature — the weak winter sun will have to warm both the straw mulch and the garlic to germinate it.  So, for this half of the bed, the fava bean crop, we are not mulching over the soil.

2. Pruning time for our dwarf Gravenstein apple tree.  We want to encourage the tree to provide fruit low to the ground — no sense in having to pull out a ladder just to pick an apple.  So hard to prune this already small tree but our patience will be rewarded some day with a full-figured, strong-limbed, laden apple tree. The prunings were chopped into small bits and placed around the trunk; every plant is entitled to its decaying minerals.  Just a hunch, but I bet that the tree, and perhaps its co-existing fungi, will appreciate dead wood of a similar species, if not from exactly the same plant.

chop and drop at base of apple tree

Chop and drop at base of apple tree. Note the limb prunings left as small apple tree "wood chip" mulch.

Lastly, the base of the tree was chopped and dropped.  In other words, the resident dandelion (has been living for many months) and a new arrowhead plant was chopped at their base, BUT NOT PULLED.  Doing so, the plants’ roots will die back and leave loose organic matter in the soil.  Yummy!, says the tree’s roots.  The greens left on the wood chip surface will mulch the surface, with the organic matter in the leaves feeding the top layer of soil.  Then the “weeds” will grow back, Tony will chop them again, over and over and apples and apples again.

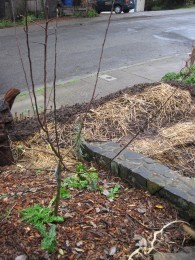
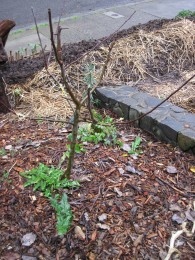
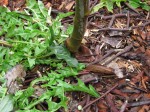
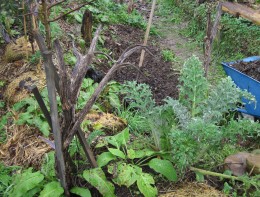
artichoke bed on Dragon Spine Ridge3. I once heard that artichoke plants ought to be cut to the ground in winter in preparation for the spring’s new growth.  Well, another “ought to” that I am not getting to.  I have enjoyed witnessing the full cycle of these enormous thistle-like plants.  Up. up, and up grow the stalks, bulking thicker and thicker as they grow.  Heavy duty veggies!   Then, the joy of the flower bud, which is the “artichoke” itself.  And sometimes I don’t want to harvest that bud.  I egg on the magnificent flower that follows.  Come butterflies, bees, wasps, beetles, and all pollen lovers to Artichoke’s purple carpet in the sky.  But, alas, the end is then near. The flower dies back, bleaches silver in the sun, and becomes a highrise insect commune.  But beware — spiders are the landlords and the rent they charge will suck the life out of you!  Soon the entire shrub-like plant, both stalk and spent flower, takes on a sun-scortched, wind-twisted tangle of gracefulness.  Art in the garden.  And all I did was plant an artichoke plant.  And, the best is yet to come.  This decaying artichoke stalk is both GARDEN SCULPTURE and HABITAT.

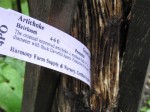
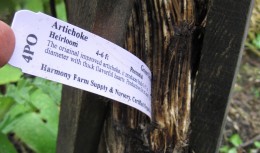
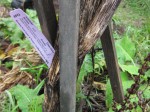
decaying artichoke stalk holding nursery tagA couple of weeks ago, I noticed that the plastic nursery tag for the Green Globe heirloom artichoke planted on Dragon Spine Ridge had fallen away from the plant’s base.  Not wanting to throw away the tag because the perrenial artichoke lives on, I thought to stick it into the plant’s spent stalk.  Amazing how nicely the pointed tag cut into the vertical fibers of the old stalk.  Wow!, that’s habitat material.

Last season's artichoke is overwintering insect habitat.

Close-up of old artichoke stalk. Note the thick vertical veins of the stalk. The stalk's pulpy interior seems the perfect insulated over-wintering habitat for insect eggs and larvae.

If the thin plastic nursery tag could penetrate the artichoke’s stalk so easily, you can bet for sure that some insects have bored holes into this plant.  Sure, some of those insects will thrive inside the plant stalk to emerge, as larva or adult insects, and eat next summer’s artichokes.  But, we have plenty to share.

If we focus on growing biodiversity, and not just this plant and that plant, we will have strong gardens.

Stay warm in your over-wintering habitat.

Tony

Nov 242010
 

Chapter 5 (by Anita Smith)

Resources for You, Your Neighborhood, and Beyond

One need not sit very long nowadays with unanswered questions about the garden, the environs surrounding it, anything, really.  There is so much information available.  In fact, the real challenge might not be finding information on a subject, but rather acting, doing, or creating.  Regarding your garden, eventually you will want to take a leap, and what better place than in the garden.

-Tony McGuigan

Introduction

Has Tony’s passion or sense of humor infected you yet?  What Tony’s doing in the garden and offering the world through his writing, I believe, is unique.  Watch out, his perspective and playful approach is contagious!  By this point in the book I bet that you’ve at least smiled and giggled some.  I hope you’ve felt your heart expand and warm, and your childlike excitement and curiosity about the natural world reignite.  I hope you’ve also been touched by hope; a sense of hope about the possibilities for a more healthy, equitable, and sustainable way of living.  There are countless things we can do—no matter who we are or where we live—to make the world a better place for everyone and all life on this precious blue orb.  The resources in this chapter are intended to help further tantalize and support you on your journey.

There are a few things I want to mention before jumping into this offering of resources for You, Your Neighborhood, and Beyond.  First, I’m operating on several assumptions here.  One is that biodiversity is a good thing.  The more biodiversity on the planet—on our continents, in our watersheds, and around our homes—the better.  It’s like having a well-stocked toolkit for keeping things running smoothly and fixing things when they break.  There are, of course, some ecosystems that naturally have lower biodiversity than others and have evolved unique and intricately balanced dynamics.  As a dominant species though, we’ve done WAY too good a job of messing with those dynamics nearly everywhere on the planet, and we have significantly and alarmingly reduced Earth’s biodiversity in the process.  If everything is indeed connected—as nature shows us it surely is and many wise people have intoned—then that diminishment of biodiversity is bound to plague us.  We would be wise to proactively address this rather than ignore it or wish it away.  Recent advances in the study of human ecology, specifically reconciliation ecology, are part of the resource toolkit we can draw upon to help inform our proactive response.  Reconciliation ecology is the science of inventing, establishing, and maintaining new habitats to conserve species diversity in places where people live, work or play.

For more of Anita’s chapter,  Resources for You, Your Neighborhood, and Beyond, see Tony’s book, Habitat It And They Will Come .

Cheers.
Tony


Aug 202010
 

Garden Log:

1) Rough day garden-wise, for me. No time spent in the garden today.

You, the Habitat Gardener:

1) No time spent in the garden today for you either, eh? Well, then, we’ll dig deep to find us a silver lining in not getting out there. In fact, it seems to me that we could give ourselves credit for not disturbing the earth, the soil, the fabric of Life that teems well without our intervention. Bare soil left bare for microbes, mollusks, insects, and larger critters. That garden life will use exposed soil to navigate through and on, to shelter in, to make shelter with (like a mud wasp might collect mud to create a nest nearby), to eat (as an earthworm processes the soil for the food in it), and to bathe in (like a bird might take a dust bathe to rid itself of tiny critters). The soil, the “weeds”, the debris piles are just there and they will do fine as we take our break from the garden or otherwise do not get to it. The fullness of Life in the garden won’t skip a beat if we don’t get out to it. My message is: Relax. Allow what you don’t do to be a part of your habitat gardening Master Plan.
Frederique Lavoipierre, Entomology Program Coordinator, of Sonoma State University’s School of Science and Technology, offers this regarding the fragile chaparral ecosystem that is often “improved upon” by gardeners:

“Introducing “more structural diversity with meadows, and trees and different canopies”, and increasing “the amount of water on the land and more soil” may increase the usefulness of the land in human terms (and may even shade out the offending [unwanted trees and plants]), but it will no longer be chaparral. Chaparral is not meant to be structurally diverse to the extent found in a permaculture garden, and increasing water, and especially adding more enriched soil, effectively destroys the fragile chaparral environment. Chaparral is a beautiful and biodiverse ecosystem that does not need improvement. It has an incredible biodiversity of insects associates and harbors many plants, reptiles and small mammals that only thrive in the somewhat poor (to us) soil of the chaparral.”

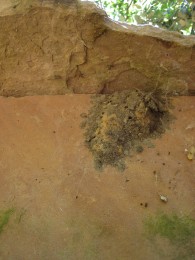
2. We have a mud wasp nest in the garden under

Mud Wasp nest under slate seat

West County Seat, a stacking of slate for critters to live in and humans to park on.    I love the local color — the orangeish soil is our yard’s adobe. I put out clobs of it on some of the wood we have in the garden. The clay keeps the wood moist longer AND wasps flock to it to gather it up and build nests with.

Close-up of mud wasp nest

Nice job today, not in the garden.

Tony