Jan 242011
 
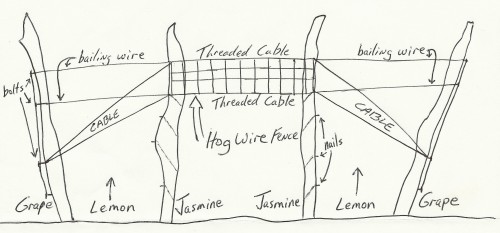
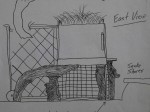
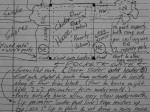
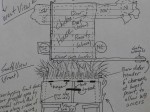
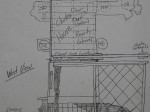
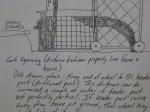
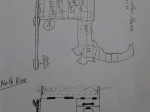
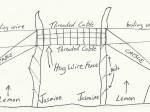
Original Plan for House Finch Hideaway

Garden Log (what I did):

1. Installed posts for House Finch Hideaway.

You, the Habitat Gardener (reflections):

1. A beloved neighbor of mine has very little privacy in her back yard and wants more.  Her yard slopes up from the back fence, so her back neighbors have a straight-shot view of her patio sliding door and into the house.  What a drag to have to draw the curtains for privacy.  But, I want to see the garden!  Solution: Create privacy at the fence.  Then, even the garden becomes private.

Original Plan for House Finch Hideaway

Original Plan for House Finch Hideaway

I love trellises.  Vertical growing allows stacked vegetation (Ex. = plants on the ground and above) or “stacked functions” [a permaculture term] (Ex. = a clear walkway below and plants above).  We will use a trellis to create Beloved Neighbor’s privacy and support for fruit vines.  Grape, kiwi, fig, and espaliered lemon all do well growing along trellis wire.  However, because our first goal is to create privacy, evergreen plants become our first choice.  Of those fruiting vines just mentioned, only the lemon is evergreen.  And one drawback to evergreen lemon trees is their relatively slow growth when compared to fruiting vines.  Pink Jasmine to the rescue — a fast growing evergreen vine with very fragrant flowers.  The jasmine will become a suspended thicket very welcoming to nesting birds and the fragrant flowers will attract bees and hummingbirds during the early spring bloom.

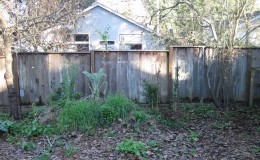
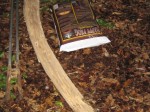
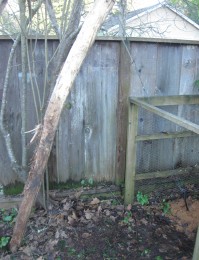
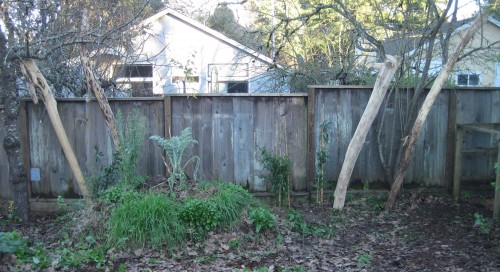
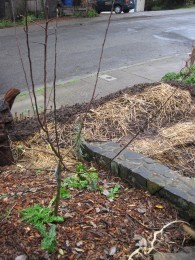
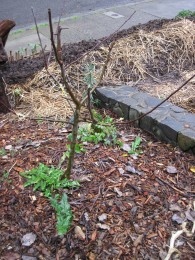
Back fence line before trellis installation of House Finch Hideaway.

Back fence line before trellis installation of House Finch Hideaway.

My friend, Jim, an organic apple farmer, took me for a walk in the orchard last spring.  He was excited to show me the perimeter fencing that he installed.  Jim’s wire fence is a grape trellis, and a couple of thousand feet long.   That’s a lot of grapes.   He was particularly excited to show me how simple the hardware is.   I was sold.   Why just put up a fence when the same fence can support a crop?   House Finch Hideaway is basically a vinyard fence a few more feet off the ground and not very long.   The entire trellis will be 2 end posts with 2 center posts between them.

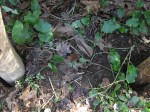
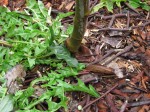
Left end post positioned in ground.

Left end post positioned in ground.

Yes!, I get to sink driftwood into the ground.   I just happen to have a few good-sized driftwood poles left over from last year’s driftwood collecting.   The four poles I’ll be using are all well over 10 feet long.  They are long enough to secure 5-6 feet in the ground and still reach above the fenceline a few feet.  My custom-made posthole digger tool (electric conduit fastened to digging clams) is long enough to do the job and save my back from breaking.   And wala!, the first post, the Left end post, is in.  I chose to sink that post first because placement next to the cherry tree is more critical than with other elements in the yard.  The post was up-ended, in other words, the heavy trunk end was flipped up into the air and the thinner end of the pole was sent into the ground.  Art!  We want creatures in the garden and what better way to do that than to jog the imagination with tree trunks in the air.

Right center post waits patiently to be installed.  Length = 15 feet.

Right center post waits patiently to be installed. Length = 15 feet.

The oddly angled posts present some challenges for this linear wire trellis.  Sinking the driftwood posts for allignment of all four posts is part guesswork and part skill.  I have worked with driftwood for a long time and can anticipate how pieces will lay, most of the time.  Fortuneately for me, I did goof up here by the time I got to the center posts.  But that’s part of my skill — to take advantage of goof ups.  For instance, I THOUGHT I wanted the center posts perfectly vertical, like a respectable fence ought to be.  BUT, I wasn’t thinking clearly and dug the center holes vertically.  Well, duh, the two center posts are not straight.  In the end, after some trial and error by my lowering them into both holes only to retreive them and switch their position, the posts told me where they belong.  And what beautiful gracefulness they are in, with the strength of the trellis magnified by their self-directed position.  Specifically, the center posts are also openning outward, as are the end posts, which will better stretch the fruit-laden wires of the trellis.  There will be less sagging in the middle of the trellis because of the great tension created by the outward-facing posts.  The wood talks!

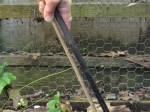
Posts in holes left loose for wire tensioning.

Posts in holes left loose for wire tensioning.

All four posts have been left loose in their holes, in other words, soil has not been backfilled to secure their position.  The posts might want to twist and turn a bit when the wire fenceline is tightened — no sense in counteracting that movement.  Then, when the wire tension is appropriate, and the posts have fallen into resting position, the postholes will be backfilled with planting mix and vine starts.  What happy plants they will be, with their roots sucking water from the hugh wood posts.

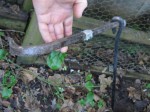
Installing earth anchors for the two end posts is next.  Securing the end posts to the ground will help keep them from breaking under the heavy weight of the vines, fruit, wire and center posts.
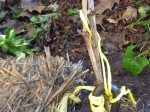
Earth anchor with eye bolt end.

Earth anchor with eye bolt end.

Earth anchor in shallow hole.

Earth anchor in shallow hole.

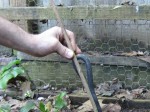
Measuring length of anchor rod before drilling.

Measuring length of anchor rod before drilling.

A crowbar provides leverage for drilling in the earth anchor.

A crowbar provides leverage for drilling in the earth anchor.

The earth anchor has been drilled into the ground "this far".

The earth anchor has been drilled into the ground "this far".

Adobe clay used to "cement in" the buried anchor.

Adobe clay used to "cement in" the buried anchor.

Clay soil soaked to maximize settling.

Clay soil soaked to maximize settling.

Grape vine cuttings planted with Right earth anchor. Note the highly visible yellow cord to warn passersby.

Grape vine cuttings planted with Left earth anchor. Note the highly visible yellow cord to warn passersby.

I don’t want to lose sight of how deep the anchors are so I use a crude stick measurement for the before and after depth of the anchors.  A crowbar in the anchor’s eye helps drill the other end’s screw into the soil.  Well, that anchor is pretty far down there but I will fill in the hole with heavy adobe clay to increase the weight on the anchor — would be a drag if the vine and fruit loaded trellis and poles were to heave out the anchor some day.  Keeping the adobe soaked in the hole will help it pack and maximize it’s volume and weight as it settles.

With both earth anchors in place, now it’s time to wire the end posts to the anchors.  13 gauge galvanized vinyard wire will be secured by Gripple fasteners; see www.gripple.com for how Gripple’s line of agricultural hardware is used.

The endposts are secured with wires angling down to the ground at 45 degrees (90 degrees to the slanting posts).  Yet to be done, the horizontal fruit-/vine-bearing wires will be strung between all four posts.

Right end post wired to earth anchor.

Right end post wired to earth anchor.

Today I got as far as wiring in the end posts.  The horizontal wires will come another day.  Stay posted, pun intended.

House Finch Hideaway's four posts awaiting connecting wire.

House Finch Hideaway's four posts awaiting connecting wire.

Tony
Jan 142011
 
Last season's artichoke is overwintering insect habitat.

Garden Log (what I did):

1. Scattered red and white clover seeds and fava beans on Straw Bale Recliner Bed in front garden.  Harvested potato crop soil from The Bog; see http://sporelore.com/food-forest-gardening/caterpillar-winter-resort-next-to-our-front-door/.

2. Pruned the gravenstein apple tree in our front yard.

3. Staked up rotting artichoke stalks (last season’s crop).

You, the Habitat Gardener (reflections):

red and white clover seeds with fava bean

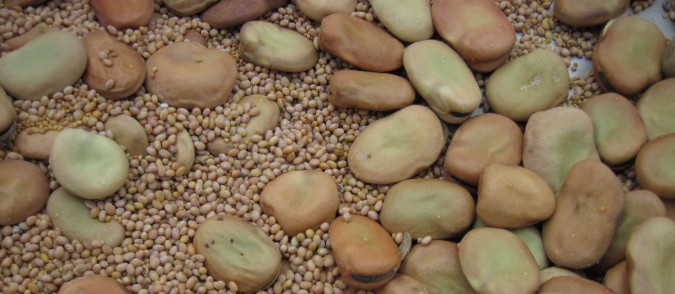
Red clover (small brown), white clover (small yellow) seeds with fava bean (large flat).

1. A light, misty rain this afternoon.  Time for me to get another crop in the ground.  Last season’s green mulch supplies are still on hand; might as well use the seeds up while they are still viable.  Found paper bags with fava bean and both red and white clover seed in our cold storage (sealed plastic bin in unheated shop).  Perfect!  The fava bean will both enhance the soil and provide veggies in the spring.  The red and white clover will also nitrogen fix the veggie bed’s soil AND the insects will love the flowers.  Bees and other polinator insects will be buzzin’ in the front garden — our little pollinator helpers to ensure all those fava bean flowers develop into pods.

fava bean, red and white clover on straw mulchThe front veggie bed was just recently half planted with garlic cloves.  It was then covered with a light mulch of old straw.  Even though that straw mulching was mostly to protect the garlic starts and the new soil that was used to plant the garlic, the entire bed was mulched with straw — even the unplanted half of the bed was mulched.  I figured that the straw layer over the unplanted half would bulk up the organic matter in the bed and be ready and waiting for a new crop.  Well, now that new crop is here.  I mixed all three seed types (fava, red and white clover) in a large bowl and sprinked them out onto the bed’s unplanted half, the half alongside the sidewalk.

potato soil harvest from The BogA thin layer of soil over the beans and seeds will suffice as “planting” them.  Luckily, the rich soil from our harvested potato crop is avalable to throw over the planted bed.soil layer over beans and seeds on straw

I’ll feel lucky when the garlic on the other half of the bed comes up.  We used straw to mulch over the planted cloves and soil layer.  The expected hard rains demanded that the soil be covered, that is, not exposed and vulnerable to harsh rainfall.  The downside of that mulch is its insulating nature — the weak winter sun will have to warm both the straw mulch and the garlic to germinate it.  So, for this half of the bed, the fava bean crop, we are not mulching over the soil.

2. Pruning time for our dwarf Gravenstein apple tree.  We want to encourage the tree to provide fruit low to the ground — no sense in having to pull out a ladder just to pick an apple.  So hard to prune this already small tree but our patience will be rewarded some day with a full-figured, strong-limbed, laden apple tree. The prunings were chopped into small bits and placed around the trunk; every plant is entitled to its decaying minerals.  Just a hunch, but I bet that the tree, and perhaps its co-existing fungi, will appreciate dead wood of a similar species, if not from exactly the same plant.

chop and drop at base of apple tree

Chop and drop at base of apple tree. Note the limb prunings left as small apple tree "wood chip" mulch.

Lastly, the base of the tree was chopped and dropped.  In other words, the resident dandelion (has been living for many months) and a new arrowhead plant was chopped at their base, BUT NOT PULLED.  Doing so, the plants’ roots will die back and leave loose organic matter in the soil.  Yummy!, says the tree’s roots.  The greens left on the wood chip surface will mulch the surface, with the organic matter in the leaves feeding the top layer of soil.  Then the “weeds” will grow back, Tony will chop them again, over and over and apples and apples again.
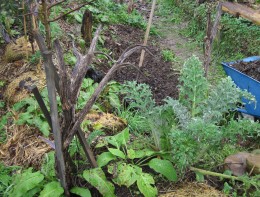
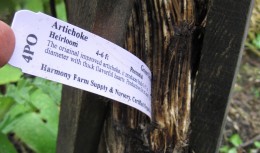
artichoke bed on Dragon Spine Ridge3. I once heard that artichoke plants ought to be cut to the ground in winter in preparation for the spring’s new growth.  Well, another “ought to” that I am not getting to.  I have enjoyed witnessing the full cycle of these enormous thistle-like plants.  Up. up, and up grow the stalks, bulking thicker and thicker as they grow.  Heavy duty veggies!   Then, the joy of the flower bud, which is the “artichoke” itself.  And sometimes I don’t want to harvest that bud.  I egg on the magnificent flower that follows.  Come butterflies, bees, wasps, beetles, and all pollen lovers to Artichoke’s purple carpet in the sky.  But, alas, the end is then near. The flower dies back, bleaches silver in the sun, and becomes a highrise insect commune.  But beware — spiders are the landlords and the rent they charge will suck the life out of you!  Soon the entire shrub-like plant, both stalk and spent flower, takes on a sun-scortched, wind-twisted tangle of gracefulness.  Art in the garden.  And all I did was plant an artichoke plant.  And, the best is yet to come.  This decaying artichoke stalk is both GARDEN SCULPTURE and HABITAT.

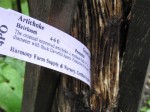
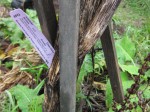
decaying artichoke stalk holding nursery tagA couple of weeks ago, I noticed that the plastic nursery tag for the Green Globe heirloom artichoke planted on Dragon Spine Ridge had fallen away from the plant’s base.  Not wanting to throw away the tag because the perrenial artichoke lives on, I thought to stick it into the plant’s spent stalk.  Amazing how nicely the pointed tag cut into the vertical fibers of the old stalk.  Wow!, that’s habitat material.

Last season's artichoke is overwintering insect habitat.

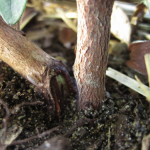
Close-up of old artichoke stalk. Note the thick vertical veins of the stalk. The stalk's pulpy interior seems the perfect insulated over-wintering habitat for insect eggs and larvae.

If the thin plastic nursery tag could penetrate the artichoke’s stalk so easily, you can bet for sure that some insects have bored holes into this plant.  Sure, some of those insects will thrive inside the plant stalk to emerge, as larva or adult insects, and eat next summer’s artichokes.  But, we have plenty to share.

If we focus on growing biodiversity, and not just this plant and that plant, we will have strong gardens.

Stay warm in your over-wintering habitat.

Tony
Jan 102011
 
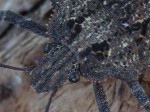
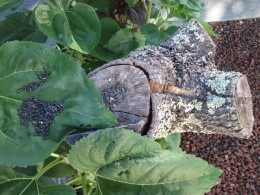
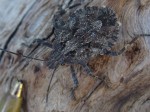
Brown Marmorated Stink Bug on redwood driftwood

Garden Log (what I did):

1. Cold here in Sebastopol, California — well at least for us — with the growing season nearly dormant.  We finally got some garlic starts in the ground about a month ago in the front veggie bed along the sidewalk.  Maybe this week I’ll plant fava beans there to grow SOMETHING.

2. Harvested hachiya persimmons from a neighbor’s tree.

3. Inspected Salamander Swimhole’s vitality.

4. Discovered brown marmorated stink bugs on a piece of driftwood in the front garden.

You, the Habitat Gardener (reflections):

1. Our garlic crop in the front bed will be ready next late spring, just in time for us to plant sunflowers.  We get garlic; the critters will reap the sunflowers.

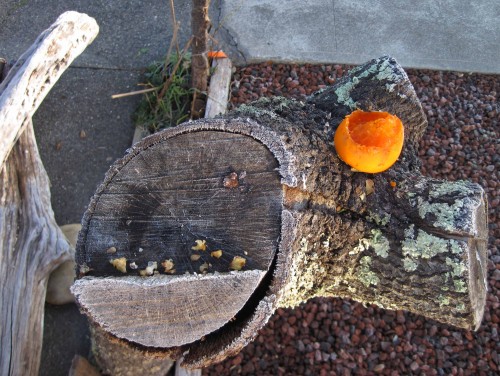
2. The persimmon that was left on Oak Pedestal last night is half eaten.  A long deck screw holds the persimmon in place and secure from strong critters, like a squirrel, that might want to eat the persimmon elsewhere.  The long screw’s head was snipped off, then that end was impaled into the oak limb’s crotch, leaving the pointy  end of the screw skyward.

Top view of Oak Pedestal feeder with partly eaten persimmon.

Top view of Oak Pedestal feeder in winter garlic bed with partly eaten persimmon.

Oak Pedestal feeder -- side view

Side view of Oak Pedestal feeder in winter garlic bed.

So easy to screw an apple, a persimmon, a tough piece of food onto the screw and thwart thieving critters.  Ha!, I am smarter for once.

Oak Pedastal Feeder and SF leaves

Top view of Oak Pedestal feeder surrounded by a summer crop of sunflower. The black oiled sunflower seeds are bagged birdseed. How fun to place some seeds on the sunflower leaf platters. Note the up-ended deck screw (in the oak limb crotch), which is used to secure apples and other food offerings.

3.Salamander Swimhole, which seemed a lost cause because of foul water (see my November 27, 2010 entry: http://sporelore.com/residential-habitats/garden-pond/) is clearing.  The magnolia tree’s leaves have all fallen for a month now so the pond is no longer being overwhelmed with fresh organic matter.  Algae is growing faster now that more sunlight is reaching the pond; the magnolia leaves were shading the new pond water.  Just-visible microbes are whirling about in the water and the potted plants are showing new growth.  The pond will thrive, with luck in time for a pacific tree frog to want to lay eggs in it this spring.

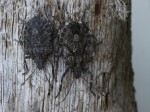
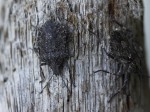
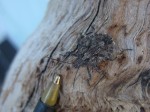
4.  Brown marmorated stink bugs ( Halyomorpha halys) are in the insect family Pentatomidae and are known as an agricultural pest in their native range of China, Japan, Korea and Taiwan.  Yes, they are not native to our California soil.  But they are so cool!  Given the species’ alien trait, I’d rather they didn’t exist in our garden BUT three bugs on one small piece of driftwood means there are probably many others entrenched in our neighborhood.  What’s a sustainability-minded Master Habitat Landscaper Apprentice like me to do?  Nothing, that’s what.  Sure, I rather the garden be full of native insects to work the garden and provide food for higher tropic animals.  But perhaps alien pollinators (or non-pollinators) will feed some of those higher tropic animals, i.e., animals more sophisticated/more developed.  An insect meal might just be an insect meal to a hungry woodpecker during these food-is-sparse short days of winter.

A couple of cool facts about these alien-to-California brown marmorated stink bugs: a) They are actually bugs!  “Bug” is often a lay term for “insect”, but “true bugs” are only one order of insect, like “beetle” is another order of insect.   b) Stink bugs get their name from a smelly fluid emitted from their thorax when threatened.   I was lucky to get the bugs pictured (below) without getting sprayed — surely their sluggishness from the cold was in my favor.  c) The term “marmorated” is derived from Latin for “marbled”.  Close inspection of the seemingly “brown”/dull-looking wing tips and exoskeleton’s back plates (pronotum, esculetum, elytron) reveals magnificent design and color.  Sure wouldn’t want to be an ant when that steel-plated star cruiser crawls overhead.

Brown Marmorated Stink Bugs on redwood driftwood Brown Marmorated Stink Bugs on redwood driftwoodBrown Marmorated Stink Bug on redwood driftwood

Brown Marmorated Stink Bug on redwood driftwood Brown Marmorated Stink Bug on redwood driftwoodEnjoy all things, stinky or not.

Tony
Dec 172010
 

Garden Log:

1. Harvested a few purple potatoes from the Bog, a ditch that was filled with planting soil and potato starts in September.

2. Carried citrus to frost protection and illuminated Anna’s Avocado Aviary with a string of white decorative lights.

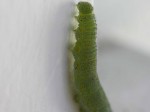
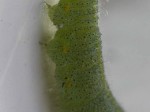
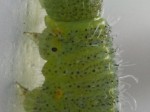
3. Photographed more caterpillar activity/crysalis formation on our home’s front door wall.

You, the Habitat Gardener:

1. The Bog is a low ditch in the middle of Dragon Spine Ridge in our back yard; it catches water from uphill.  The Deva Tub drains directly to the Bog.  The Deva Tub’s landscaped bowl — a lush horseshoe of fern, trumpet and jasmine vine, buddleia, ginger, forget-me-not, morning glory, rosemary, canna lily, and fig —  also drains to the Bog.  Good reason to use organic soap in Deva Tub, and not much of it!  The Bog sure appreciates that soapy bath water during the summer and the many plants in the Bog willingly process the greywater.  This year we decided to fill the Bog with soil and potato starts to grow potatoes during the dryer months.
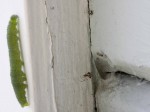
During the wetter months, we want the Bog to collect storm water off the slight hill in our back yard.  No problem, all we have to do is harvest the potatoes that have been enjoying the temporary planting bed in the Bog.  The potatoes will go in our kitchen (or into cold storage) and the Bog’s planting soil will either go into bins for storage or into another planting bed.  I bet some of it will go into the garlic bed we want to get started.  Yes, we are running late.  But we still have some garlic hanging in the kitchen from this fall’s garlic harvest and that can be used with the potatoes coming in now.  Garlic potatoes from the garden — gardening has it’s rewards.

2. The string of 300 lights that we are using to minimize the frost damage on our avocado, paw paw, and guava trees use 61.2 watts — equivalent to a medium-sized light bulb.  Not every night, just when the frost might be a bit too much for these young trees.  Some day we will cut the cord (both electric and umbilical) and the more mature trees will be on there own.  Yes, there will be some frost damage but the older trees will be able to recoup strength and leafage in the spring.  Shutting off the string of lights after the morning’s warmth has arrived helps us minimize their electric use.

3. There’s been a lot of caterpillar activity on the front wall of our home while we have been warm and cozy inside (just minding our own business, I might add).  As I mentioned in “Happy Thanksgiving weekend AND Saving a Pond” ( http://sporelore.com/residential-habitats/garden-pond/ ), these caterpillars are most likely coming to the wall for its warmth and shelter features.  Lucky for us today, there was a yet-to-pupate caterpillar looking for its over-wintering site.  A fresh, plump, partially transluscent light green caterpillar.  Most likely by tomorrow it will have found a cozy nitch to set up camp for the winter.

Enjoy the pics.  And if you know what type of caterpillar this is, please drop me a line.

Tony

Dec 102010
 
Zen Canyon Snake Pit -- slate stacking completed

Garden Log:

1. Completed slate stacking to bring Zen Canyon Snake Pit’s ceiling flush with surrounding edges, which finished the installation of the habitat.

Zen Canyon Snake Pit covered over with soil, leaves and branches.

Zen Canyon Snake Pit covered over with soil, leaves and branches. The topmost slate of the slate-layered chamber will support a branch/twig/stump/log pile. That pile of organic material will be a thriving animal habitat as it breaks down, soon to be thrown onto the compost.

2. Dug out soil around irrigation zone #3’s last riser, in corner of back garden, to expose the tee connection.  Threw the soil on top of Zen Canyon Snake Pit.

3. Cleaned magnolia leaves off spa deck and on pathways in back garden — thanks Glory!  Leaves were dumped on top of fresh soil just thrown on ZCSP.

4. Began stick debris pile on top of Zen Canyon Snake Pit; sticks were from dying birch and miscellaneous piles around the yard.

5. Tossed old straw “tiles” into the trench that was the base of Rock Pile Planter.

6. Harvested persimmon fruit from neighbor’s tree.  Thanx for the persimmons, Sunny!

You the Habitat Gardener:

1. What a great session in the garden today.  Always a good day when an animal habitat is completed.  All the ideas, the what-if’s, the how would that be’s, the plans and sketches, the gathering of materials, the actual work (imagine that!) to manipulate space and materials are over.   Sometimes, finishing a habitat installation is anti-climatic, especially one that has been in my mind for months, maybe years.  But today’s completion of Zen Canyon Snake Pit brings our back garden to a new stage.

Now that Zen Canyon is bridged over with slate, we can begin to create an organic debris pile (sticks, tree limbs, etc.) on top of it.  Debris Pile Food Court is born!  Where there once was a hole in the garden, there will be a through-fare for the wheelbarrow and a large-item compost pile, that is, a debris pile.  We will keep the debris pile to one edge of the top of the snake pit and have a path for the wheel barrow over the other edge of it.  The filled over  “canyon” will become the base, or floor, of the debris pile, a new habitat in of itself.

Habitat stacking in the garden — the debris pile will shelter many microbes, insects, snails, slugs, spiders, and small animals feeding on them.  Perhaps some of those critters will seek shelter below the debris pile, in the staking of slate and stone  or in the two toilet tanks that make up the cracks and crevices of Zen Canyon Snake pit.  And all the while the debris pile breaks down we will be making soil.  Eventually most of the organic debris pile will be tossed on the nearby compost pile.  We’re making soil!

Debris Pile Food Court above Zen Canyon Snake Pit

Organic garden debris, too large for the compost pile, will be piled to create the Debris Pile Food Court above Zen Canyon Snake Pit. Perhaps larger critters will live below ground and feed on the debris pile's smaller critters above.

2. Today began the creation of  Debris Pile Food Court (Garden Log #2,3,4) — a  pile of sticks , logs, stumps, tree limb sections piled above Zen Canyon Snake Pit.  The debris pile will stand alone as an animal habitat, friendly to critters from microbes to insects to birds, amphibians, and reptiles.  Maybe even a garden snake!  Soil was thrown at the base of the pile to help sustain such biodiversity.  Maybe some of those microbes working (breaking down) the wood pile will take shelter or food from the soil floor of the pile.  Maybe that soil floor will be where the insects, snails, and slugs lay their eggs to keep the explosion of life going.  And, that soil floor, rather than the slate floor is was, will also keep water available to further sustain animal life.

3. The magnolia leaves (Garden Log #3) cleared of our spa deck and off our garden slate pathways was thrown on top of Debris Pile Food Court’s soil base.  Not great science, just wanted some place to put the leaves till our compost pile area is ready AND the leaves under the wood pile will add to the bio-diverse habitat of the now-planned soil-leaves-wood pile.  Note that I said the leaves were only cleared away from the spa deck and the pathway; all other leaves will be left to break down on our small grass patch and in the beds of the back yard.  What a mess!  But that mess will provide great nutrition,  shelter, and insulation for the soil microbes, larger critters, and plants ALL WINTER LONG.  And be assured, by spring, the ground cover beds and grass will not only have recovered, but will be thriving and happy.

4. Used straw tiles (Garden Log #5) to fill up the base trench to the demolished Rock Pile Planter.  Pulling off a few inches at a time from the end of the bale made nice thick, wet, heavy, partially-decayed slabs, or tiles, of straw.  Perfect for filling in the thin trench.  Eventually that straw will break down and leave a nutritious layer for the soil.  Sure beats the adobe that was in the trench.  And, in the meantime, the area has been leveled off and will have wheelbarrow access to the area.

5. Persimmon Harvest (Garden Log #6) is here.  The beautiful fruit is ready to pick off of our neighbor’s tree.  Enough fruit is left high in the tree, beyond reach with a 12-foot orchard ladder, to treat the birds of the neighborhood.  No fruit goes unused — we will throw any harvested damaged fruit into the Earthworm Bin.  Had some fun harvesting persimmons this year by using Nature-provided packaging.  We used persimmon leaves between layers of fruit — the leaves provided a soft cushion AND are ripe with beauty.  Will be fun to pack away some leaves as we pull out the fruit.  Now you know what old phone books are good for; they have thin, absorbent paper that easily makes a flower or leaf press.

Hachiya persimmon fruit and leaves

Hachiya persimmon fruit and leaves, pulled in from the cold (some frost on fruit).

Competed installing one animal habitat and started another — what a great day!

Tony

Dec 022010
 
Anna's Hummingbird
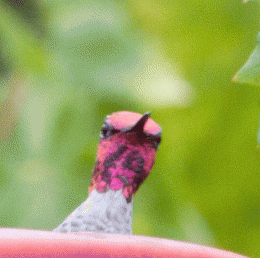
Male Anna's Hummingbird

A male Anna's hummingbird at our back deck.

Garden Log:

1. Not much in the garden today, on this near-winter day.  A brief hello while moving our 4 small potted citrus under a jasmine vine thatch along the deck lattice.

2. Divided up the kitchen washbasin water between the  citrus, avocado, and paw paw tree pots.  All the trees are young and small.  The 4 avocado and 4 paw paw are patiently waiting to be unpotted and are residing in Anna’s Avocado Aviary alongside are back deck.

You the Habitat Gardener:

1. Our back deck has lattice along one side to increase privacy from the next door neighbors.  Then, we planted jasmine at the base of the deck to grow on the lattice — awesome privacy,  EVERGREEN plants and beautiful, fragrant flowers.  Great cover for brave nest-building birds, wasps, and spiders.  Habitat!  Nowadays the jasmine could use a trim, but I knew there was a reason I didn’t get to it.  Okay you young citrus trees in pots, wanting to escape the night’s frost, hide under here.  So the citrus pots were pushed up against the lattice wall and are tucked under the overhanging jasmine thatch.  The frost, which falls straight down, will fall directly below the canopy line of the jasmine and won’t leaf damage the citrus.  Mission accomplished and I didn’t have to move the trees and cover them with a sheet elsewhere.

Jasmine Gondola Apartments alongside back deck

Jasmine Gondola Apartments alongside back deck. Since this pic (last March), the jasmine has grown much thicker. The citrus are resting comfy tonight up against the lattice, protected by the jasmine vine thatch overhead. The empty gourds hanging in the jasmine thatch provide shelter for spiders, crawling insects, and wasps.

2. Our Sunset zone here in Sebastopol, California is 15.  Pretty cushy weather-wise.  Dry summers with morning fog, cool winters with some frosting, almost no snow.  So we are going to grow avocado and paw paw (the largest native North American friut, native to east of the Mississippi).  Frost protection, especially during the trees’ young years will help them get to the old years.  And some work may be worth it — both tree species deliver exceptional fruit and the trees are long-lived and attractive.

In order to more easily throw a tarp above the trees, they will be planted alongside our back deck.  The deck structure will enable an easy secure point to toss a tarp above the trees.  Note that I say “above” and not “on”.  The covering, whether it be a sheet of cloth or plastic, should not rest on the trees wood or foliage.  If touching like that, the cold above the tarp will transfer through the covering directly to the tree.  So the key is to provide a covering AND an air space above it.  And because I envision an aisle of avocado, paw paw, guava, and honeysuckle, all in bloom some day, the habitat is called Anna’s Avocado Aviary.  Anna’s frequent our garden, even beyond the hummer feeder that hangs on the back deck.

Anna's Avocado Aviary alongside deck lattice frame.

Anna's Avocado Aviary alongside deck lattice frame. The area was chosen because a frost-protecting tarp can be easily spanned, on especially cold nights, from the high lattice wall over to the honeysuckle trellis. The large potted trees alongside the deck are avocado, the smaller are paw paw.

A closeup of Anna’s Avocado Avairy’s guest of honor:

male Anna's hummingbird at feeder

A male Anna's hummer wants to know, "Do I bother YOU when you're eating?"

That’s all folks!

Tony

Nov 272010
 
Salamander Sunny Swimhole remodelled and flushed

Happy Thanksgiving weekend all!

So nice to have a little more focus on what we have to be grateful for.

Garden Log:

1. Emptied the kitchen compost into the Earthworm Bin.

2. Emptied the kitchen wash basin onto Salamander Resort.

3. Removed leaves and sunken oak wedge from Salamander Sunny Swimhole, the pond over Salamander Resort.  Flushed pond water.

4. Potted red currant and jostaberry starts that were saved during the demolition of Rock Pile Planter.

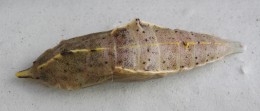
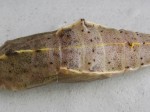
5. Photographed what was a caterpillar yesterday and is a pupa today.  Just outside our front door, where the sun’s warmth is wind-sheltered, a caterpillar was crawling along the siding yesterday.  In just about the same space today — “You haven’t gotten very far Little One, have you?”  Well duh!  That caterpillar may be there all winter.  In fact, it’s not even a caterpillar any more.  It’s a chrysalis, attached to the siding with a sticky silk ball.

Butterfly chrysalis on wood siding.

Butterfly chrysalis on wood siding.

Close-up of butterfly chrysalis

Close-up of butterfly chrysalis. Yesterday it was a plump, cylindrical, light-green, soft-skinned caterpillar. Today it is forming angular, hard ridges (natural I-beams) and a dark, thick crust.

You the Habitat Gardener:

1. The nights are getting chilly, even for cold-blooded invertebrates.  I like to use planty of straw in the Earthworm Bin to keep it well insulated and to create a compost-breaking-down situation.  All the die-hard microbes will generate heat, that will allow the straw and kitchen food to breakdown (from the microbes, of course), which puts off still more heat.  The bottom will fall out of this Pyramid Scheme when we run out of kitchen scraps to add to the compost — “Quick!, gather up those rotten fallen apples and feed them to the worms.”

2. The Salamander Resort, our 6-foot-deep habitat hole/cavern/rock, wood, and soil pile, still has an unplanted surface.  Intense soil making for now.  The surface has been covered with different layers of organics, including manure soil, oak leaves, wood chips, magnolia leaves, straw.  Great place to dump the kitchen washbasin, which is considered blackwater.  “Blackwater” is a notch more ecologically volatile than greywater because of either sewage (toilet) or food particles from the kitchen sink.  Sewage or food — all the same to a microbe.  So for our garden, we purposefully wash our dishes in a half bucket, let it cool, then dump it in non-food areas or on the ground being careful to stay away from any leafage or root crops.  Food particles and nitrogen-based “Earth-friendly” soap.  [Pill Bug to his family]: “Soup’s on!”  When in doubt, spread any greywater/kitchen water around then garden so you won’t drastically inundate any one plant.  And don’t forget to save the bottom of the wash basin for one of your favorite plants.  “Who will get all this yummy oatmeal flake- and baked eggplant polenta-infused water today?  Who’s been good?

3. My heart broke this week.  All the hard work I did to set up a cooler-than-cool pond habitat in Salamander Sunny Swimhole turned out to be a flop.  A cold snap, with some nights as low as 26 degrees (well, after all, this is sunny California!) set in and forced a lot of falling leaves.  Between the shorter days of low-angled sun, the flood of organics falling out of the air (leaves), and the lower temps, the half-barrel pond ecosystem could not keep up.  Murky water filled with fallen leaves AND a touch of “oil slick” on the surface.  It was the slick that told me this pond is going anaerobic — it’s being starved of oxygen.  All the precious muck that I saved during the the relocation plus the current conditions were just too much for it to keep up, for it to recycle life from the decaying matter being quickly added to it.  A note about the shiny, multicolored slick:  it’s a sign that there’s too high a concentration of nitrogen in the water, usually from muck on the bottom.

Sure, there’s some lesson to be learned here about our pond that went flop.  But the bigger picture lesson I want to convey is how freeing it is to learn from a mistake and to feel the satisfaction of having corrected it.  My heart broke not because the pond wasn’t working.  My heart broke because I was WRONG.  Don’t you just hate that!  I was so jazzed to include a neat piece of wood (a freshly cut oak wedge with rotted out holes) when setting up the pond.  What design, what art!  All my visions of tadpoles and other aquatic critters meandering through the wood’s passages, perhaps escaping a foraging raccoon, gone up in smoke.  How couldn’t this be Paradise?

Daily cleaning out of some of the fallen magnolia leaves postponed more effective action.  Luckily, I was smart enough to finally give up the ghost and hauled the wood wedge out of the pond.  Smelly!  Foulness that bespoketh rotteneth (Old English, so old that they may not even know about it).  Clearly an inorganic situation, AKA anaerobic, going on in the pond.  How cool once the wood wedge was out.  More water could be added to make up for the displaced wood.  Also, I was able to scoop out leaves and muck more easily.  Then I gave the pond a good flushing with fresh water.

Be careful when flushing a pond, especially if you are flushing with city water which might contain health-related additives in it.  Those additives, like fluorine and chlorine, will bubble out if you let them sit overnight.  But straight from the city-water hose to the pond in an excessive amount might overwhelm some critters and kill them.  But back to Tony’s state-of-the-art foul pond.  For our pond, it was already foul, so I flushed it, flushed it, and then flushed it some more.   Hey, we’re starting over, both me and the pond.  The pond will recoup and achieve it’s ecosystem.  I will find something to be right about, again, some day.

Stay posted — I’ll post a pic of the pond’s success as it comes.

Tony

Nov 242010
 

Chapter 5 (by Anita Smith)

Resources for You, Your Neighborhood, and Beyond

One need not sit very long nowadays with unanswered questions about the garden, the environs surrounding it, anything, really.  There is so much information available.  In fact, the real challenge might not be finding information on a subject, but rather acting, doing, or creating.  Regarding your garden, eventually you will want to take a leap, and what better place than in the garden.

-Tony McGuigan

Introduction

Has Tony’s passion or sense of humor infected you yet?  What Tony’s doing in the garden and offering the world through his writing, I believe, is unique.  Watch out, his perspective and playful approach is contagious!  By this point in the book I bet that you’ve at least smiled and giggled some.  I hope you’ve felt your heart expand and warm, and your childlike excitement and curiosity about the natural world reignite.  I hope you’ve also been touched by hope; a sense of hope about the possibilities for a more healthy, equitable, and sustainable way of living.  There are countless things we can do—no matter who we are or where we live—to make the world a better place for everyone and all life on this precious blue orb.  The resources in this chapter are intended to help further tantalize and support you on your journey.

There are a few things I want to mention before jumping into this offering of resources for You, Your Neighborhood, and Beyond.  First, I’m operating on several assumptions here.  One is that biodiversity is a good thing.  The more biodiversity on the planet—on our continents, in our watersheds, and around our homes—the better.  It’s like having a well-stocked toolkit for keeping things running smoothly and fixing things when they break.  There are, of course, some ecosystems that naturally have lower biodiversity than others and have evolved unique and intricately balanced dynamics.  As a dominant species though, we’ve done WAY too good a job of messing with those dynamics nearly everywhere on the planet, and we have significantly and alarmingly reduced Earth’s biodiversity in the process.  If everything is indeed connected—as nature shows us it surely is and many wise people have intoned—then that diminishment of biodiversity is bound to plague us.  We would be wise to proactively address this rather than ignore it or wish it away.  Recent advances in the study of human ecology, specifically reconciliation ecology, are part of the resource toolkit we can draw upon to help inform our proactive response.  Reconciliation ecology is the science of inventing, establishing, and maintaining new habitats to conserve species diversity in places where people live, work or play.

For more of Anita’s chapter,  Resources for You, Your Neighborhood, and Beyond, see Tony’s book, Habitat It And They Will Come .

Cheers.

Tony


Oct 222010
 

Garden Log:

  1. Fed Mexican lime, Kaffir lime, and Lemon Guava kitchen scraps before mulching with earthworm harvest, wood chips, granular spore, and a sprinkle of water.
  2. Chop and drop throughout the back garden.
  3. dock and comfry grown for "chop and drop"

    Western Fence Lizard Liar with dock (left) and comfry (back right) grown for "chop and drop". Insects will come to eat the red currant berries (taller green plants alongside slate) and lizards from the rockpile habitat will feast on the insects.

    Wood chip mulched Hister Beetle Huckleberry Habitat, apple and pear trees, and Sea Lion Splash’s kiwi vine.

  4. Harvested white clover mulch from under Norwegian Hill Basket to seed/mulch Salamander Redwood Lodge with white clover.
  5. Digging in SSSC’s Lower Chamber, slowly but surely. Lined waiting toilet tanks with cardboard over holes in bottom. Filled tanks with wood chip.
  6. Prepared 15 gallon tubs with layered alfalfa and clay from SSSC. Tubs stored near Earthworm Box and will be used to mix material into box contents. Also layered 15 gallon tubs under deck that wick water to jasmine and grape; top layer is adobe so rotting alfalfa does not stink too bad.
  7. Tied string around split trunk of huckleberry.

To you, the Habitat Gardener:

  1. About those 15 gallon nursery pots used to wick water (#6, above), that’s my solution to not having drip irrigation EVERYWHERE. Sure, everywhere would be most efficient, but I do wallow in procrastination at times. The wicking pots, also provide a place to make poor soil good soil, as the mulch breaks down AND it’s habitat. All that soil/clay/mulch/wood chips/water — you know there’s a multicultural neighborhood going in those pots.
  2. “Chop and Drop” (#2, above) is about carbon farming — plants grown for their ability to harness the sun’s energy and turn it into green leafage.  Both the comfrey and the dock in your garden can be grown “as weeds”, leafing out wherever you want to build soil.  The plant grows, you chop it down, NOT PULL IT OUT.  That dock or comfrey plant will grow back, you will chop it again, Pete and repeat.  The beauty of your labor will be making soil.  As the plant grows, it will send out roots.  Chop to ground level, and those roots die back AND, in the process of dieing back, leave organic matter in your soil.  Not only has the plant busted its root down into the soil, but also it will leave some of the water and organic matter in it behind when the above-surface life is cut from it.  And even better, the comfrey will also nitrogen fix the soil.  In other words, the rhizomes clinging to the comfrey roots will release nitrogen into the soil when the root dies back.   Emphasis on “when” there because most gardeners that grow comfrey as companion plants in their gardens don’t realize that significantly more nitrogen is released when the rhizome dies back.  Chop to the ground, release nitrogen to the subsoil, mulch the surface with the nitrogen-rich leaves, and know that that comfrey plant will thrive again, to be chopped again.  You might want to get to the comfrey before it goes to seed; controlling the rhizome spreading plant is challenging enough.  Also note that the comfrey is a very medicinally useful plant.  As for dock, the very young (inner) leaves are tasty raw by themselves and in salads.  Don’t forget that mega salad you’ve got growing in the back of the garden, AKA “the compost pile” — dock greens are a great way to jumpstart the pile.
  3. For huckleberry trunk repair (#7, above), I used 1/2 of garden twine (knotted one end and split the string open) to create a thin strand that will decay by the time the plant is ready to bust loose from the bondage. I had thought that the huckleberry shrub was dying from a water issue but then found that the trunk was split during planting. Since planting this spring, the wound seems to have healed partially and the plant has bulked up — it’s going to live! The berries will be enjoyed by many critters, including me and the birds. Check out the pics to today’s repair job for that split huckleberry trunk below or at: BEFORE and AFTER.

Save a life (yes, plants count), enjoy a berry or two.

Tony

Aug 202010
 

Garden Log:

1) Took a break from digging SSSC today but did water the clay in barrels and bins along the garden path. 2) Finally found the “missing” plans to Chicken Haven coop and pen

To you, the Habitat Gardener:

adobe clay from habitat installation awaiting fill stage

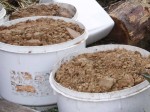
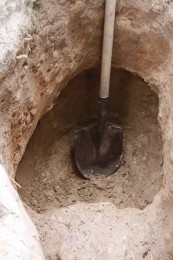
1) About the watering of the clay: A lot of that clay will go back into the hole that will become Salamander Shady Shallows Cellar. Some will get stored away for a future habitat installation. But for now, we want to keep the clay moist so it is usable — the hot sun will turn it into rock if it drys out. Not too much water, though. Too much water will drown the microbes and create an anaerobic (no oxygen) situation on the bottom of the containers. Smelly!, that’s anaerobic; think about decay, sulphur, methane, pew! So a light sprinkle of water will be just enough to offset the sun’s heat for a while. My plan so far (changes daily, and isn’t that fun!) is to install habitat features in the enormous hole waiting for our creativity. Oh, how I love being vague — “habitat features” could be anything, maybe even the kitchen sink. Actually that’s just a lead-in to what we will be using — enamel tiolet tanks. Yes, tiolet tanks saved from the dumpster at a water-reducing project I happened upon. Sounds like a fairy tale, doesn’t it? But better than a fairy tale, these enamel tanks will last FOREVER under ground. A lasting tribute to the amphibian world in the form of stone-like caverns with organic bedding. Dig hole. Fill hole with tiolet tanks packed with wood chips, tree limbs that jut out of the hole, cardboard tubing, straw bale “tiles”, and lots more wood chips. Pour in liquified clay (INGREDIENTS: clay, water. Not an approved source of daily nutrition!). Let it sit, and sit, and sit. Serves 500-1000 amphibians, and trillions of microbes! But why the liquified clay? Thanks for asking.

The vaulted Lower Chamber of Salamander Shady Shallows Cellars

Liquified clay will refill the hole and allow it to self support itself. The hole is large enough that although The Lower Chamber is vaulted, we wouldn’t want to run the risk of having it collapse. A collapse of any magnitude would change the surrounding garden features. This is a small garden (that’s why we are going underground!) and we don’t want the nearby slate path or planting beds to collapse. And what fun to visualize the liquid clay solidifying and creating structure to the hole. The sides, and the vaulted lower chamber, will become one again with the same clay that was dug, scooped, and shaved from the hole. The liquid clay will tightly fill around the wood chip-filled tiolet tanks and the rising tree limbs. Once the toilet tank wood chips and tree limbs decay (yes, will take years), hollows and tunnels, respectively, will be created. The hollows will have soft, moist organic bedding and the tunnels, installed at a climbable slope, will have critter-friendly soft, moist organic footing. A pond on top of the filled-in hole will allow salamanders, toads and frogs to breed in our garden. True, a small pond, but at least it’s wet, it’s water. Water — the g

iver of Life. And from that pond, perhaps an amphibian or two will seek refuge and everlasting happiness below in Salamander Shady Shallows Cellars. I love happy endings.

2) Check out my plans for Chicken Haven below.

Chicken Haven plans -- East view

Chicken Haven plans -- Top view

Chicken Haven plans -- South view

Chicken Haven plans -- West view

Chicken Haven plans -- West view and notes

Chicken Haven plans -- North view

Dream, and record it!

Tony