Nov 212012
 
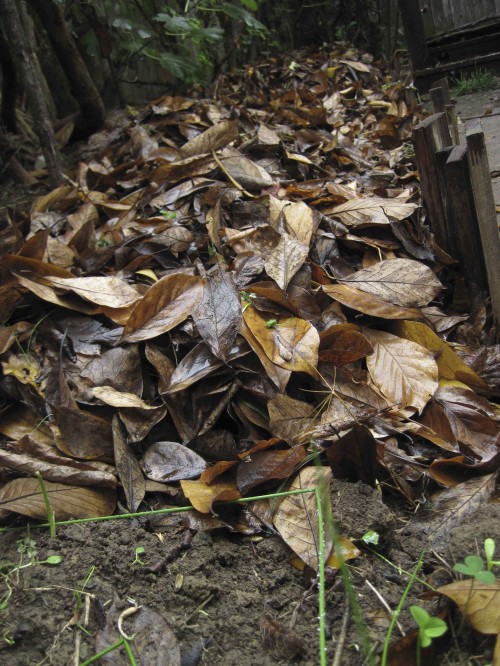
Ground level (critter head height) entrance to Leaf Trench Highway.

Day 6 in this 6-day video series: Preparing patio pots for winter veggie planting.

First a video  re “Leaf Layer Added to Leaf Trench Highway”,  then some animal habitat pics (below the video):

Patio Veggie Pots 6 of 6 (video):

Leaf Layer Added to Leaf Trench Highway (pics):


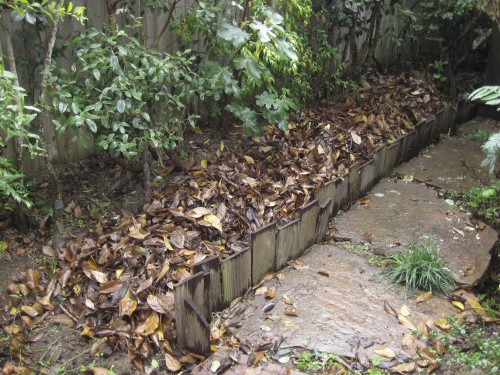
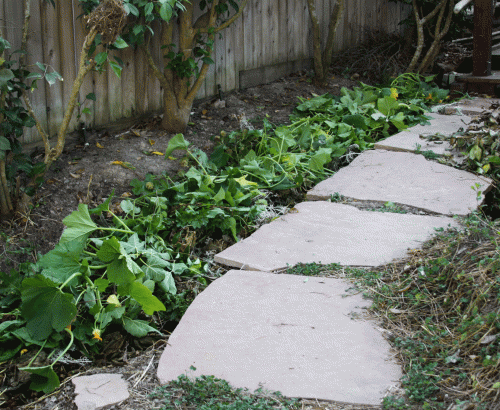
Leaf Trench Highway with a fresh layer of tulip magnolia leaves.

Leaf Trench Highway with a fresh layer of tulip magnolia leaves. The trench along the walkway is three feet deep and filled with different organic/yard debris layers. The layers will break down and form rich compost in about 6 months to a year.


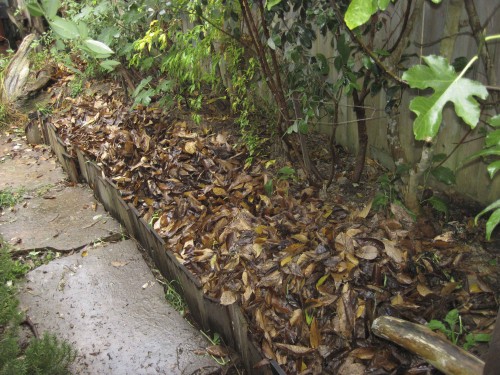
Leaf Trench Highway extends along the back corner of our yard to Salamander Resort (left).

Leaf Trench Highway extends along the back corner of our yard to Salamander Resort (left). Besides storing organic material (twigs, leaves, straw, manure, pulled weeds), the trench also feeds the fedge (food hedge) along our property line. Pineapple guava, fig, and pomegranate trees, as well as annual veggies, grow in the compost-making veggie bed.


Ground level (critter head height) entrance to Leaf Trench Highway.

Critter level, perhaps the head height of a raccoon, skunk, or possum, of the entrance to Leaf Trench Highway. Personally, if I were a salamander, I would crawl under the leaf litter. Lots of tiny tidbit treats (FOOD!) under those moist leaves.


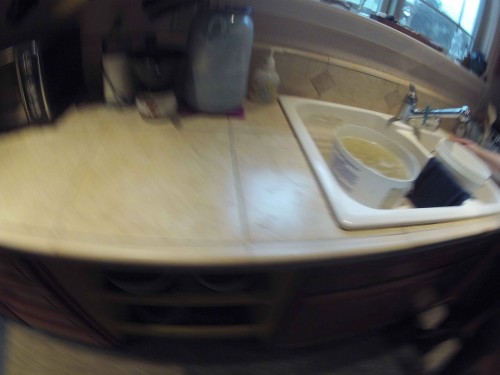
Kitchen dishwater ready for the compost pile.

Dishwater ready for the compost pile. Dishwater with soap and food (left bucket) is considered “blackwater”; rinse water is considered “greywater”. We pour blackwater directly into the compost where microbes and micro-critters will process it. The greywater rinse water makes a fine treat for most of the garden, with care not to pour it directly on fruit/vegetables.


Happy planting veggies on your patio and see you tomorrow (Happy Thanksgiving!).

Tony


Nov 202012
 
Anita dumps a new load of soil critter food.

Day 5 in this 6-day video series: Preparing patio pots for winter veggie planting.

First a video  re “Patio Veggie Pots”,  then some animal habitat pics (below the video):

Patio Veggie Pots 5 of 6 (video):

Soil Making in Leaf Trench Highway (pics):


Horse manure ages in leaf Trench Highway.

Horse manure ages in leaf Trench Highway, on top of many layers of garden debris organics.


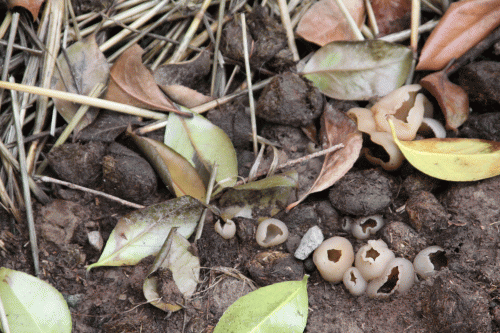
Mushrooms pop out of Leaf Trench Highway’s manure after the first rain.

Mushrooms pop out of Leaf Trench Highway’s manure after the first rain. Good stuff! Having the fungi/mushrooms means the manure will break down faster.


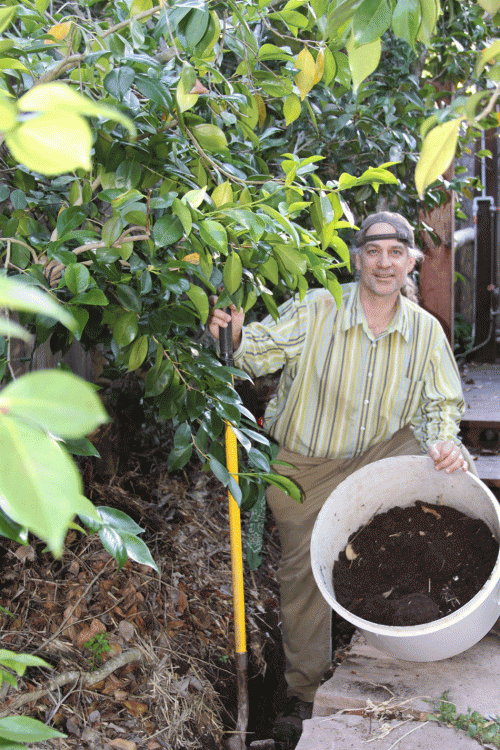
Harvesting compost from Leaf Trench Highway.

Later that year, Tony harvests compost/rich soil from the trench.


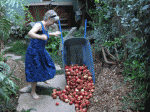
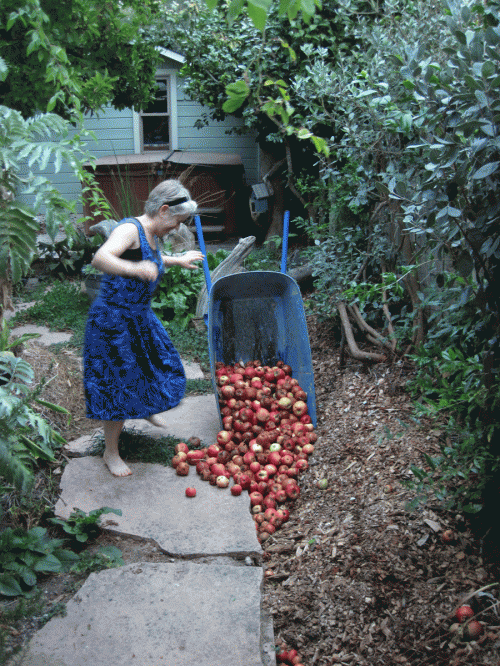
Anita dumps a new load of soil critter food.

Anita dumps a new load of soil critter food. These apples were “debris” for a neighbor that wanted under her tree “cleaned up”. The soil critters and we are sure happy to have the mess!


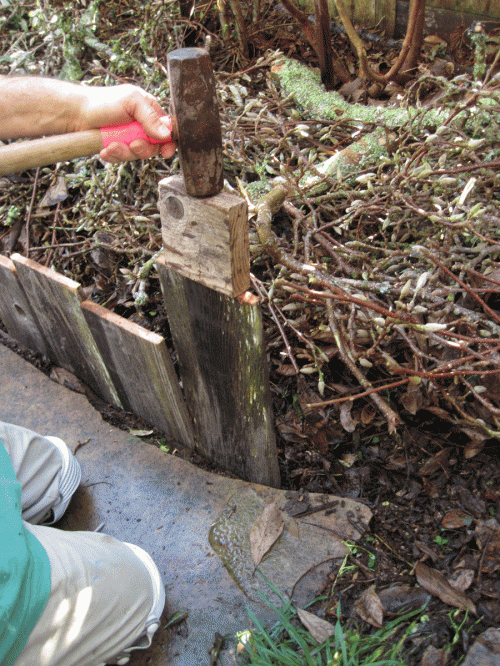
A short retaining wall is added to Leaf Trench Highway.

A short retaining wall is added to Leaf Trench Highway. The short wall of re-used fence boards will allow a higher pile of organics to be heaped into Leaf Trench Highway, yet keep the walkway clear. Note how the block keeps the sledge from splitting the dry fence board.


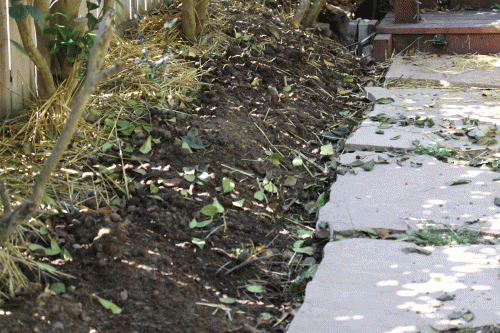
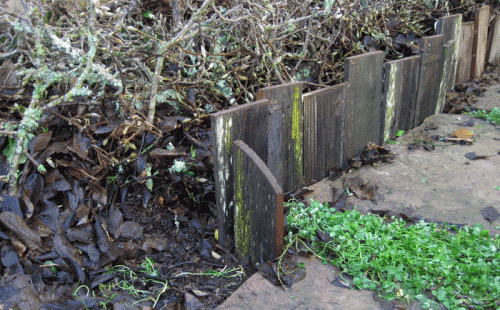
Leaf Trench Highway’s short retaining wall.

Leaf Trench Highway’s short retaining wall in place, holding back tulip magnolia prunings (limbs and twigs). Lichens, mosses, and algae so abundant! Does life get any better?!


Pics and captions from Tony’s new book, Habitat It and They will Come :

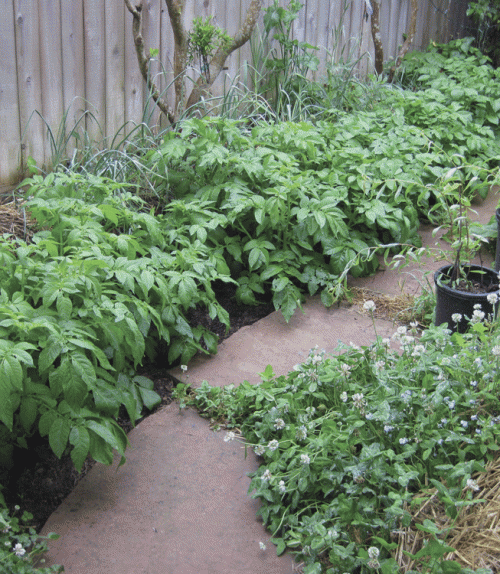
Potato crop in Leaf Trench Highway.Figure 2.11  White Clover and Leaf Trench Highway.  Leaf Trench Highway is about making soil — the 3 foot deep trench is filled with green mulch (for example, a whole lot of pumpkin vine prunings), then covered over with old (cool) manure and compost. Potato starts are dug in. Harvest, 6-9 months later, yields full-grown potatoes PLUS a long, deep trench of beautiful soil to use elsewhere in the garden. The white clover attracts pollinating insects to the potato flowers, adds nitrogen to green mulching, and is a sheltering go-between for critters to travel from one garden bed to another. Laying the slate pavers on soil, and not on sand or cement, allows soil fungi, microbes, and larger animals to pass through the soil, thereby assisting the growth of the clover cover crop.


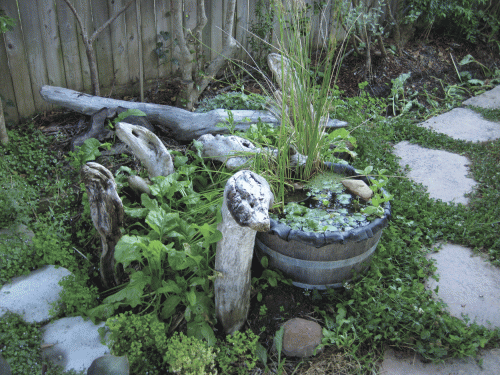
Salamander Resort, the City of Oz for those critters that have travelled the length of Leaf Trench Highway.Figure 3.37  The After of Salamander Resort.  One year later and the resort is still operating.  Driftwood creatures,  a thriving beet crop, and Salamander Sunny Swimhole hide the goings-on eight feet below.  See Figure 3.36 for “The Before”.  Watering the pond waters the beets waters the compost waters the wood chips waters the oak rounds waters tank cavities waters Salamander Shady Shallows, AND waters the adobe clay earth surrounding Salamander Resort.  Water + Cavities + Microbes + Mollusks (slugs and snails) + Worms + Insects =  Happy Salamanders.  The half wine barrel pond, with a 5’ x 5’ sheet of pond liner, was home this spring to Pacific Tree Frogs (and tadpoles).  Many types of insect on the wing visit the pond.  A salamander must be living somewhere in all that!  Note some habitat features: clover on the slate path links this habitat to the rest of the garden, the pond’s surface rocks provide a critter rest stop, the “fedge” (food hedge of fig, pineapple guava, loquat, and pomegranate) along the fence provides flowers and food, and the compost in Leaf Trench Highway at the base of the fedge attracts its own ecosystem of soil makings and critters.


Happy planting veggies on your patio and see you tomorrow.

Tony


Nov 082012
 
Transplanting tree collard cutting - 2

You have landed on Day 3 in this 5-day series of videos depicting propagation of tree collard cuttings.  Enjoy!


First a video  re “Collard Propagation”.   Today’s video is part 3 of 5 (1/day) for the series!   THEN some collard tree pics (below the video):


Tree Collard Propagation — 3 of 5 videos


Transplanting Tree Collard Cuttings for Propagation (pics):

Transplanting tree collard cutting - 1

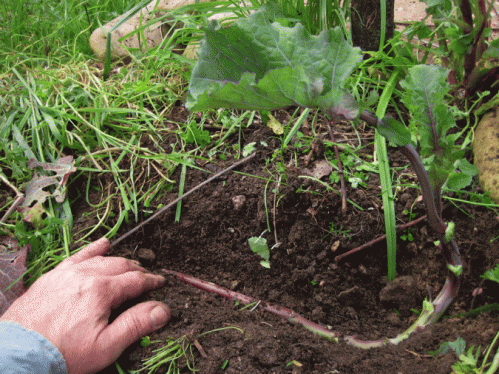
Transplanting tree collard cutting - 1 of 4. Note the bend in the cutting. Could be very difficult to stab this cutting into the ground and keep the leaves off the soil-mulch surface. But working with what we have, we'll lie the cutting on its side. The extra length of cutting (not pruning it back because of the bend) will allow more root development and better ensure propagation.


Transplanting tree collard cutting - 2

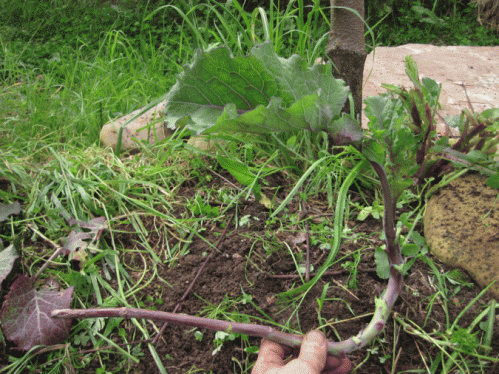
Transplanting tree collard cutting 2 of 4. Perfect fit for this tree collard cutting that has two 90-degree bends in it. Permaculture principle #1 = the problem is the solution. Because of its twists and turns, this cutting has primo real estate in the topsoil layer – look at how well the cutting, or new root system travels horizontally, along the rich microbe-abundant topsoil layer.


Transplanting tree collard cutting - 3

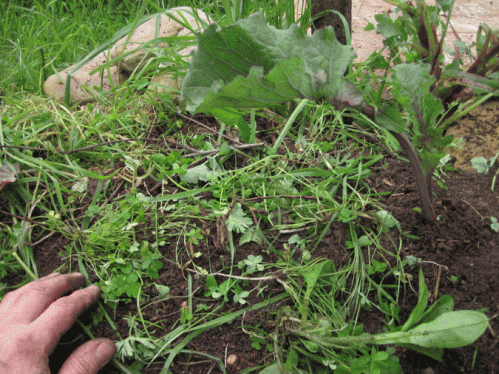
Transplanting tree collard cutting - 3 of 4. The topsoil layer is returned over the cutting. Leave it as you found it. The soil microbes have had a heck of a day (I hate moving!), but they will get a second chance at thriving, alongside the transplanted tree collard cutting. The green manure (boring people call them “weeds”) are also pushed back into place with the lightly packed topsoil. Those plants/greens are going to be mulched over (next pic) so they will boost the existing community of soil microbes. And the soil microbes and the tree collard cutting’s new roots will live happily ever after.


Transplanting tree collard cutting - 4

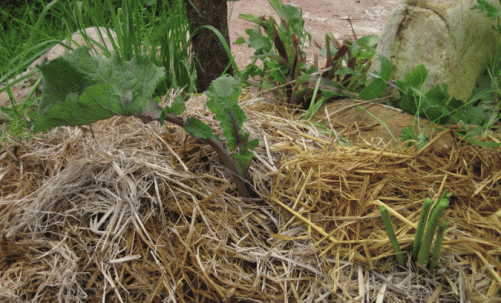
Transplanting tree collard cutting - 4 of 4. Rice straw (old, perhaps last year's bale) is used to mulch over the tree collard cutting. Moisture retention is critical while the cutting decides to thrive or not. Note the chop-and-drop'ed dock plant (lower right); see text below re chop-and-drop.

Note the chop-and-drop’ed dock plant in the above pic (lower right).  Sure it could have been ripped out while I was digging in the transplant.  BUT, I would rather have the dock plant’s large, voluptuous leaves soak in the sun’s rays, create carbon (sugars) and other organic matter in the form of more leaves and a more developed root system.  THEN, I will come along again (for the umpteenth time!) and demand that the plant start all over.  Besides perhaps emotionally scarring Dock, the leaves I’ve collected can be used to make mulch, compost, or salad.  The root system that was supporting all that leaf growth dies back; the leaves are no longer feeding it.  Those died-back roots then become food for the soil as well as organic material that retains moisture for the new roots to come as the dock plant regrows.

Chop and drop video by TrevorsGarden.

Happy collard propagation and see you tomorrow.

Tony


Nov 042012
 
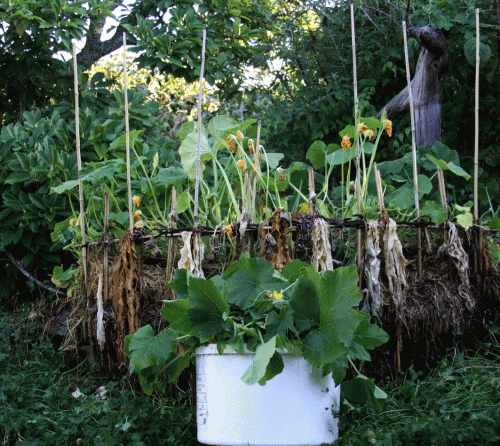
Squash grown for green manure

You have landed on Day 4 in this 6-day series of videos depicting the fine art of collecting/processing/storing pumpkin seeds.  Enjoy!


First some pumpkin pics:

Day 1 = flowers

Day 2 = vine

Day 3  = new fruit

Today  = green manure

Day  5 = seed saving

Day 6  = seed planting


THEN a video  re “Saving Happy Halloween Pumpkin Carving Seeds”.   6 videos (1/day) for the series!


Green Manure

Squash grown for green manure

Squash grown for green manure to establish new planting bed. The over-planted (like WAY TOO MANY!!!) squash and pumpkin vines will be harvested to create soil. Likewise, the vines could be "chop-and-drop'ed" in place and covered with soil -- the vines would become a rich source of compostable material as microbes, fungi, and critters (insects, etc.) break it down.


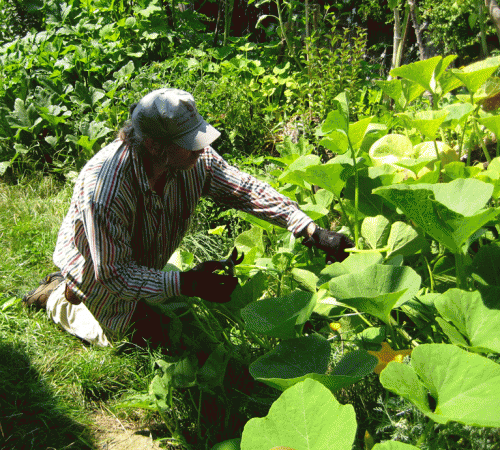
Tony harvests green manure (squash vines) to feed earthworms

Tony harvests green manure (squash vines) to feed earthworms. Those are not just squash vines that have grown ridiculously abundandant. Those are sheets of moisture, sponges of sugar, and whole communities of resident microbes/insects. Earthworm bin, compost pile, under a new soil mound, the harvested squash vine is a delicacy for the garden.

Sure, composting can be rewarding.   But frankly, I hate turning the pile.   Permaculture slacker!   But I do try to make up for some of my sins.   My favorite use of green manure is to pile it and mound soil over it.   I try to imagine the  busy life of microbes/crawly critters/earthworms/mollusks/a rooting skunk all working the pile.   Indentured servitude in my soil mound, and I have no guilt!    In fact, I have provided jobs.

Green Manure from Norwegian Hill Basket.

Green Manure from Norwegian Hill Basket.


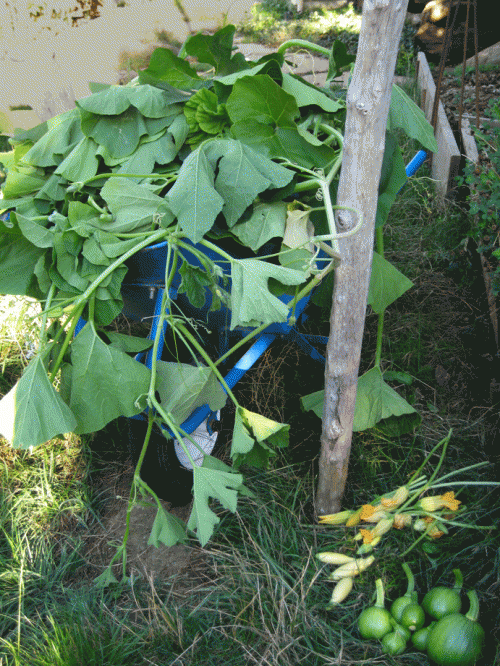
Harvest from Norwegian Hill Basket.

Harvest from Norwegian Hill Basket. The fruit is nice, it's food. The squash flowers are very nice to have; they can be breaded and fried for a delicacy. The green manure, and a piled high wheelbarrow of it!, is Life worth living for, realized dreams, a reason to keep on going. We now have organic material to create healthier soil. Talk about riches!

And my favorite use of green manure — burying it.  For one, I believe plants above the mound will have an easier time sending roots into the warm soil.   Roots that  seek the warmth and nutritious moisture that the breaking down greens provide will send roots along the loosely packed decayin greens and grow far and wide.

Leaf Trench Highway filled with green manure, including squash greens.

Leaf Trench Highway filled with green manure, including squash greens. LTH, our soil-making trench, stores our green mulch for six months to a year. The greens are layered with other garden assets, like brown leaves, rotten fruit, and twigs according to REMP standards. Invented by you, whenever you find the time, Real Estate Marketting Principles, are very effective in the garden -- what can you do to have microbes and critters big and small want to move in your mix of organics. For one, water the area. Once you attract the critters and microbes, relax. Harvest your compost-rich soil when ready.

Saving Happy Halloween Pumpkin Carving Seeds — 4 of 6

Happy seed saving and see you tomorrow.

Tony


Nov 032012
 
Young Pumpkin in Percy's Pearmain Portal

You have landed on Day 3 in this 6-day series of videos depicting the fine art of collecting/processing/storing pumpkin seeds.  Enjoy!


First some pumpkin pics:

Day 1 = flowers

Day 2 = vine

Today  = new fruit

Day 4  = green manure

Day  5 = seed saving

Day 6  = seed planting


THEN a video  re “Saving Happy Halloween Pumpkin Carving Seeds”.   6 videos (1/day) for the series!


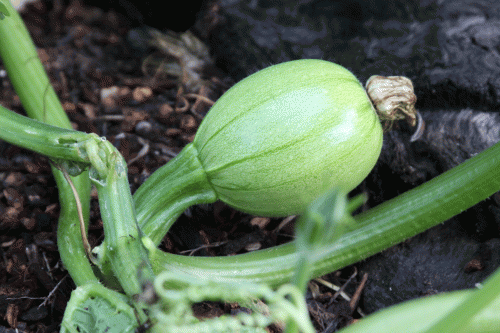
Young Pumpkin in Percy's Pearmain Portal

Young Pumpkin in Percy's Pearmain Portal. Note the thick stem, a sign that this pumpkin is going to be a biggy! Also note how the stem comes off the vine at a 90-degree angle, which will allow the vine to sit on top of the soon-to-be large pumpkin. Note the shriveled, dieing off flower. See the next pic, which shows this pumpkin's growth a month later.


Adolescent pumpkin in Percy's Pearmain Portal

Adolescent pumpkin (maybe Junior High). Note 1) how the vine was dragged up on top of the pumpkin (the vine was alongside the fruit when younger; see previous pic) so that the growing pumpkin would not pull away from the vine. With the vine on top and pumpkin below, why wanting the fruit to come off of the vine at a 90 degree angle (as mentioned in previous pic) becomes clearer.


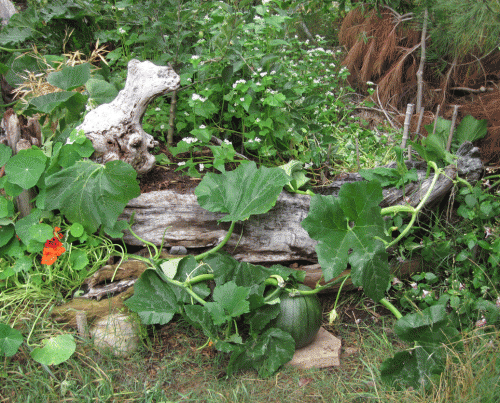
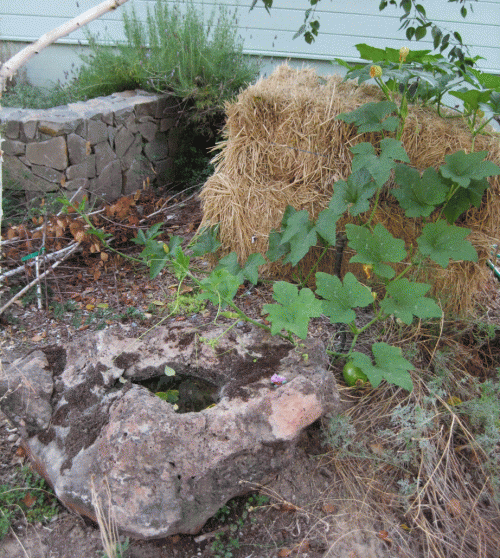
Young pumpkin growing across Rock Birdbath

Young pumpkin growing across Rock Birdbath. Note how quickly the fruit has grown yet the vine is not very developed beyond it. Also note how the young pumpkin still has the shriveled flower attached.


Years later, I am starting to really have fun with the lushness, almost unreasonable growth, of pumpkin vine.


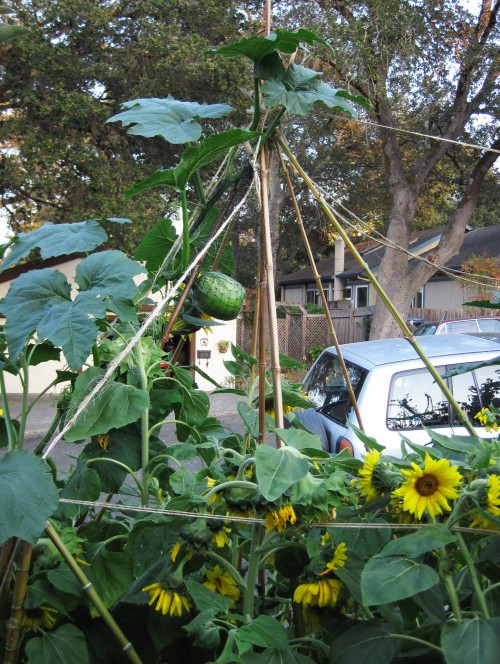
Skyward Netted Pumpkin

Skyward Netted Pumpkin. Now this project has been fun! My goal was to have a pumpkin grow in the air, suspended off the ground. This pumpkin almost made it to the top, that is, to the crossing bamboo poles, where I was wanting a pumpkin to hang out for a while – at least till Halloween. Spore Lore’s blog entry, 20121030 Skyward Pumpkins and Happy Halloween, tells all.


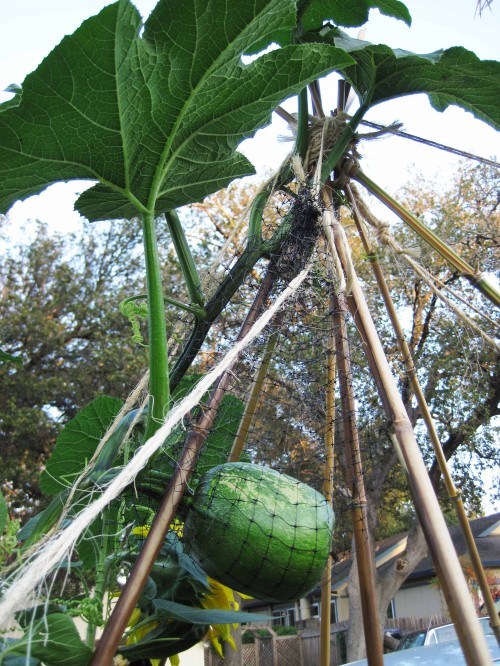
Skyward Netted Pumpkin -- close-up

Skyward Netted Pumpkin -- close-up view. Note the thick stem, 90-degree stem, and the black plastic landscape netting that supports the weight of the pumpkin in the air on the not-so-strong vine.


And my favorite of the year…drumroll, please!


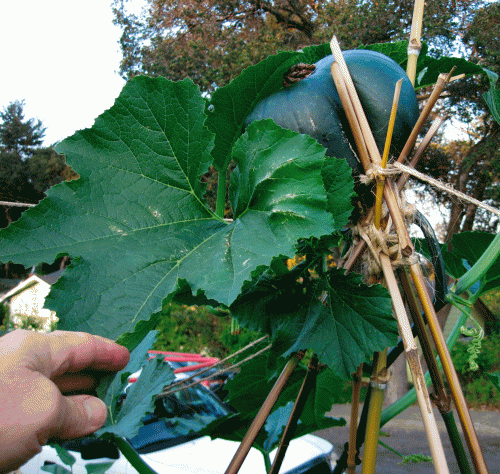
Skyward Nestled Pumpkin -- close-up view

Skyward Nestled Pumpkin -- close-up view. At last, a pumpkin vine has climbed up to the very crotch of the bamboo teepee AND fruited in a perfect orientation to wedge itself in FOREVER! You do it – I am not going to be the one to tell Skyward Nestled Pumpkin it’s time to move on.

Saving Happy Halloween Pumpkin Carving Seeds — 3 of 6


Happy seed saving and see you tomorrow.

Tony


Feb 212011
 
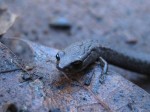
Close-up of black bellied slender salamander.

Garden Log (what I did):

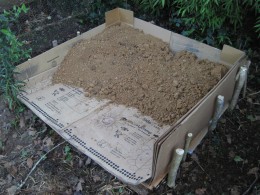
3-sided carboard storage bin for adobe soil.

3-sided carboard storage bin for adobe soil.

1. Made a 3-sided cardboard box for storing adobe (clay) soil.

You, the Habitat Gardener (reflections):

1. Time to get to some serious gardening in during these wonderful warm days of winter.  First that comes to mind, after the long list of jobs that I am procrastinating, is to get some better soil on hand.  Many ways for me to improve our garden’s soil — fetching oak leaves from the curb, collecting fallen leaves and rotten fruit from under a neighbor’s persimmon tree, hauling a truckload of free horse manure, or buying a truckload of mycellium-rich compost from a mushroom farmer.  Those are just a few ways that are currently easiest for me.  As with the infinite wonder of soil, how to improve it is also infinite.  Yes, I do like to gravitate to the FREE, or at least fairly inexpensive, sources of material.

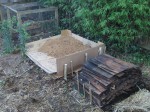
The adobe bin between stacked roofing shakes and the compost bin.

The adobe bin between stacked roofing shakes and the compost bin.

I will want to empty the 55-gallon plastic drums that I use for collecting soil/manure/compost material.  Right now, half of those bins/barrels are filled with excavated adobe soil from the depths of Salamander Resort (see Watered Clay).  What to do with the adobe?  Lucky for me, we have some extra room next to our compost bins.  We’ll pile the adobe there and feed the compost with it over the years.  Adobe by itself is a tough sell for plants.  But mix that adobe into already rich compost and wala!, you have a superb mix of soil tilth (consistency) and nutrition.  A back-the-truck-up visit to our town’s cardboard dumpster and gathering some pruned shrub limbs is all the supplies we’ll need to create an outdoor storage bin for the adobe.

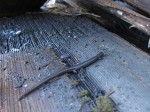
A slender salamander discovered between wooden roofing tiles (shakes).

A slender salamander discovered between wooden roofing tiles (shakes).

Clearing a space in this out-of-the-way part of the yard proved interesting.  First off, you should know that the immediate yard was reclaimed by ivy, thick ivy.  Sheet mulching a couple of years ago has proven effective in keeping down the ivy.  And when clearing away the stack of roofing shakes that were next to the compost, I found out just what a great habitat the back yard is.  Salamander Haven!  Sheets and sheets of moist cardboard covered under decaying straw — the black bellied slender salamanders (Batrachoseps nigriventris) of our neighborhood have thrived here.  Dozens were under and in the small roofing shake pile that I re-organized to make room for the adobe bin.

Black Bellied Slender Salamander

Black Bellied Slender Salamander. Note the minimal front AND back limbs.

I wanted a flat surface to create the cardboard adobe bin/box.  Getting the surface flat mostly meant sorting through some ivy vines (no sheet mulching here) and the crumbly wood shakes that were at the bottom of the pile.  Lots of salamanders to avoid hurting, too.  After piking out the shakes worth saving, I made a pile of the old scraps and some rich soil to house some of the salamanders not insulted out of their habitat.  All that was then covered with the thickest cardboard to form the bottom of the bin.

Close-up of black bellied slender salamander.

Close-up of black bellied slender salamander found in wooden roofing tile stack.

True, perhaps a very rough day for some relocated salamanders, that is, those that went off into the surrounding vegetation to escape the upheaval of their Roofing Tile Palace.  But, also a good day for those that will stay in the immediate area.  Not only do those local salamanders get new accommodations in a well-stacked highrise apartment complex, but also they get yearly renewable membership to Anita’s Adobe Assembly.  Actually, the salamanders will probably not be too interested in the adobe clay pile itself.  My guess is, though, that the moist underneath and sides of the clay pile will be this summer’s, and many summers to come, happenin’ place if you’re a sally.  The clay pile will keep cool and moist long after the surrounding soil dries up from warmer weather.  That moisture-laden microenvironment will attract much food and shelter for the salamanders.  So, salamanders, sorry for the unannounced housing move — hope the neighborhood improvements make up for any inconvenience.

Adobe anyone?

…………………………………………………………Tony

Feb 022011
 
The new Olympic-sized swimming pool at Critter Convention Center.

Garden Log (what I did):

1. Installed an underground watering hole habitat, called Dano’s Great Newt Grotto.
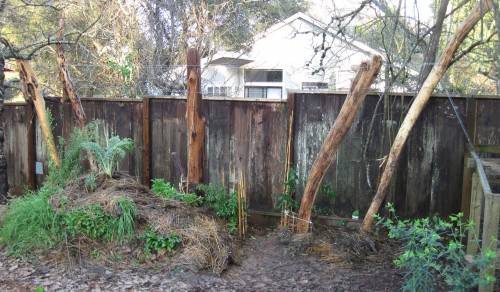
Trellis habitat, House Finch Hideaway.

Trellis habitat, House Finch Hideaway. The subterranean habitat, Dano's Great Newt Habitat, was installed while the Center Pole posthole was being backfilled.

You, the Habitat Gardener (reflections):
Center Post (2 posts) in ground, yet to be backfilled.

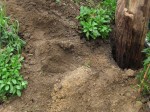
Center Post (2 posts) in ground, yet to be backfilled. The posts were dug in on the back side of Captain Cicada's Buried Treasure, a buried wood pile animal habitat. The adobe soil in the foreground is from the posthole digging and covers the small hill's topsoil.

1. The celestial heavens were so kind to me the other day.  Dan and I were on our way to completing an awesome garden project — a 6-post two-tier trellis built to grow food and provide privacy.  We had just lowered the Center Post (which is actually 2 posts; see House Finch Hideaway — Completed ) into its hole when the noontime lunch whistle blew.  Dan was off to follow his stomach’s commands.  Cool!, now I have some time to throw in a habitat up against the center posts before the area is backfilled.  A quick search of material caches and I was back with a toilet tank top, a small piece of flagstone slate, two old kitchen tiles, a water-catching boulder, and a bucket lid.  Habitat here we come!
The habitat's tiolet tank top will catch and hold water.

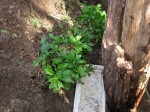
The habitat's toilet tank top will catch and hold water.

Water.  So often when building a habitat, I include a focus of making water, or at least moisture, available for garden critters.  Perhaps I am so drawn to water because one of my strongest passions in building animal habitats is to increase amphibian populations in residential gardens.  And amphibians LOVE, thrive, and do water well (pun accepted!).  This habitat’s major water feature is a toilet tank top rescued from a dumpster.  “Help, help, please help!”, I faintly heard coming from the bottom of a commercial renovation project’s 10-yard dumpster.  So I took the beautiful uncracked enamel critter swimming pool home with me and vowed to incorporate it in a habitat.  Alas, Toilet Tank Top is delivered to the soil and its critters while Dan is off at lunch.  A little water in the upside down lid helps me install it level (to hold the most amount of water possible).
The new Olympic-sized swimming pool at Critter Convention Center.

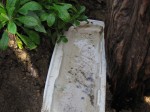
The new Olympic-sized swimming pool at Critter Convention Center.

The enamel coated top side of the toilet tank lid seals the pottery and enables it to hold water.  The underside of the lid, which is pictured holding water, will absorb some of that water because it is not enamel coated.  But that’s okay — moisture-loving critters, like insects, snails, slugs, salamanders, frogs and toads, will seek out that cool dampness in the dryer months.

I stand on the upside down lid to press it into the adobe soil at the edge of the posthole and up against the Center Post.  It sets in firmly and gives me confidence that it will hold at least some water, that is, stay level, for a long time.
Flagstone and kitchen tile cover the habitat's grotto.

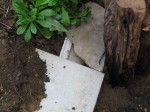
Flagstone and kitchen tile cover the habitat's grotto.

Now to protect the top of the swimming pool to keep it from completely filling with soil.  Some soil will likely backfill into the swimming pool, and that’s okay, but we would like some of the upside down toilet lid’s volume to be available for water.  Completely sealed off would not be good either — the critters would think the pool is closed.  “Oh man, we always come on the wrong day!”  A small piece of flagstone slate and kitchen tiles are the strong, non-biodegradable materials I come up with to protect the habitat’s pool of water.  Two kitchen tiles are used to add strength and to provide another crevice (between the tiles) that critters can take advantage of.  Sure there’s a gap between the tiles and the slate but we’ll deal with that shortly.  For now, we’re sitting pretty because the swimming pool was just upgraded to a grotto.  How European!  The subterranean pool, or grotto, will shelter and feed many a microbe and larger critter that had never dreamed of travelling to such places.
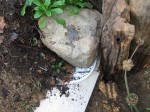
Water-holding boulder sits above the grotto.

Water-holding boulder sits above the grotto.

Now to cover the small gap between the tiles.  And I just happen to have a bucket lid that will cover that gap.  One good thing about the plastic lid is that it will last a zillion years. Sure, some people would cringe about burying plastic in the garden but I figure that the trade-offs here are worth it.  If it never breaks down, then some critters will have shelter security.  If it does break down, then we are doing our part to return this human-made atrocity to the soil.  Hey, why get out of bed in the morning if your rationalization system is not intact?!  And now back to the plastic bucket lid on top of the kitchen tiles and the flagstone slate.  Yes!, the bucket lid turns out to more helpful than I thought it would be.  Not only will it cover the gap, but also it is a coaster (like a table coaster protecting delicate wood) for the brittle tile and crackable slate.  Now a good-sized rock, AKA boulder, can be stacked on top of the grotto, tiles, and slate.
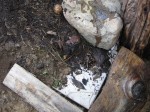
Leveling the boulder to hold water.  Wood frame protects the tile.

Leveling the boulder to hold water. Wood frame protects the tile.

Multi-tasker boulder will 1) keep the materials below it securely in place because of its heavy weight, 2) provide temperature modulation to the habitat, and 3) hold a smidgen of water in the small indentations on its top surface. That’s pretty much the bulk of the habitat, but now I want to take measures to protect this underground waterhole, this subterranean grotto.  Because it’s underground, or hidden, foot traffic could easily kick it apart by accident. I grab a couple of fireplace logs and frame the exposed tile corner.  That sits pretty but why leave things up to chance?

Firewood log staked with gap awaiting compost fill.

Firewood log staked with gap awaiting compost fill.

I take the extra time to secure the downhill side of a log with a hefty wooden stake pounded into the ground.  The stake is surely very secure BUT I missed my mark. The stake is a couple of inches away from the fireplace log instead of snugly up against it.  Once again, THE PROBLEM IS THE SOLUTION (a permaculture axium).  In other words, there’s good to be found here so why not go with that?  Lucky for me, I sometimes take my own advice.  I snug the firewood log up against the post to expose a gap alongside the habitat.  That gap, or couple of inches “off”, will now allow me to throw in some nutritious compost soil. There will be more good soil for the jasmine vine I will plant above this habitat.
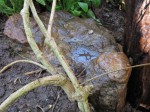
Jasmine vine planted above Dano's Great Newt Grotto.

Jasmine vine planted above Dano's Great Newt Grotto.

Time to plant the jasmine vine that will grow up Center Post and create a thicket on the trellis.  The grotto habitat is nearly complete except for planting and cosmetic issues.  The jasmine vine’s roots will help secure the “hillside” of soil and help tie together the habitat’s elements.  Perhaps those roots will find the grotto and drink its water — hard to say because the roots will not develop in the intended air cavity of the habitat.  In the end, though, I vote that the jasmine will be a happy camper as a result of the grotto habitat.  If nothing else, the poop factor will benefit the jasmine — there will be so much poop (that feeds the soil) from the snails and slugs that come to vacation at the grotto.

Compost soil is strewn over the habitat and surrounding area.  The jasmine vine is wiggled into position next to the boulder and surrounded by as much compost soil as will stay on the little hill of Captain Cicada’s Buried Treasure.  Forget-me-not plants that were moved to the side for protection are returned to the hill, above the habitat.  Some bamboo stakes are pounded into the ground and strung together to make small fences to protect the area from foot traffic.  Lastly, old straw mulch is used to keep the compost soil and plants in place.  Also, the old straw mulch will keep the area moist and humus-rich as it breaks down.  The decaying straw is a habitat unto itself!
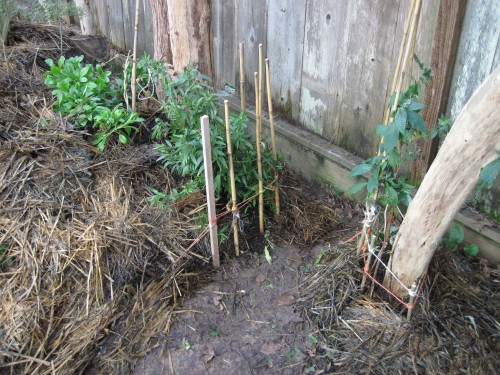
Dano's Great Newt Grotto habitat is buried under old straw mulch (left).

Dano's Great Newt Grotto habitat is buried under old straw mulch (left). Grape cuttings at a post's base for the trellis habitat, House Finch Hideaway.

What a great day!   A habitat within a habitat day.  Hard work and looking forward to my vacation.  See you at The Grotto.

……………………………………………………. Tony
Jan 272011
 
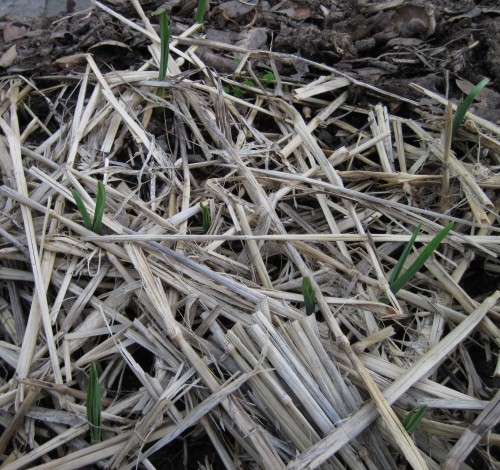
Close-up of garlic sprouts.

Garden Log (what I did):

1. Watered garlic sprouts in sidewalk veggie bed.

You, the Habitat Gardener (reflections):

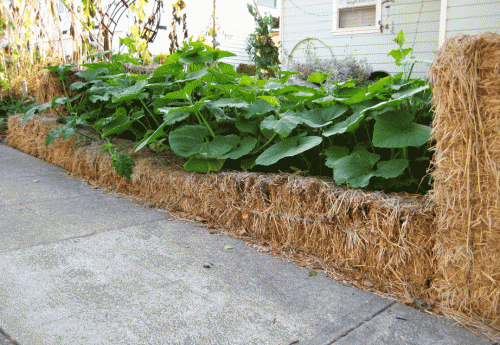
1. Our veggie bed along the sidewalk, Straw Bale Recliner, is sprouting garlic through the straw mulch.  Yay!, the garlic bulbs that I got from the supermarket germinated — I was somewhat anxious about whether they would sprout or not because I have been told that sometimes the markets irradiate garlic bulbs to prevent sprouting in the market.  Makes sense but I have been successful with the big-market garlic a couple of seasons now.  And yes, the supermarket’s price of garlic is more friendly to my gardening budget.

Garlic sprouting in Straw Bale Recliner veggie bed.

Garlic sprouting in Straw Bale Recliner veggie bed.

What an easy crop garlic is!  So glad that we planted the cloves before the New Year.  Nothing was growing in the beds anyway so what could we lose?  Come spring we will have both a crop AND soil that was loved all winter long.  Soil that was alive!  Soil that had a happy exchange of mineral nutrients, microbes, insects, earthworms, snails, slugs, and plant roots.  Soil that sent out green stalk ambassadors to capture the sun’s energy, make food with it, and send it to the developing garlic bulbs.

We mulched the newly planted garlic cloves with a light layer of straw.  The mulch protects the soil from a heavy rainfall and helps keep moisture in the bed so the garlic does not stop thriving.  So easy to lay the thin layer of mulch BEFORE the sprouts reach skyward.  What a pain to have plants sprout and then want to mulch the bed.  Been there, done that enough times to appreciate getting the mulch down during  planting.  Not only is mulching after sprouting difficult, but also doing so can damage a recently sprouted plant.

Close-up of garlic sprouts.

Close-up of garlic sprouting through a thin layer of straw.

Mulching during planting does present a trade-off, though.  If the mulch layer is too thick, the sun will not warm the soil enough, with air and moisture becoming trapped in the soil.  The seed/bulb will rot and die.  So, moderation prevails when mulching over a planted crop.  Hard to say amounts here — too many factors, like soil type, hours of sunlight, type of seed, weather conditions, to say just what that thin layer of mulch ought to look like.  Try it!  You’re bound to get it right eventually.  Yes, even you 🙂 .
Tony